Step 1: Anticipation

|
See the full description here
Summary:
Collaborate and form a team with your child. When you invest the time to form a strong team, children feel more comfortable and less anxious – this will help you complete the care with less stress – for you and your child.
Use these tips, from the start, to set the stage for a positive care procedure:
- Create the right moment: integrate the care in a routine.
- Alert your child to the needed care and communicate together.
- Form a team with your child: Encourage autonomy by offering realistic choices such as the method of distraction. Stay tuned to your child. Manage pain and anxiety, using distraction and positioning for comfort.
|
|
Step 2: Preparation

|
See the full description here
Summary:
- Prepare the environment: Identify a routine place for care. Close windows, doors and fans. Wash and dry the work surface and gather the needed materials for the care and to distract your child.
- Prepare your child: Get help if needed. Position your child for comfort to receive the care and start to use the selected distraction method.
- Prepare yourself: Find the right time when you are ready to provide the care safely. Review the list of care steps. Wash your hands.
Now that you are ready to start the care procedure, take the opportunity to encourage and praise your child.
|
|
Step 3: Procedure

|
See the full description here
Summary 3 key concepts:
- Safety: Carefully follow the care practice steps as you have been taught.
- Flexibility: Be ready to adjust according to your child’s reactions during the procedure. As needed, reposition or select an alternative distraction strategy. Follow your child’s pace and rhythm.
- Collaboration: Reassure your child, verbally and non-verbally. Acknowledge your child’s emotions and reactions. Help your child differentiate between the different sensations during a procedure.
|
|
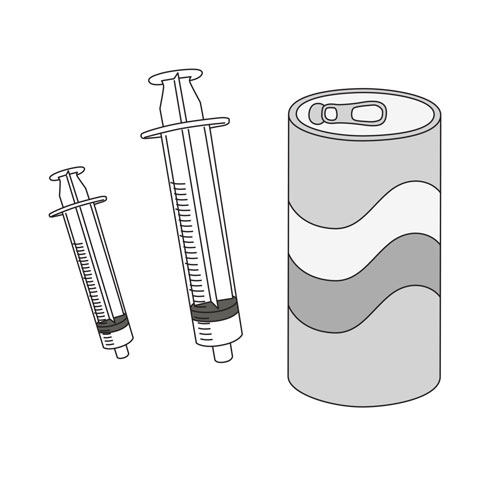
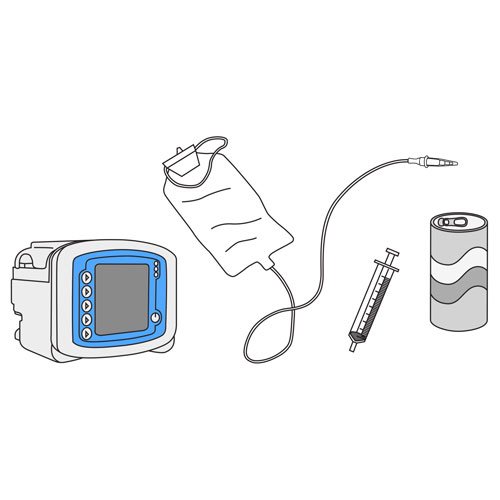
Step 4: Prepare the material
|
- Set up on a flat surface or a well-cleaned table.
- Gather and inspect all equipment to ensure that it is not damaged.
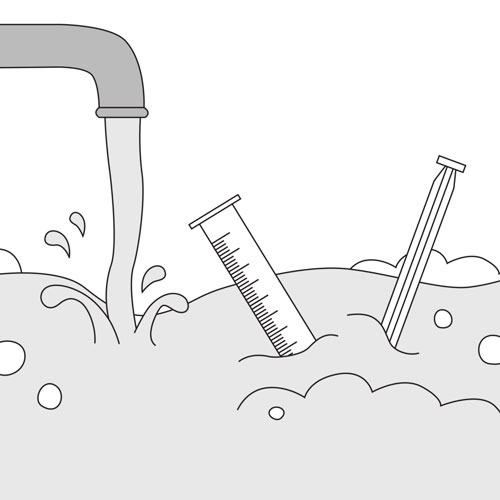
- Fill the irrigation syringe with the amount of water recommended by your healthcare team.
- Make sure the pump is properly charged or plugged into a wall outlet.
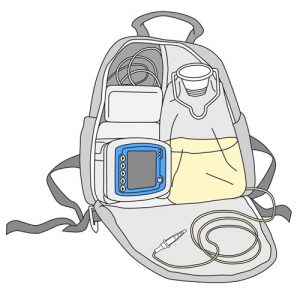
- Place the pump on a solid surface (eg, chest of drawers, bedside table or kitchen table), on an IV pole or in its backpack.
Why ? This step ensures that the required materials are on hand in order to start the procedure.
|
|
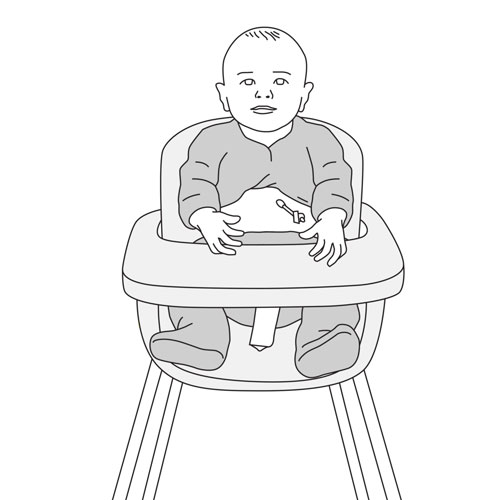
Step 5: Position your child
|
Place your child in a seated or semi-seated position according to your child’s comfort and capacity.
Why ? This position facilitates digestion and avoids aspiration of the formula into the lungs.
|
|
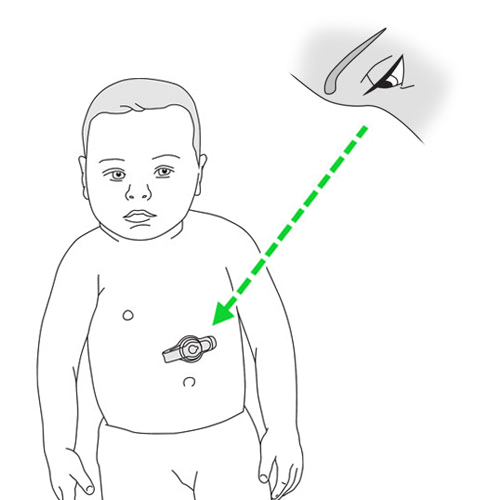
Step 6: Check the location of the button
|
- Make a visual inspection your child’s button; check to see if it is intact.
- Check to see if the button is correctly in place and not pushed into the stoma, or too far out of the stoma.
Why ? This step ensures the safe use of the button.
|
|
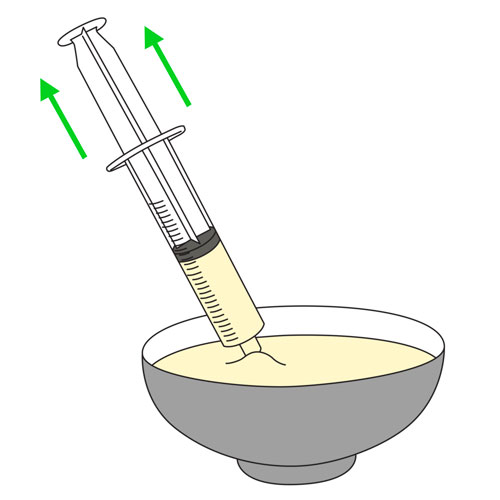
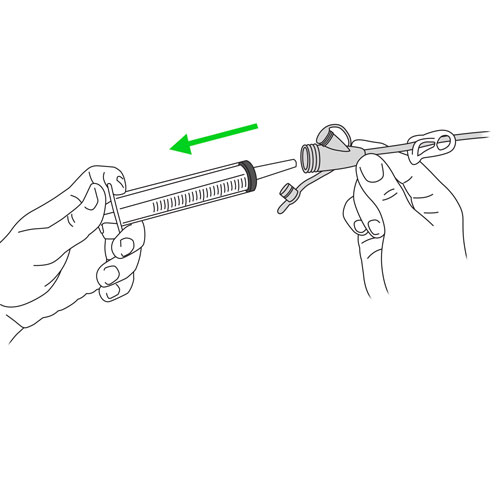
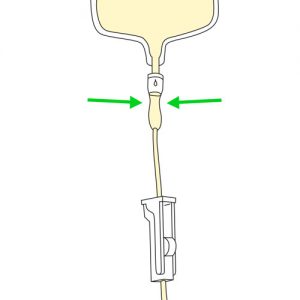
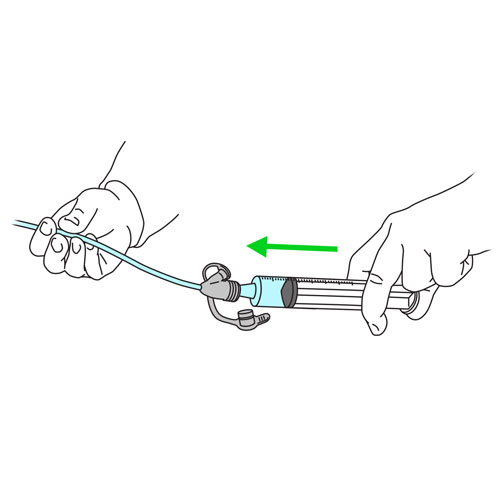
Step 7: Irrigate the button extension set
|
- Remove the cover from the extension set feeding port.
- If the extension set has two ports, make sure that the medication port remains closed throughout the procedure.
- Connect the syringe to the end of the extension set.
- Make sure the extension set clamp is open.
- Depress the plunger of the syringe to inject water all the way to the end of the extension set.
- Close the clamp on the extension set.
- Leave the syringe connected to the extension set.
Why ? This step ensures that the extension set tubing is filled with water and ready to flush into the button feeding port.
|
|
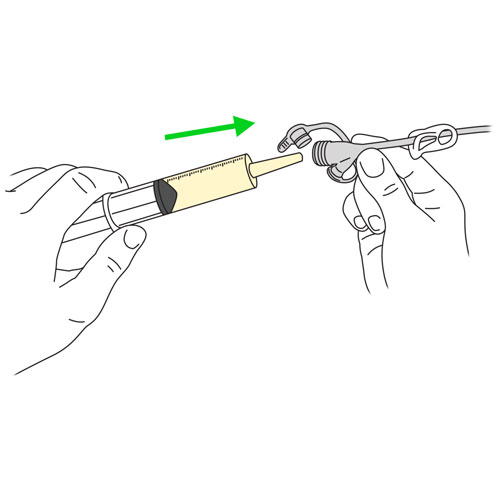
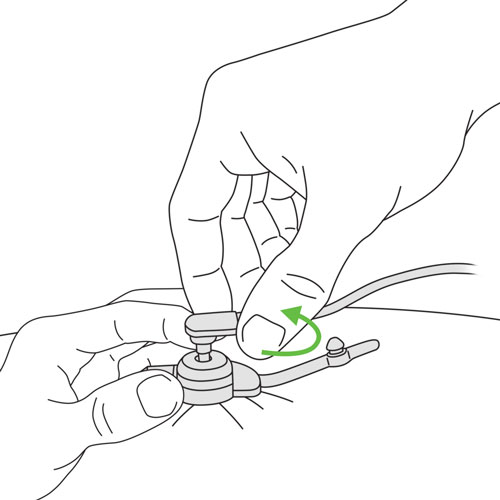
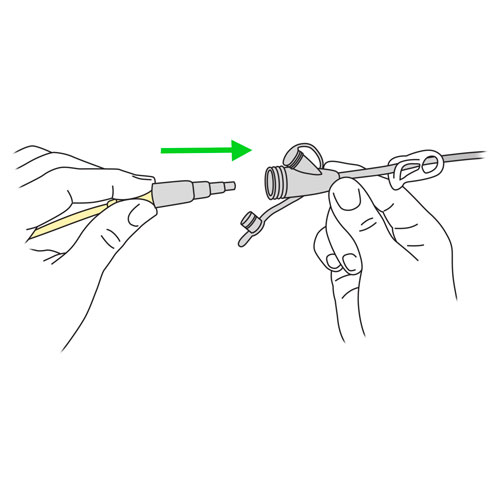
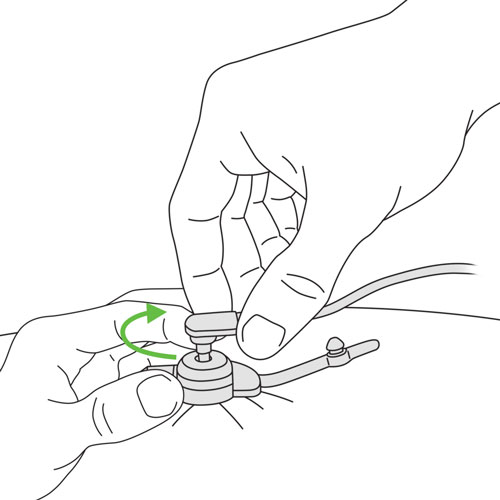
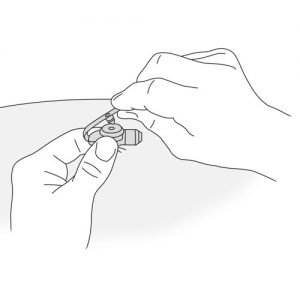
Step 8: Connect the extension set to the button
|
- Remove the cover from the button feeding port, if closed.
- Make sure the port is clean.
- Hold the sides of the button and insert the extension set into the feeding port.
- Lock the extension set into the button, according to the manufacturer’s instructions or those of your healthcare team.
Why ? This step prepares for verification of the button location and irrigation.
Holding the sides of the button helps to stabilize it during the installation of the extension set.
|
|
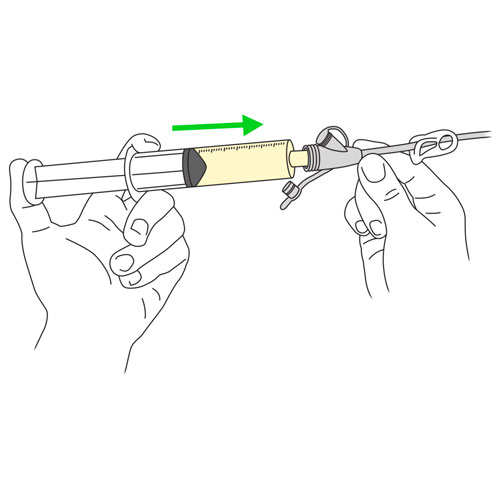
Step 9: Irrigate the button
|
|
- Open the clamp of the extension set.
- Slowly depress the plunger of the syringe (already connected to the extension set) to push the water into the button.
- When the syringe is empty, close the clamp of the extension set.
- Disconnect the syringe.
- Replace the cover on the feeding port of the extension set.
Why ? This step ensures that the button is patent, ready to use and reduces the risk of the button being blocked with debris.
|
|
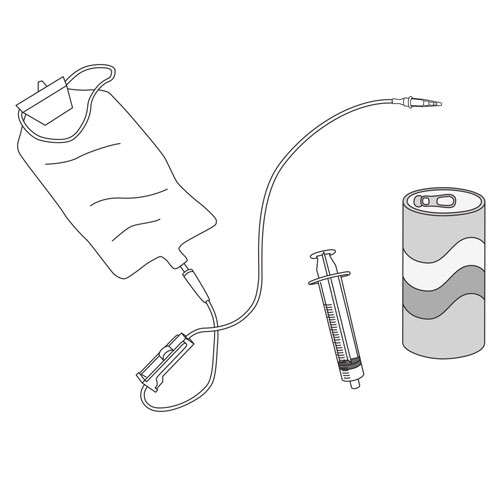
Step 10: Pour the formula into the bag
|
- Open the cap of the feeding bag.
- Pour the formula into the bag, adding about 30 ml more than the amount to be given to get rid of the the air in the tubing.
- Close the cap of the bag.
Why ? This step allows you to fill the bag with the formula.
|
|
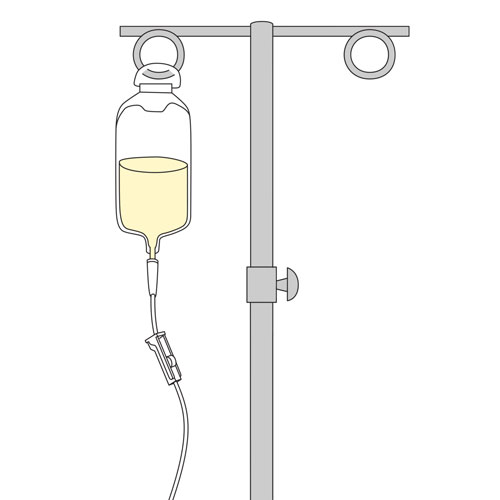
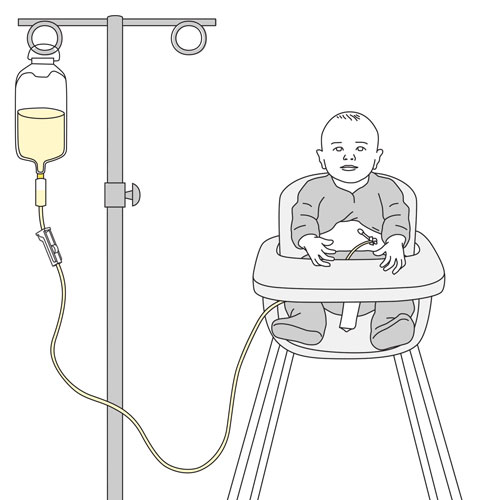
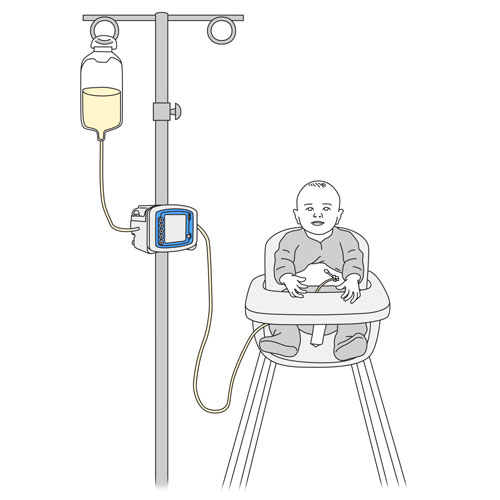
Step 11: Hang the bag

|
- Install the bag so that the highest level of the formula is about 15 cm above the pump.
- Hang it from a coat rack, a wall hook, or place it on the IV pole.
- If the bag is put in a backpack, keep the bag upright.
Why ? The correct positioning of the bag promotes the safe administration of the formula.
|
|
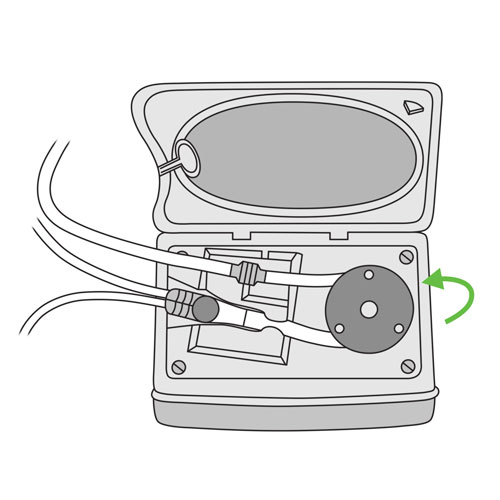
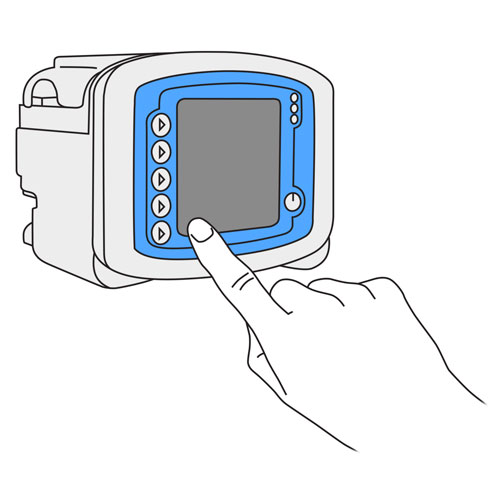
Step 12: Prepare the pump
|
As directed by the manufacturer or your healthcare team:
- Turn on the pump.
- Verify that the prescribed delivery parameters (eg, volume, flow rate) are set.
- Insert the bag tubing onto the pump.
Why ? This step ensures secure administration of the formula.
|
|
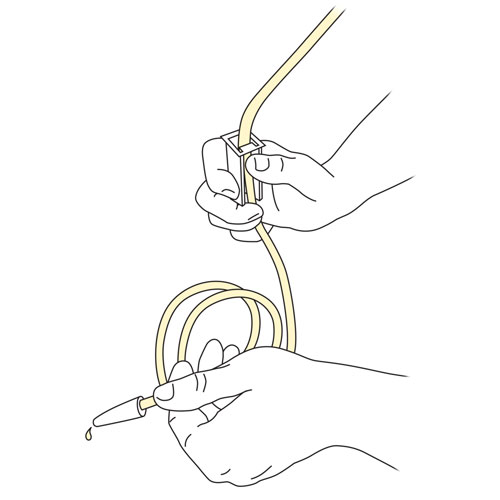
Step 13: Empty the air out of the bag tubing

|
- Remove the cap from the end of the tubing.
- Get rid of the air from the bag tubing, as instructed by the manufacturer or your healthcare team.
Why ? This step avoids the entry of air into the stomach and prevents swelling of the belly from excess air.
|
|
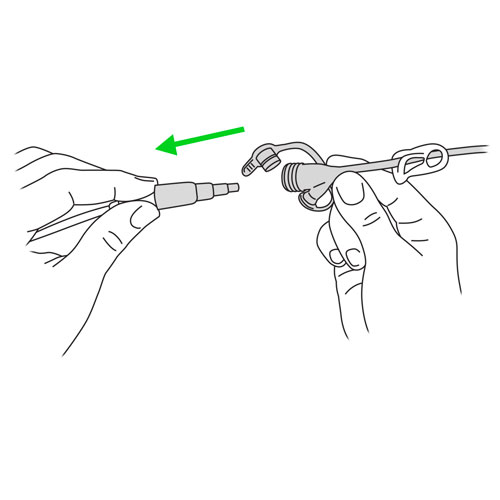
Step 14: Connect the tubing to the button extension set
|
- Remove the cover from the extension set port.
- Connect the tubing to the end of the extension set.
- Open the extension set clamp.
Why ? Once the bag tubing is connected to the button extension set, the feeding can begin.
|
|
Step 15: Start the pump
|
Start the pump as directed by the manufacturer or your healthcare team.
Why ? This step starts the delivery of the formula.
|
|
Step 16: Administer the formula
|
- Open the extension set clamp.
- Observe your child for signs of discomfort when the feeding session is started (eg, nausea, vomiting, difficulty breathing, abdominal pain, sweating, etc.).
If the formula is administered over a long period of time:
- Every 4 hours: Irrigate the button.
- Every 4 hours and after adding formula to the bag: Shake the bag for 10 seconds.
Why ? This allows delivery of formula at a set rate into the stomach.
|
|
Step 17: Stop the pump
|
|
When the feeding session is over, turn off the pump as instructed by the manufacturer or your healthcare team.
Why ? This step ends the administration of the formula.
|
|
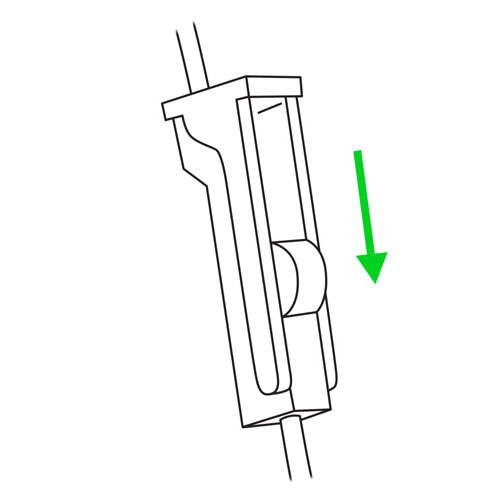
Step 18: Disconnect the tubing from the button extension set
|
- Close the button extension set clamp.
- Disconnect the tubing from the extension set.
- Replace the cover on the extension set.
Why ? This step clears the extension for irrigation.
|
|
Step 19: Irrigate the button
|
|
- Remove the cover from the extension set.
- Connect the syringe to the end of the extension set.
- Open the clamp of the extension set.
- Slowly depress the plunger of the syringe to push the water into the button.
- When the syringe is empty, close the clamp of the extension set.
- Disconnect the syringe.
- Replace the cover on the feeding port of the extension set.
Why ? This step ensures that all of the formula was given and reduces the risk of the button being blocked with left over traces of formula.
|
|
Step 20: Disconnect the button extension set
|
- Hold the sides of the button.
- Unlock the button extension set, as directed by the manufacturer or your healthcare team.
- Remove the extension set from the button feeding port.
- Put the cover on the button feeding port.
Why ? If the extension set is held in place, your child may accidentally pull on it and move the button, in addition to it being cumbersome.
Holding the sides of the button helps stabilize the button while the extension set is being removed.
Closing the cover prevents leakage of the stomach contents through the button in between feeding sessions.
|
|
Step 21: Keep your child in the same position after the session
|
|
- Leave your child in a seated or semi-seated position for at least 30 minutes after formula administration, if possible.
- Burp your baby after feeding, as needed.
Why ? This position facilitates digestion and reduces regurgitation.
Burping your baby avoids abdominal pain (bloating and swelling).
|
|
Step 22: Clean and store equipment
|
- Leave the tubing in place in the pump and follow your healthcare team’s or manufacturer’s instructions for cleaning.
- Clean all other materials and equipment and store as recommended.
Why ? This step is necessary to ensure cleanliness and proper functioning of the equipment for the next use.
|
|
Step 23: Recovery

|
See the full description here
Summary:
The treatment is finished. Wash your hands again.
Be prepared to recognize the challenges faced and to provide positive feedback. Help your child recognize his/her strengths. Acknowledge the collaborative teamwork.
- Listen to what your child says about the parts of the procedure that were difficult or painful.
- Comfort your child and recognize your child’s collaboration with positive feedback.
- Highlight your child’s specific strengths that helped make the procedure positive.
- Discuss with your child what might be done the same or differently the next time the care is needed.
- Keep your promises if you have promised a reward, follow through.
- Reward yourself too.
|
|