Step 1: Anticipation
|
See the full description here
Summary:
Collaborate and form a team with your child. When you invest the time to form a strong team, children feel more comfortable and less anxious – this will help you complete the care with less stress – for you and your child.
Use these tips, from the start, to set the stage for a positive care procedure:
- Create the right moment: integrate the care in a routine.
- Alert your child to the needed care and communicate together.
- Form a team with your child: Encourage autonomy by offering realistic choices such as the method of distraction. Stay tuned to your child. Manage pain and anxiety, using distraction and positioning for comfort.
|
|
Step 2: Preparation

|
See the full description here
Summary:
- Prepare the environment: Identify a routine place for care. Close windows, doors and fans. Wash and dry the work surface and gather the needed materials for the care and to distract your child.
- Prepare your child: Get help if needed. Position your child for comfort to receive the care and start to use the selected distraction method.
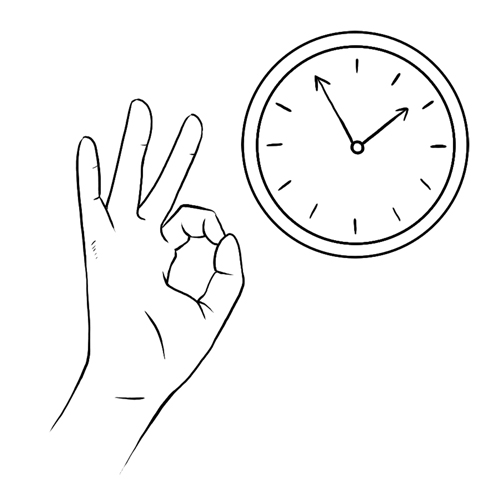
- Prepare yourself: Find the right time when you are ready to provide the care safely. Review the list of care steps. Wash your hands.
Now that you are ready to start the care procedure, take the opportunity to encourage and praise your child.
|
|
Step 3: Procedure

|
See the full description here
Summary 3 key concepts:
- Safety: Carefully follow the care practice steps as you have been taught.
- Flexibility: Be ready to adjust according to your child’s reactions during the procedure. As needed, reposition or select an alternative distraction strategy. Follow your child’s pace and rhythm.
- Collaboration: Reassure your child, verbally and non-verbally. Acknowledge your child’s emotions and reactions. Help your child differentiate between the different sensations during a procedure.
|
|
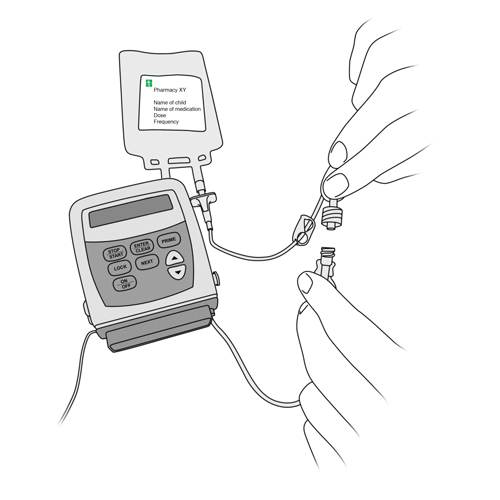
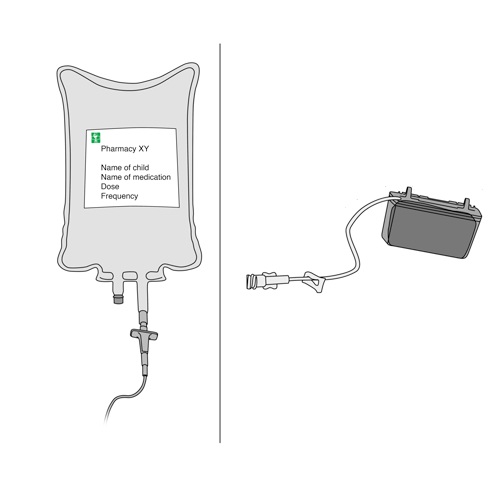
Step 4: Prepare the drug
|
- Make sure the new bag or cassette is at room temperature.
- Check on the label that:
- your child’s name appears,
- the date of the drug has not expired,
- the drug name and dose are the same as those prescribed for your child.
- Inspect the bag or cassette carefully. It must not contain air bubbles or particles. If this is the case, contact your pharmacy or healthcare team.
Why ? This step ensures the safety of the procedure and reduces the risk of medication errors.
|
|
Step 5: Prepare the materials
|
- Select and clean a work surface (eg, tabletop).
- Gather the necessary equipment.
- Check that the new tubing is not damaged.
Why ? This step ensures the safety and allows the rest of the procedure.
|
|
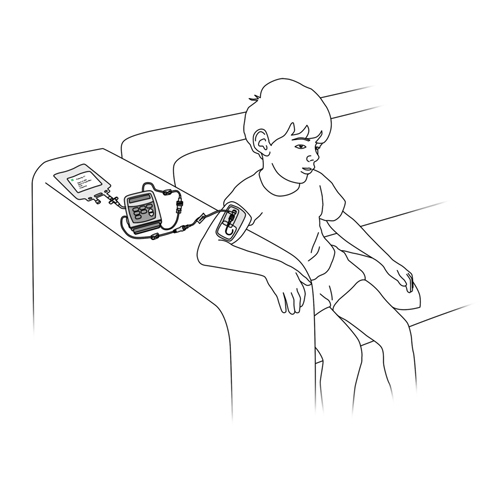
Step 6: Position your child
|
Position your child:
- to securely reach the catheter entry site,
- in one of the positions discussed with your healthcare team,
- depending on comfort, age and ability to collaborate.
Why ? This step facilitates the work and optimizes your child’s comfort.
|
|
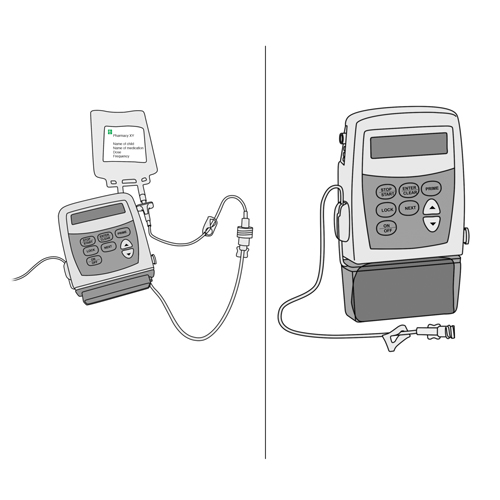
Step 7: Stop the pump

|
Refers to the CADD-Legacy® PLUS pump
- Push and hold the “STOP/START” button of the pump until 3 sets of dashes appear on the pump screen (or follow the instructions of your healthcare team for the special features of your child’s pump).
- Close the clamps of all tubing.
Why ? This step allows the rest of the procedure.
|
|
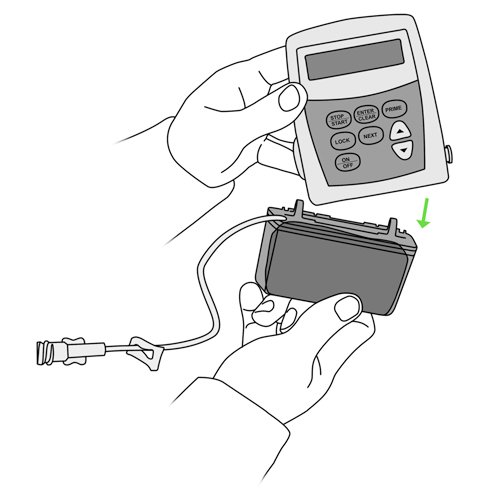
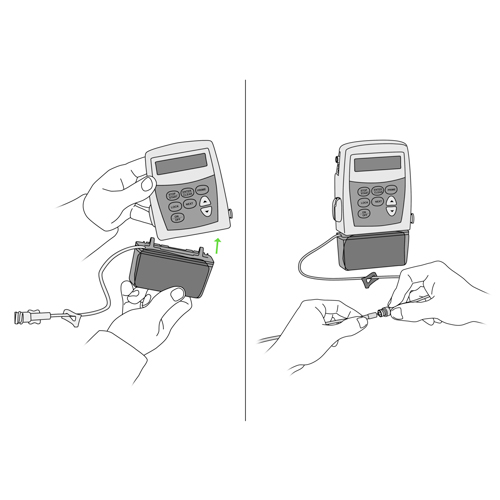
Step 8: Remove the cassette or empty cassette reservoir from the pump

|
- Press the “ON/OFF” button on the pump to turn the pump off (or follow the instructions of your healthcare team for the special features of your child’s pump).
- Unlock the cassette lock.
- Remove the old cassette or the empty cassette reservoir from the pump.
- Set aside the old cassette and empty bag or empty cassette reservoir connected to the catheter extension tubing on the work table.
- Pump with bag: go to the next step.
- Pump with cassette réservoir: go to step 10.
Why ? This step allows the rest of the procedure.
|
|
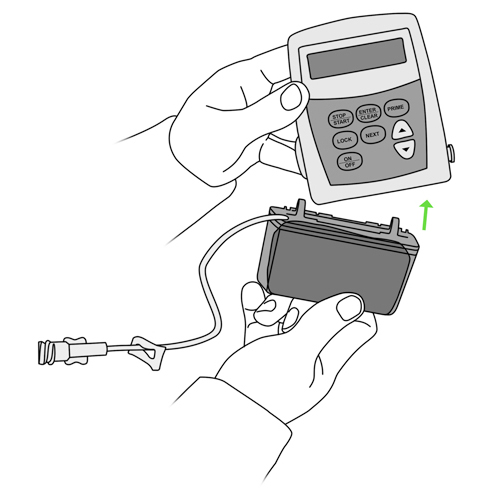
Step 9: Install a new bag and cassette tubing, if applicable
|
- Insert the new cassette into the pump.
- Secure the cassette lock.
- Remove the protective cap from the tubing of the new bag.
- Remove the protective cap from the cassette tubing.
- Make sure that nothing touches the openings of the tubing to prevent contamination.
- Connect the tubing of the cassette to the tubing of the new bag by turning a quarter turn clockwise until the connection is tight.
- Press the ON/OFF button on the pump to turn on the pump.
- Return the residual volume to the starting volume:
- press the “NEXT” button on the pump to display the residual volume screen,
- then press the ENTER/CLEAR button to restore the residual volume to the starting volume.
- Go to step 11.
Why ? This step allows the rest of the procedure.
|
|
Step 10: Install the new cassette reservoir and the new extension tubing, if applicable
|
- Insert the new cassette reservoir into the pump.
- Secure the cassette lock.
- Remove the protective cap from the tubing of the cassette.
- Remove the protective cap from the new extension tube.
- Connect the tubing of the cassette reservoir to the new extension tube by turning clockwise about 1/4 turn until the connection is tight.
- Press the ON/OFF button on the pump to turn the pump on.
- Return the residual volume to the starting volume:
- press the “NEXT” button on the pump to display the residual volume screen,
- then press the ENTER/RESET button to restore the residual volume to the starting volume.
Why ? This step allows the rest of the procedure.
|
|
Step 11: Remove the air from the new tubing

|
- Open the tubing clamp of the new cassette reservoir or the clamp of the tubing of the new bag.
- Keep the protective cap on at the end of the tubing to prevent contamination.
- Prime the tubing:
- press and hold down the “PRIME” button,
- stop pressing down when “Prime” and 3 sets of dashes appear on the pump screen,
- press again without releasing the button. “Priming…” will appear on the screen.
- repeat until the solution reaches the end of the tubing.
- Check that a drop appears at the end of the tubing and is visible through the transparent cap.
- When the tubing is filled with solution (and no air), close the clamps.
- Place the tubing in the pump air sensor.
Why ? This step ensures the safety of the administration of the drug.
|
|
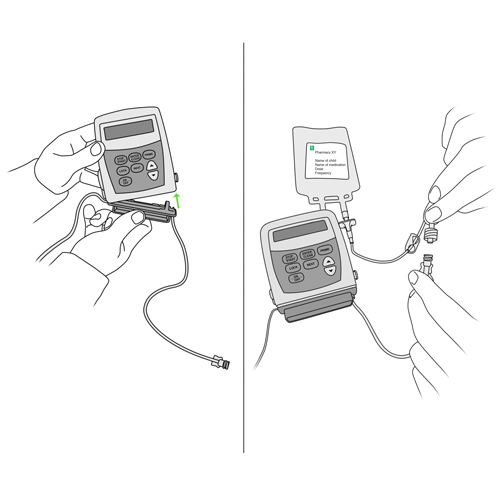
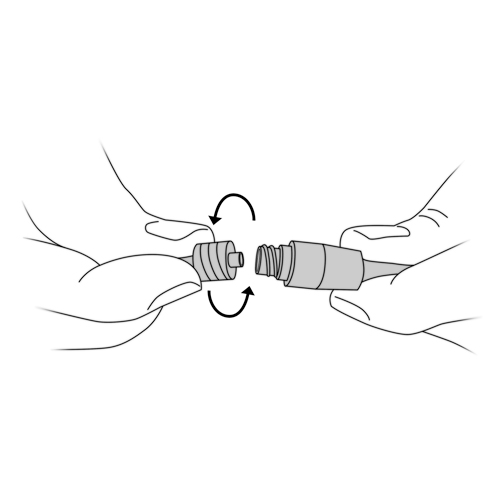
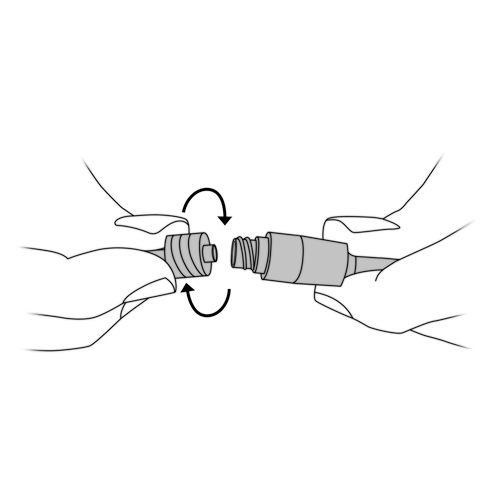
Step 12: Disconnect the old tubing from the needleless connector
|
- Hold the needleless connector with one hand and the tubing of the pump with the other.
- Disconnect the tubing by turning it counterclockwise.
- Discard the old tubing with the cassette and the empty bag or the empty cassette reservoir in the trash.
Why ? This step completes the disconnection of the used tubing and the installation of the new tubing in preparation for flushing of the catheter, if required.
The use of both your hands prevents the needleless connector from unscrewing instead of the tubing.
|
|
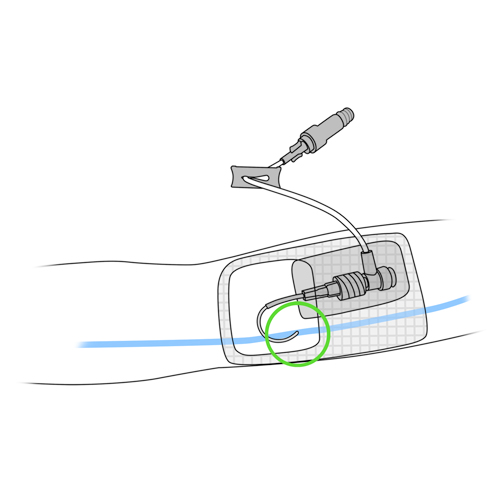
Step 13: Monitor the catheter site
|
Refer to steps 5 through 8 of the catheter site monitoring procedure.
Why ? This step helps to quickly detect problems.
|
|
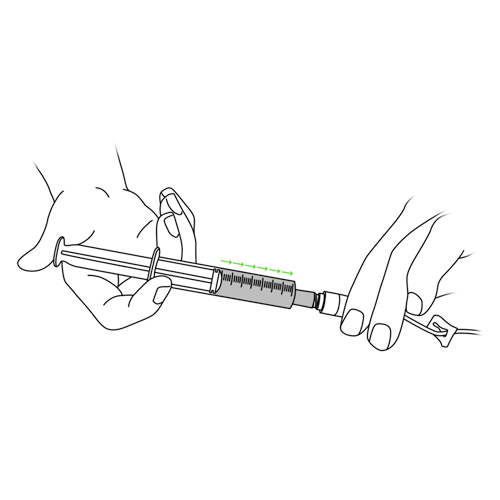
Step 14: Irrigate the catheter with the saline solution, if necessary
|
Why ? This step removes deposits that accumulate in the catheter and prevents it from blocking.
|
|
Step 15: Connect the new tubing to the needleless connector
|
- Disinfect the needleless connector.
- Remove the protective cap from the new tubing.
- Take the needleless connector between the thumb and forefinger of one hand.
- With the other hand, insert the end of the new tubing into the needleless connector.
- Turn clockwise about 1/4 turn until the connection is tight.
Why ? This step allows the rest of the procedure.
|
|
Step 16: Restart the pump
|
|
- Open the clamps of all tubing.
- Press and hold the STOP/START button of the pump and hold until the 3 sets of dashes disappear from the pump screen.
Why ? This step allows the medication delivery to be restarted.
|
|
Step 17: Secure the pump and medication

|
- Place the antibiotic bag near your child’s body in a waist pack or backpack.
- Make sure that the pump is well positioned and the tubing is not bent or compressed.
Why ? This step helps protect the pump and ensure proper flow of the medication from the pump into your child.
|
|
Step 18: Recovery

|
See the full description here
Summary:
The treatment is finished. Wash your hands again.
Be prepared to recognize the challenges faced and to provide positive feedback. Help your child recognize his/her strengths. Acknowledge the collaborative teamwork.
- Listen to what your child says about the parts of the procedure that were difficult or painful.
- Comfort your child and recognize your child’s collaboration with positive feedback.
- Highlight your child’s specific strengths that helped make the procedure positive.
- Discuss with your child what might be done the same or differently the next time the care is needed.
- Keep your promises if you have promised a reward, follow through.
- Reward yourself too.
|
|