Step 1: Anticipation

|
See the full description here
Summary:
Collaborate and form a team with your child. When you invest the time to form a strong team, children feel more comfortable and less anxious – this will help you complete the care with less stress – for you and your child.
Use these tips, from the start, to set the stage for a positive care procedure:
- Create the right moment: integrate the care in a routine.
- Alert your child to the needed care and communicate together.
- Form a team with your child: Encourage autonomy by offering realistic choices such as the method of distraction. Stay tuned to your child. Manage pain and anxiety, using distraction and positioning for comfort.
|
|
Step 2: Preparation

|
See the full description here
Summary:
- Prepare the environment: Identify a routine place for care. Close windows, doors and fans. Wash and dry the work surface and gather the needed materials for the care and to distract your child.
- Prepare your child: Get help if needed. Position your child for comfort to receive the care and start to use the selected distraction method.
- Prepare yourself: Find the right time when you are ready to provide the care safely. Review the list of care steps. Wash your hands.
Now that you are ready to start the care procedure, take the opportunity to encourage and praise your child.
|
|
Step 3: Procedure

|
See the full description here
Summary 3 key concepts:
- Safety: Carefully follow the care practice steps as you have been taught.
- Flexibility: Be ready to adjust according to your child’s reactions during the procedure. As needed, reposition or select an alternative distraction strategy. Follow your child’s pace and rhythm.
- Collaboration: Reassure your child, verbally and non-verbally. Acknowledge your child’s emotions and reactions. Help your child differentiate between the different sensations during a procedure.
|
|
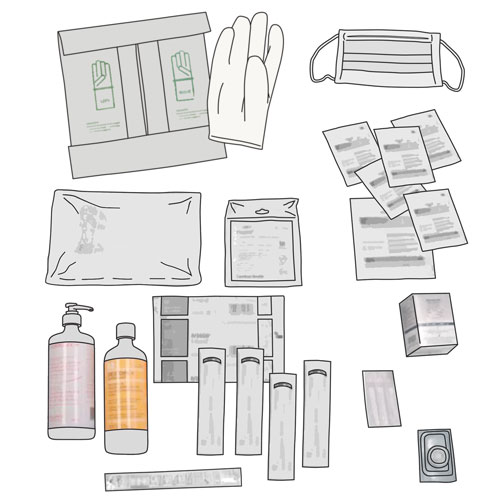
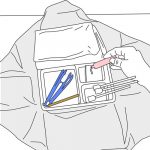
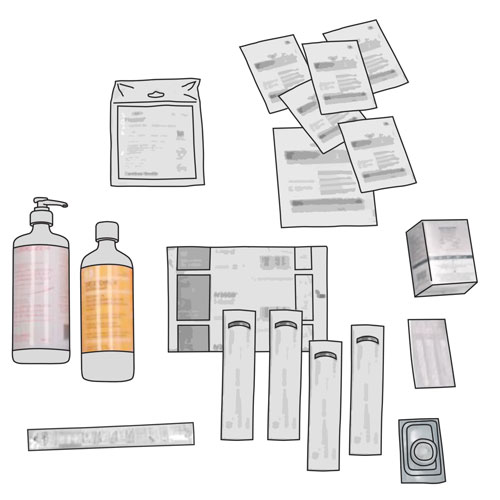
Step 4: Prepare the materials
|
- Make sure the necessary materials are on the well-cleaned work surface.
- Open the packets of swabsticks and leave the swabsticks in the packets.
- Open the sterile compresses package and leave the compresses in the opened package.
- If you know there is crusted skin (scabs) around the site: Open the bottle or remove the cap on the saline syringe and pour some solution on the compress.
Why ? This step allows you to have all the materials safely at hand for the rest of the procedure.
|
|
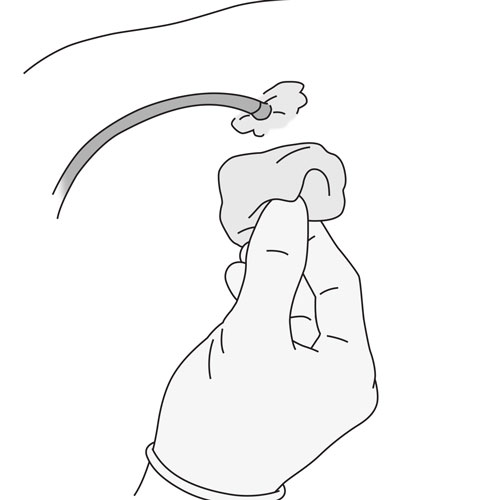
Step 5: Disinfect your hands

|
- Wash your hands again with the alcohol-based antiseptic gel.
- Apply a generous amount to cover the entire surface of your hands.
- Rub until your hands are dry (20-30 seconds).
Why ? This hand disinfection prevents contamination for the rest of the procedure.
|
|
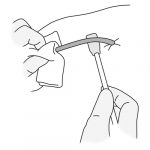
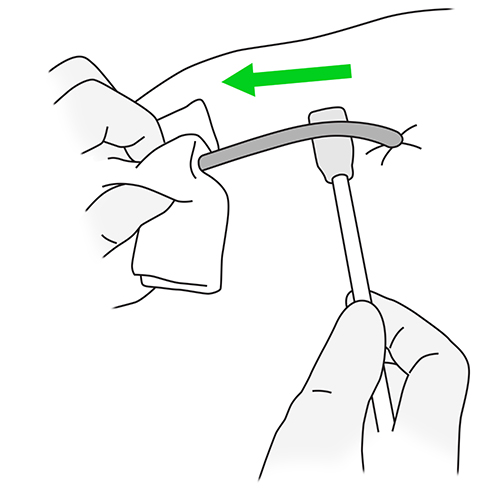
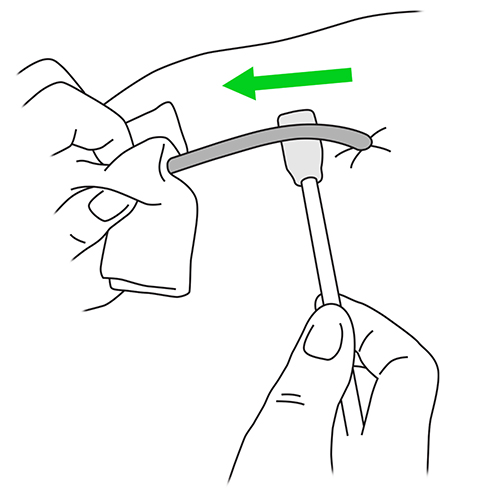
Step 6: Remove the dressing
|
- Gentle remove the dressing
- Be careful not to pull on the catheter or irritate the skin.
- If you see scabs around the site and have not already done so: Open the bottle or remove the cap on the saline syringe and pour some solution on the compresses.
Why ? This step allows a good view of the skin around the catheter insertion site.
|
|
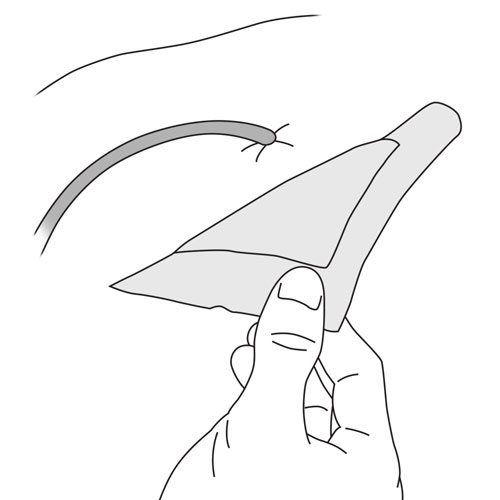
Step 7: Check the catheter insertion site
|
- The catheter insertion site should not change in appearance.
- Check the site for redness, warmth, swelling, tenderness, or discharge.
- If so, take a small specimen from the catheter insertion site with the swabstick, as instructed by your healthcare team; take a picture as well if possible.
Why ? This step allows detection of any skin irritation or infection and to allows for the analysis of the specimen if necessary.
|
|
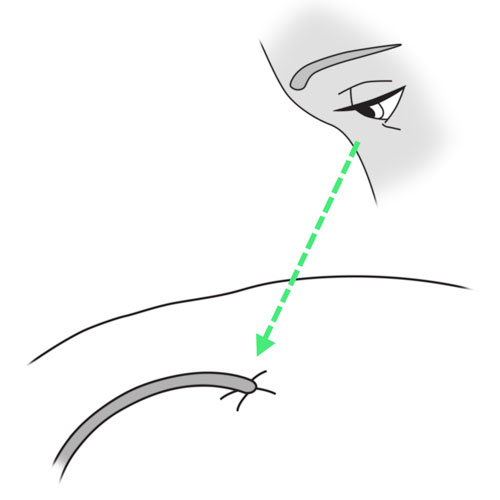
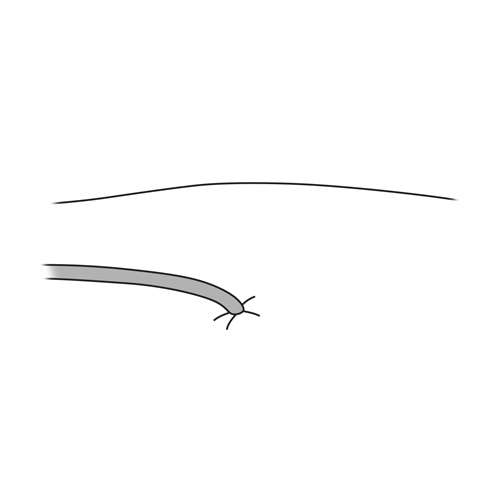
Step 8: Check the catheter tunnel
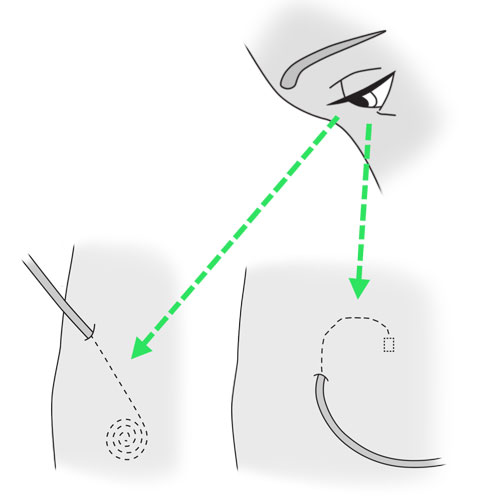
|
- Check the skin along the tunnel path for redness, swelling, tenderness or hardness.
Why ? This step allows detection of possible irritation or infection of the tissue where the catheter lies.
|
|
Step 9: Soften scabs, if present
|
- Soak a compress with saline solution.
- Soften the scabs by applying the wet compress.
- Do not pull on the scabs to avoid breaking the skin.
Why ? This step facilitates the removal of scabs to promote healing of the site.
|
|
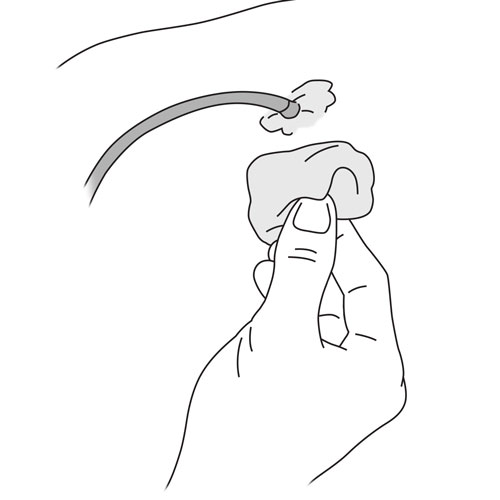
Step 10: Clean the catheter insertion site
|
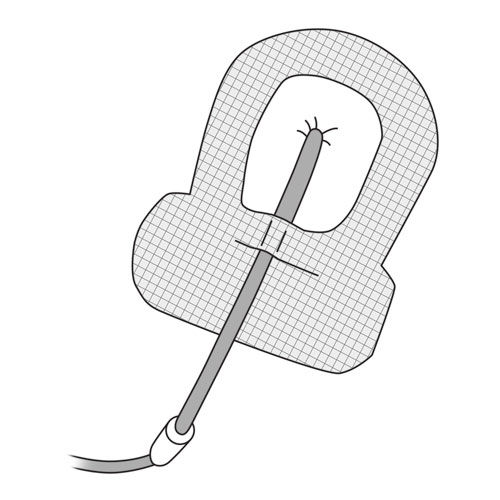
- With one hand, stabilize the catheter by holding it with a sterile compress.
- With the other hand, use a first swabstick to clean the skin surrounding the catheter insertion site.
- Unless otherwise instructed by your healthcare team, move back and forth repeatedly for at least 30 seconds as shown in the illustration.
- Apply gentle pressure to the skin as you move the swabstick.
- Make sure the skin is clean when finished this step.
Why ? Stabilizing the catheter while cleaning the site prevents it from moving and irritating the skin and also prevents accidental dislodgement of the catheter.
This cleaning reduces the amount of microbes on the skin around the catheter insertion site and prevents infections.
Applying light pressure on the skin allows the swabstick solution to penetrate and clean the skin well.
|
|
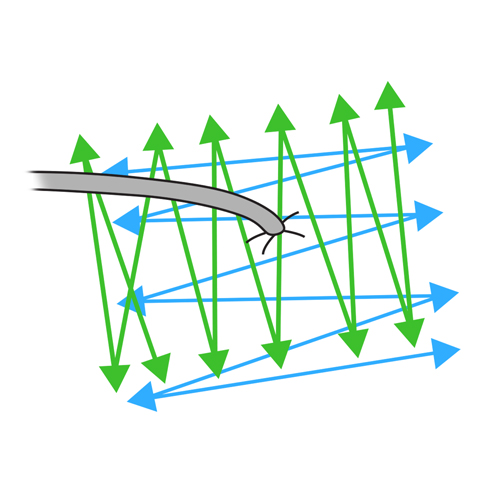
Step 11: Clean the catheter
|
- Continue to stabilize the catheter with one hand.
- With the other hand, use a second swabstick to clean under the catheter, starting near the insertion site and moving away from it.
- Use the third swabstick to clean over the catheter in the same manner.
- Do not clean the catheter using a back and forth motion; only move the swabstick once, starting near the insertion site and moving away from it.
Why ? Stabilizing the catheter while cleaning the site prevents it from moving and irritating the skin and also prevents accidental dislodgement of the catheter.
This step helps prevent infections by reducing the number of microbes on the catheter that could contaminate the catheter insertion site.
|
|
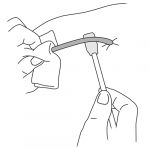
Step 12: Dry the catheter insertion site
|
- Allow the site to air dry completely for two minutes.
Why ? This step prevents the skin from remaining wet under the dressing, which can cause irritation or infection.
|
|
Step 13: Protect the skin around the catheter insertion site

|
If you are applying a Tegaderm advanced® adhesive dressing as agreed with your healthcare team, go directly to step 15.
- Make sure the catheter is in a straight line with the insertion site.
- Fold a dry compress in half.
- Place it under the catheter.
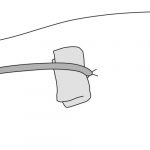
- Then cover the catheter insertion site with another compress.
- If desired, apply the skin protector to the skin, which will be covered by an adhesive dressing.
Why ? Proper catheter alignment and protection prevents injury to the insertion site.
|
|
Step 14: Place the dressing over the catheter insertion site
|
- Remove the clear film from the adhesive dressing.
- Apply the dressing to the catheter site as instructed by your healthcare team.
- Make sure the dressing covers the catheter for at least 2,5 cm.
- Go to step 16.
Why ? The installation of this dressing immobilizes and protects the catheter and prevents it from moving.
The catheter is more stable if the dressing covers it for at least 2.5 cm.
|
|
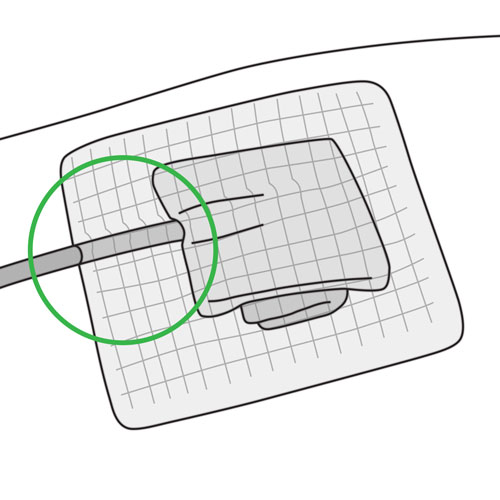
Step 15: Apply a Tegaderm advanced® dressing to the catheter insertion site
|
- Ensure that the catheter is is in a straight line with the insertion site.
- Peel back the dressing liner to expose the adhesive surface of the adhesive dressing.
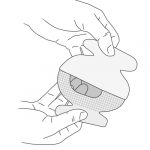
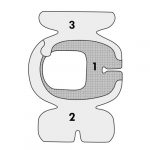
- Place the transparent film so that the catheter insertion site is placed in the center of the dressing (Part 1).
- Remove the remaining protective paper and attach the catheter by crossing the white wings under it.
- Apply light pressure with your fingers all around the bandage so that it sticks to the skin without creating an opening.
- Remove the remaining protective paper from around the bandage.
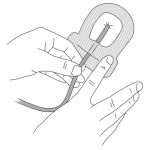
- Take the strip with the U-shaped opening (Part 2) and stick it under the catheter so that it covers the cross of the wings with the slit facing up.
- Take the strip (Part 3) and stick it over the catheter at the U-slot to avoid gaps; make sure to secure the strip.
Why ? The installation of this dressing immobilizes and protects the catheter and prevents it from moving.
|
|
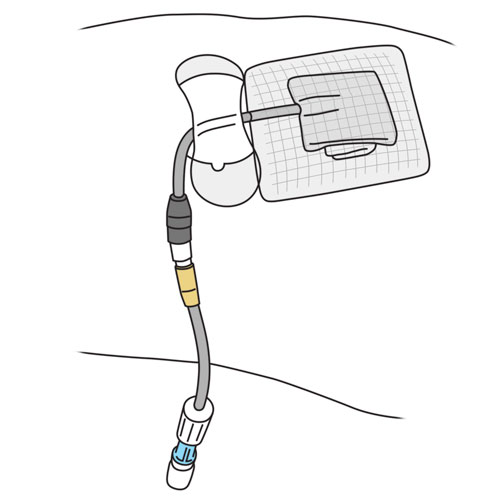
Step 16: Secure and immobilize the catheter
|
- Secure and immobilize the catheter on the abdomen with the device or tape recommended by your healthcare team.
- Do not put the device or tape over the connections.
- If necessary, apply a mesh bandage over the dressing.
- Fold the catheter under the mesh or sweater as needed.
Why ? A properly immobilized catheter keeps the insertion site healthy.
This step prevents the catheter from moving and irritating the insertion site.
The mesh bandage keeps the dressing in place.
|
|
Step 17: Recovery

|
See the full description here
Summary:
The treatment is finished. Wash your hands again.
Be prepared to recognize the challenges faced and to provide positive feedback. Help your child recognize his/her strengths. Acknowledge the collaborative teamwork.
- Listen to what your child says about the parts of the procedure that were difficult or painful.
- Comfort your child and recognize your child’s collaboration with positive feedback.
- Highlight your child’s specific strengths that helped make the procedure positive.
- Discuss with your child what might be done the same or differently the next time the care is needed.
- Keep your promises if you have promised a reward, follow through.
- Reward yourself too.
|
|