Step 1: Anticipation

|
- You and your child are a team. Encourage autonomy by making realistic choices about what they can do to help you.
- Make the care part of a routine.
|
|
Step 2: Preparation
|
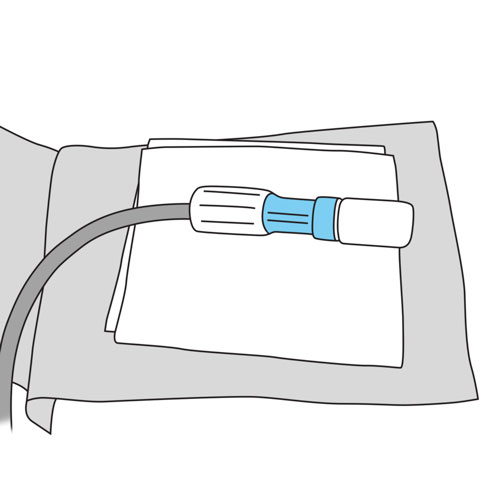
- Prepare the environment: Identify a place to perform the treatment.
- Prepare your child:
- Get help if needed.
- Position your child to safely assess the catheter insertion site in one of the positions discussed with your healthcare team, based on your child’s comfort, age and ability to cooperate.
- Begin distraction strategies.
- Prepare yourself: Choose a time when you are ready to do the treatment. Review the method.
- Perform basic procedures, as taught by your healthcare team:
- Wash your hands with soapy water for at least 20 seconds.
- Dry your hands well with a clean paper or towel.
- Close the tap with the paper or towel.
- Close doors and windows or ventilation system.
- Wash your working surface (eg., table) with alcohol or a disinfectant wipe (eg, Sani-Cloth® Plus).
- Let the table dry.
- Gather and inspect materials.
- Put on a mask.
- Remove jewelry.
- Wash your hands with a 4% chlorhexidine soap solution for 2 minutes.
- Dry your hands well with a clean paper or towel.
- Close the tap with the paper or towel.
- Now touch only the dialysis equipment.
- Now that you are ready to begin the treatment, take the opportunity to congratulate your child and offer encouragement during the rest of the procedure.
|
|
Step 3: Procedure

|
See the full description here
Summary 3 key concepts:
- Safety: Carefully follow the care practice steps as you have been taught.
- Flexibility: Be ready to adjust according to your child’s reactions during the procedure. As needed, reposition or select an alternative distraction strategy. Follow your child’s pace and rhythm.
- Collaboration: Reassure your child, verbally and non-verbally. Acknowledge your child’s emotions and reactions. Help your child differentiate between the different sensations during a procedure.
|
|
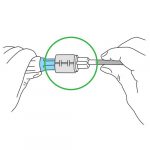
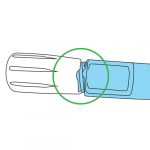
Step 4: Check the closure of the catheter extension
|
- Make sure that the cycler and cassette assembly is complete and that there is no air in the patient line.
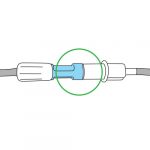
- Make sure that the catheter extension is properly closed: the two half-moons of the white part and the light blue part must be well aligned and nested in each other.
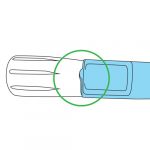
Why ? This step prevents contamination with air and fluid in the patient line.
|
|
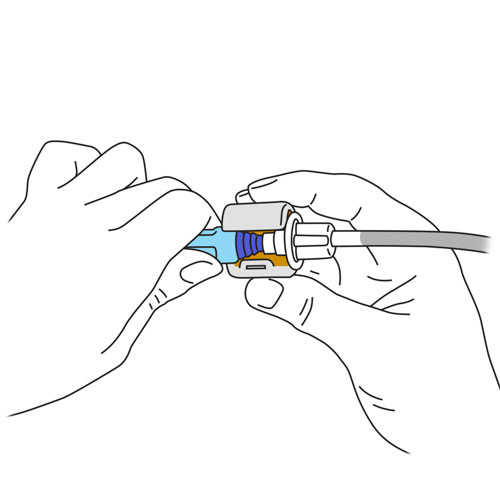
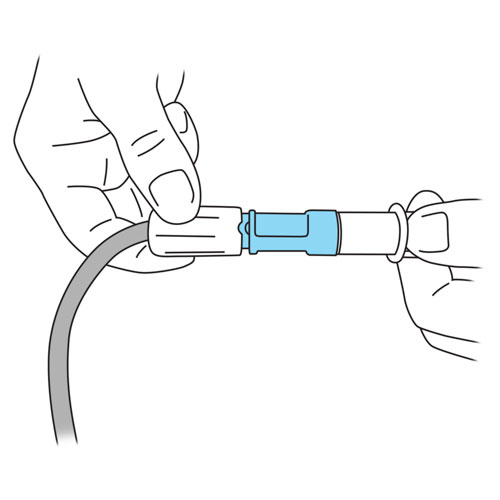
Step 5: Disinfect the junction of the extension with the MiniCap
|
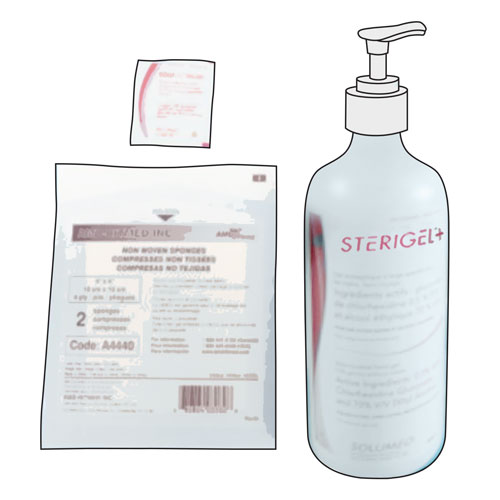
- Open the sterile compresses package.
- Open the disinfectant pad package.
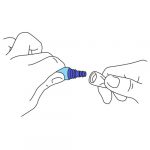
- Take the white part of the extension with one hand.
- With the other hand, wipe the outside of the extension at the MiniCap junction with the disinfectant pad for 15 seconds.
- Let dry.
- Do not remove the MiniCap to clean underneath (the dark blue end of the extension).
Why ? Disinfection removes most bacteria from this area before making the connection to the patient line.
|
|
Step 6: Protect the extension
|
- Place the extension on a compress or keep it in your hands.
Why ? This step avoids contamination of the extension.
|
|
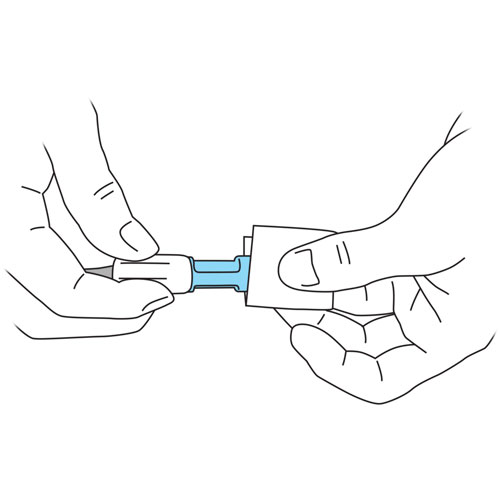
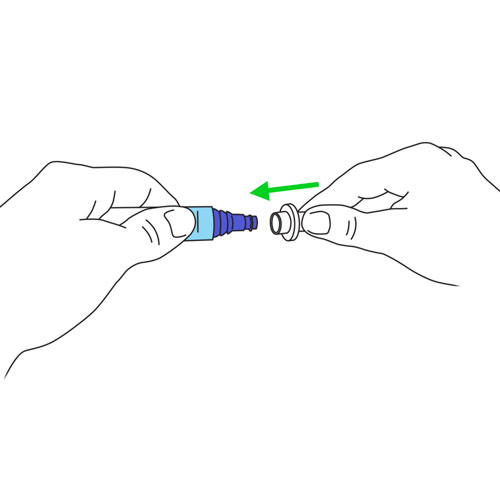
Step 7: Connect the patient line (with pediatric set)
|
If your child has an adult set, move on to the next step.
- Remove the protective cap from the patient line without touching the end of the line.
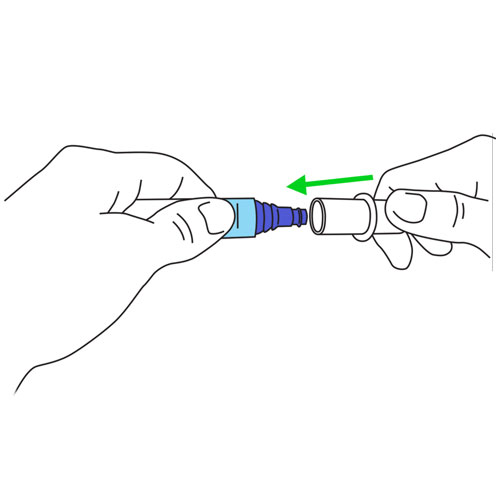
- Remove the MiniCap by unscrewing it without touching the dark blue end of the extension.
- Insert the ends into each other and screw firmly.
- Check that the connection between the extension and the patient line is secure.
- Go to step 10.
Why ? This step connects the patient line to the catheter extension to enable treatment.
|
|
Step 8: Connect the patient line (with adult set)
|
- Open the connection shield package, if used.
- Remove the protective cap from the patient line without touching the end of the line.
- Remove the MiniCap by unscrewing it without touching the dark blue end of the extension.
- Insert the ends into each other and screw firmly.
- Check that the connection between the extension and the patient line is secure.
Why ? This step connects the patient line to the catheter extension to enable treatment.
|
|
Step 9: Put on the connection shield (if adult set)
|
- Install a connection shield around the connection, if recommended by your healthcare team.
Why ? The connection shield protects the exposed part of the catheter extension.
|
|
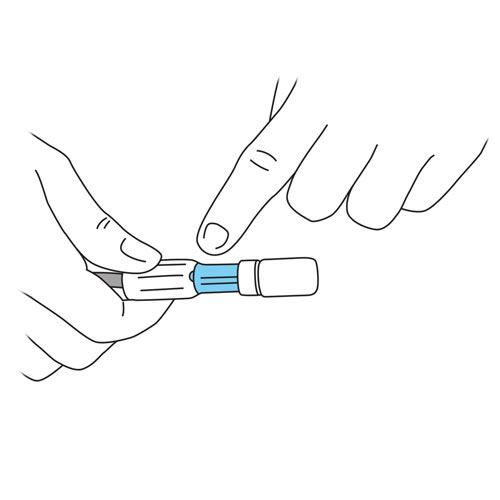
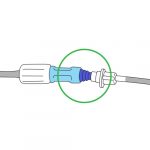
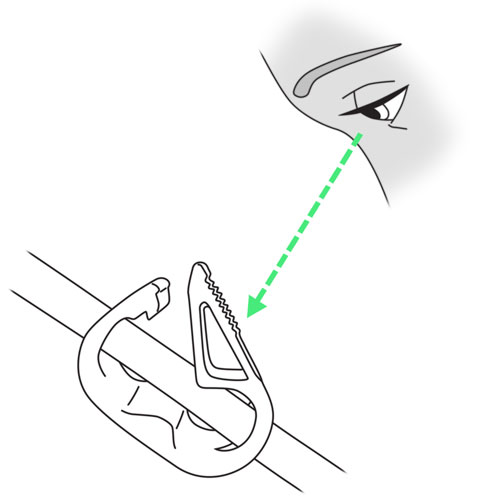
Step 10: Open the catheter extension
|
- With one hand, turn the white part of the catheter extension counterclockwise.
- With the other hand, turn the light blue part clockwise.
- The two half-moons are no longer interlocked.
Why ? This step allows the automated peritoneal dialysis to start.
|
|
Step 11: Check the system
|
- Open the patient line clamp.
- Make sure that the clamps on all bags are open.
- Check for kinked, bent, or jammed tubing.
- If your child is in diapers or has a gastrostomy/jejunostomy, wrap a protective pad around the connection.
Why ? These checks ensure the proper flow of solutions through the system.
Installing a protective pad around the connection protects it from leaks.
|
|
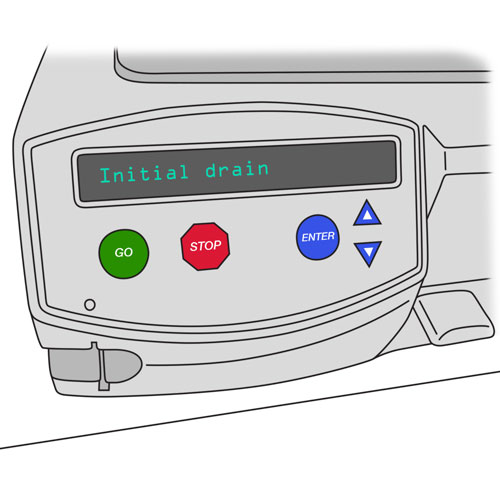
Step 12: Start the treatment
|
- Press the green GO button on the front of the unit.
- The message “Initial drain” with the programmed volume appears on the screen.
- If the drainage volume displayed is correct, press the GO button again.
- If the drainage volume displayed is incorrect, modify according to the recommendation of your healthcare team
- The message “Initial drain” appears on the screen and the treatment begins.
Why ? This step begins the automated peritoneal dialysis treatment with the initial drainage of your child’s peritoneal cavity.
|
|
Step 13: Recovery

|
See the full description here
Summary:
The treatment is finished. Wash your hands again.
Be prepared to recognize the challenges faced and to provide positive feedback. Help your child recognize his/her strengths. Acknowledge the collaborative teamwork.
- Listen to what your child says about the parts of the procedure that were difficult or painful.
- Comfort your child and recognize your child’s collaboration with positive feedback.
- Highlight your child’s specific strengths that helped make the procedure positive.
- Discuss with your child what might be done the same or differently the next time the care is needed.
- Keep your promises if you have promised a reward, follow through.
- Reward yourself too.
|
|