Step 1: Anticipation
|
See the full description here
Summary:
Collaborate and form a team with your child. When you invest the time to form a strong team, children feel more comfortable and less anxious – this will help you complete the care with less stress – for you and your child.
Use these tips, from the start, to set the stage for a positive care procedure:
- Create the right moment: integrate the care in a routine.
- Alert your child to the needed care and communicate together.
- Form a team with your child: Encourage autonomy by offering realistic choices such as the method of distraction. Stay tuned to your child. Manage pain and anxiety, using distraction and positioning for comfort.
|
|
Step 2: Preparation

|
See the full description here
Summary:
- Prepare the environment: Identify a routine place for care. Close windows, doors and fans. Wash and dry the work surface and gather the needed materials for the care and to distract your child.
- Prepare your child: Get help if needed. Position your child for comfort to receive the care and start to use the selected distraction method.
- Prepare yourself: Find the right time when you are ready to provide the care safely. Review the list of care steps. Wash your hands.
Now that you are ready to start the care procedure, take the opportunity to encourage and praise your child.
|
|
Step 3: Procedure

|
See the full description here
Summary 3 key concepts:
- Safety: Carefully follow the care practice steps as you have been taught.
- Flexibility: Be ready to adjust according to your child’s reactions during the procedure. As needed, reposition or select an alternative distraction strategy. Follow your child’s pace and rhythm.
- Collaboration: Reassure your child, verbally and non-verbally. Acknowledge your child’s emotions and reactions. Help your child differentiate between the different sensations during a procedure.
|
|
Step 4: Prepare the materials
|
- Use a flat work surface that has been properly cleaned.
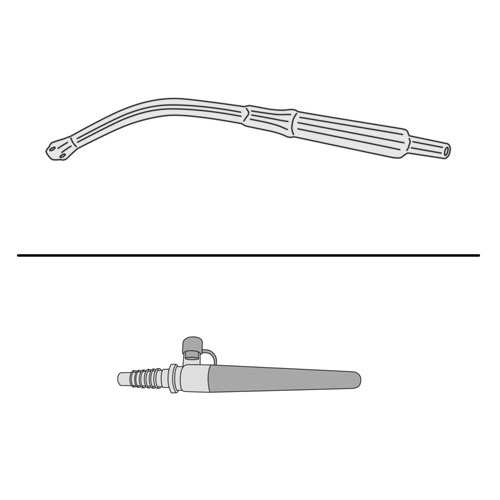
- Gather the material required.
- Leave the catheter in its envelope or with the cap on. Open one end of the envelope if using a new catheter.
- Pour cooled boiled water or sterile water into a clean container.
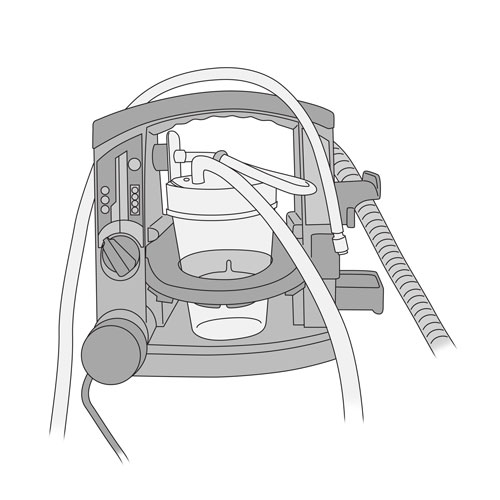
- Check that the canister for collecting secretions is correctly installed on the suction device and that it is less than ¾ full.
- Connect the suction tubing to the suction device.
Why ? This step ensures the safety and the continuity of the procedure.
|
|
Step 5: Set the pressure regulator of the suction device
|
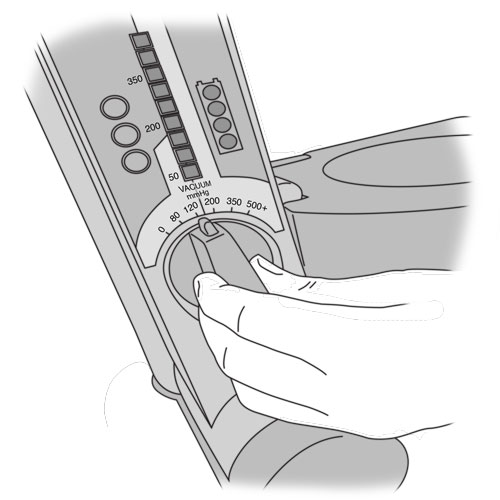
- Switch on the suction device.
- Adjust the pressure setting, following the directions of the healthcare team.
Why ? This step ensures that the correct pressure setting is used.
An excessively high pressure may damage the fragile lining of the mouth.
A pressure that is too low may be ineffective in suctioning secretions.
|
|
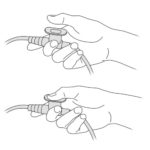
Step 6: Connect the suction catheter to the suction tubing
|
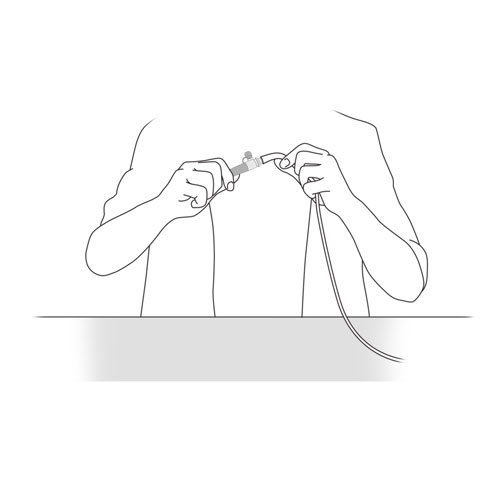
- Take the free end of the suction tubing with one hand.
- With the other hand, connect the end of the suction catheter to the tubing, taking care to keep the tip of the catheter (the part that goes into the mouth) inside the envelope or with the cap on.
Why ? By connecting the catheter in this way, the tip stays clean, reducing contamination with bacteria.
|
|
Step 7: Position your child
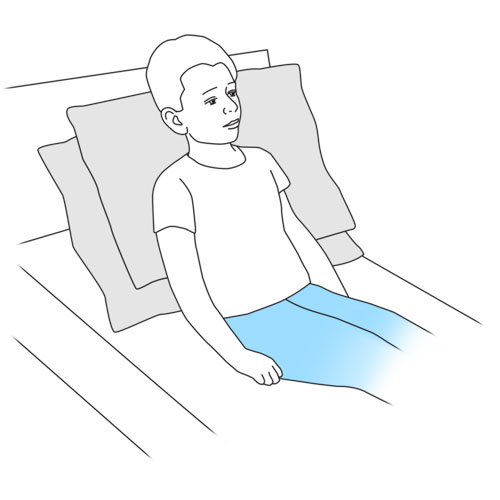
|
- Place your child in a comfortable position that easily allows you to perform this care.
- If your child is in a sitting or semi-sitting, gently turn your child’s head to one side, facing you.
- The procedure can also be done with your child in the lying position.
Why ? The sitting or semi-reclining position is preferred to optimally remove oral secretions.
|
|
Step 8: Check the pressure level of the suction device and lubricate the catheter

|
- Remove the suction catheter from the protective envelope or remove the cap, if applicable.
- Dip the tip of the catheter into the lubrication solution (either cooled boiled water or sterile water) in order to aspirate a small amount of water.
- If the catheter has a suction valve: then at the same time as you dip the catheter into the solution, close the valve with your thumb to create a vacuum effect and then remove your thumb to release the suction.
- If the catheter does not have a suction valve: the aspiration of the water will be continuous.
- Check that the water has been sucked into the catheter.
- Confirm that the pressure level indicated on the device is matched to the values recommended by the healthcare team.
- Remove the tip of the catheter from the water container.
Why ? This step ensures that the device works and that the catheter is lubricated.
This also verifies that there is no air leak in the aspiration device and that the pressure is correctly set.
Dipping the catheter in water ensures that it is lubricated; this minimizes irritation of the lining of the mouth.
|
|
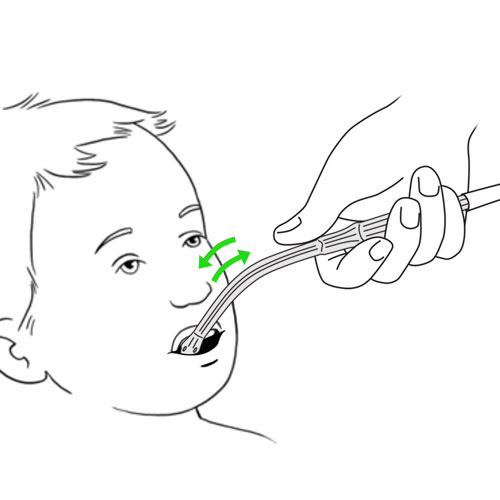
Step 9: Insert the catheter
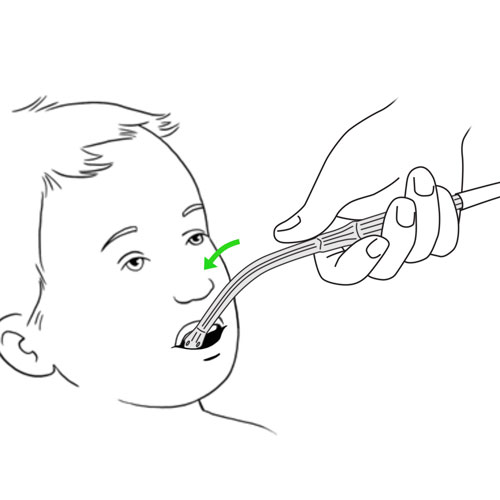
|
- Carefully insert the catheter into your child’s mouth.
- Continue inserting the catheter, aiming towards your child’s cheeks (not blocking the suction valve, if present).
Why ? This method avoids injury to the lining of the mouth.
|
|
Step 10: Aspirate the secretions
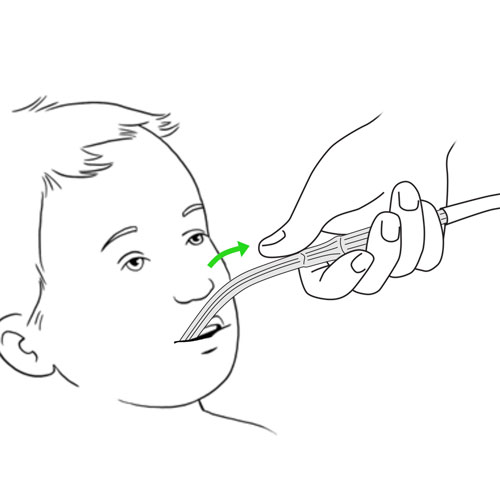
|
- Gently move the tip of the catheter inside the mouth, around the gums, under the tongue and towards the back of the throat.
- Gently remove the catheter from the mouth (intermittently closing the suction valve with your thumb, if present).
- Each session of aspiration should not last more than 15 seconds.
- Pause suctioning if your child starts to cough; once the coughing stops, resume the steps here.
- Wipe excess secretions from the mouth using a paper tissue, if necessary.
Why ? Aspiration of oral secretions should be brief as it removes air from the lungs at the same time. Excess suctioning can dry out your child’s mouth.
|
|
Step 11: Rinse the catheter
|
|
- Wipe the outside of the catheter using a non sterile gauze or compress to remove secretions.
- Dip the tip of the catheter into the cooled boiled water or sterile water container and aspirate a small quantity of water to clean the inside of the catheter (closing the suction valve of the catheter with your thumb, if present).
- Remove the catheter from the water container.
Why ? By wiping clean the outside of the catheter first, you avoid contaminating the water solution before rinsing the inside of the catheter.
Aspirating water into the catheter helps to remove and residual secretions from the inside the catheter.
|
|
Step 12: Repeat the aspiration, as needed
|
- Let your child rest for at least 30 seconds between each episode of aspiration.
- Repeat the procedure 2 to 3 times if secretions are still present in the mouth.
- Between each episode of aspiration, rinse the catheter with water (boiled or sterile).
- Notify your healthcare team if there is a change in the colour, consistency or amount of secretions.
Why ? This step helps remove saliva and secretions more effectively from your child’s mouth.
A rest period between each episode of aspiration gives your child a chance to catch his breath.
A change in the colour, consistency or amount of secretions may indicate a change in your child’s healthcare status (eg, beginning of a respiratory tract infection).
|
|
Step 13: Clean the catheter
|
|
Keeping the suction valve closed with your thumb, if present:
- Thoroughly rinse the catheter one last time by aspirating water (boiled or sterile) until no more secretions are visible inside the catheter and the suction tubing.
- If secretions remain inside the catheter, aspirate a small amount of 3% hydrogen peroxide (previously poured into a small clean container) until the secretions are removed.
- Aspirate water (boiled or sterile) and air into the catheter to rinse and dry the inside of the catheter.
- Wipe the outside of the catheter with an alcohol swab.
- Let the catheter air dry.
- Disconnect the catheter from the suction tubing.
Why ? This step is needed to keep the catheter clean and ready for next use and to limit contamination that might cause infections.
|
|
Step 14: Store the equipment
|
- Turn off the suction device.
- Replace the cap on the catheter, if applicable; or place the catheter back into the envelope or a clean, sealed container.
- If necessary, empty the secretions from the canister into the toilet.
- Discard the rinsing and lubricating solutions used during the aspiration procedure.
- Rinse the containers used to hold the solutions with water and let air dry.
- Store the containers with the rest of the aspiration equipment.
Why ? This step ensures that the equipment is clean, in good condition and ready to use for the next episode of aspiration.
|
|
Step 15: Recovery
|
See the full description here
Summary:
The treatment is finished. Wash your hands again.
Be prepared to recognize the challenges faced and to provide positive feedback. Help your child recognize his/her strengths. Acknowledge the collaborative teamwork.
- Listen to what your child says about the parts of the procedure that were difficult or painful.
- Comfort your child and recognize your child’s collaboration with positive feedback.
- Highlight your child’s specific strengths that helped make the procedure positive.
- Discuss with your child what might be done the same or differently the next time the care is needed.
- Keep your promises if you have promised a reward, follow through.
- Reward yourself too.
|
|