Step 1: Anticipation

|
See the full description here
Summary:
Collaborate and form a team with your child. When you invest the time to form a strong team, children feel more comfortable and less anxious – this will help you complete the care with less stress – for you and your child.
Use these tips, from the start, to set the stage for a positive care procedure:
- Create the right moment: integrate the care in a routine.
- Alert your child to the needed care and communicate together.
- Form a team with your child: Encourage autonomy by offering realistic choices such as the method of distraction. Stay tuned to your child. Manage pain and anxiety, using distraction and positioning for comfort.
|
|
Step 2: Preparation

|
See the full description here
Summary:
- Prepare the environment: Identify a routine place for care. Close windows, doors and fans. Wash and dry the work surface and gather the needed materials for the care and to distract your child.
- Prepare your child: Get help if needed. Position your child for comfort to receive the care and start to use the selected distraction method.
- Prepare yourself: Find the right time when you are ready to provide the care safely. Review the list of care steps. Wash your hands.
Now that you are ready to start the care procedure, take the opportunity to encourage and praise your child.
|
|
Step 3: Procedure

|
See the full description here
Summary 3 key concepts:
- Safety: Carefully follow the care practice steps as you have been taught.
- Flexibility: Be ready to adjust according to your child’s reactions during the procedure. As needed, reposition or select an alternative distraction strategy. Follow your child’s pace and rhythm.
- Collaboration: Reassure your child, verbally and non-verbally. Acknowledge your child’s emotions and reactions. Help your child differentiate between the different sensations during a procedure.
|
|
Step 4: Prepare your child to wear the mask

|
- Observe the condition of the skin on your child’s face, nose and around the eyes.
- Advise the healthcare team if you notice redness or skin breakdown; it is important to revise the fit of the mask to prevent further skin irritation.
- Make sure your child’s face is clean and free from oil or creams.
- If necessary, gently wash your child’s face with warm water and mild soap; dry the skin well afterwards.
Why ? Regular surveillance of the skin helps to prevent skin breakdown.
Clean dry skin helps to keep the mask correctly in place, allowing for effective ventilatory assistance.
|
|
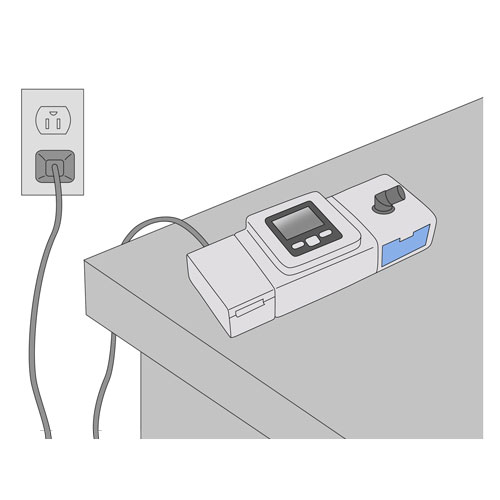
Step 5: Prepare the device
|
- Plug the power cord into an electric wall outlet and plug the other end of the power cord into the power adaptor.
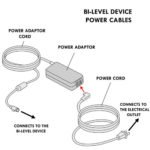
- Plug the power adaptor cord to the back of the ventilatory assistance device.
- Ensure that all connections are secure, as indicated by your healthcare team.
Why ? This step is required to provide a power source to the device, allowing for effective ventilatory assistance.
|
|
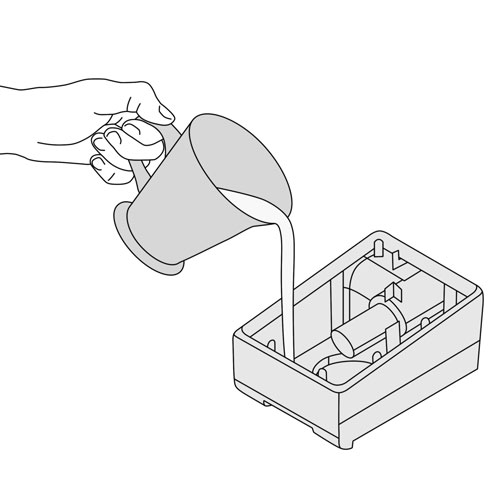
Step 6: Prepare the humidifier of the device
|
- Remove the water chamber from the humidifier.
- Remove the cover of the water chamber.
- Place the water chamber on a flat, solid surface (eg, table).
- Fill water chamber with distilled or demineralized water up to the maximal fill line.
- Put the water chamber back into the humidifier.
Why ? The addition of humidity to the air flow from the device helps to prevent irritation and over drying of the lining of the airways.
|
|
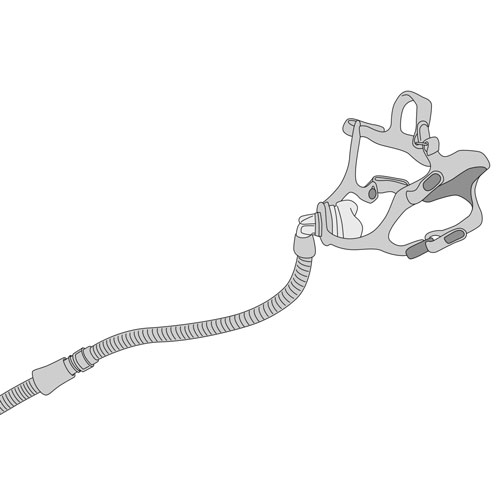
Step 7: Assemble the ventilation circuit
|
- Connect one end of the circuit tubing to the air outlet port of the humidifier.
- Connect the other end of the circuit tubing to the mask or the tubing of the mask, if any.
- Make sure that the circuit parts are well connected to each other.
- Verify that the tubing of the circuit is not bent, pinched or obstructed.
Why ? A correct assembly of the circuit parts avoids air leaks during ventilatory assistance.
Air leaks can reduce the effectiveness of ventilatory assistance.
Correct positioning of tubing helps to prevent the accumulation of water inside the tubing.
|
|
Step 8: Prepare the mask
|
- Check that the mask is not damaged in any way (cracks, discoloration, cleanliness, etc.)
- Attach the straps to the mask, if not already present.
Why ? The mask must be in good condition in order for the ventilatory assistance to be effective.
|
|
Step 9: Position and prepare your child
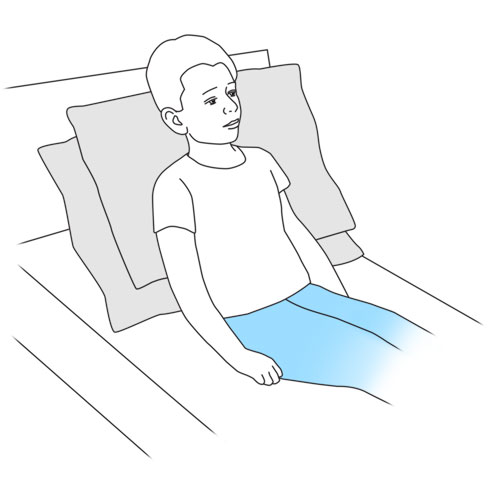
|
- Place your child in a comfortable position and one that allows for easy installation of the mask over your child’s face.
- Suction the secretions, if needed.
Why ? The best position is one which optimizes your child’s comfort and the effectiveness of ventilatory assistance.
|
|
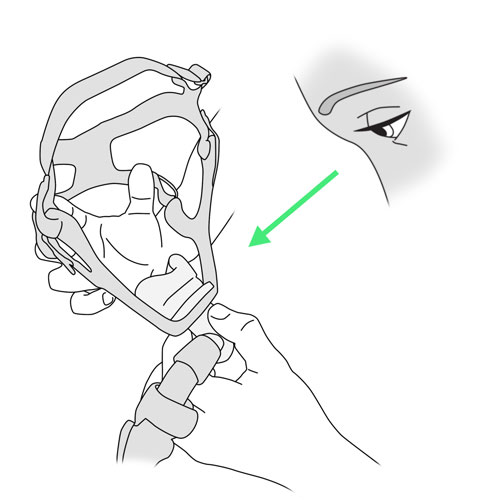
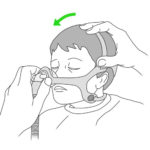
Step 10: Install the mask
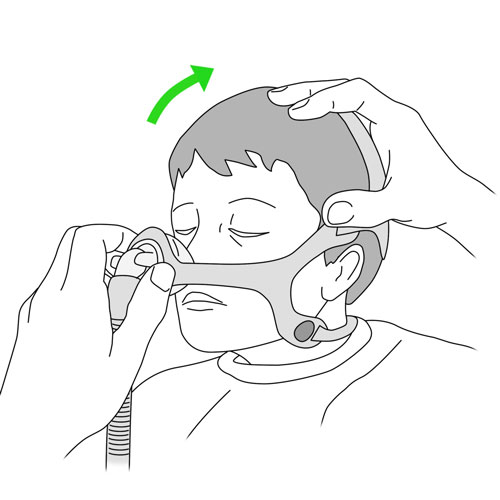
|
- Place the mask over the nose of your child.
- Secure the straps around the child’s head, following the instructions of the healthcare team.
- Avoid putting excessive tension on the straps as this can cause air leaks or damage to your child’s skin.
Why ? This step allows your child to be connected to the ventilation circuit.
A correctly fitting mask prevents air leaks which can reduce the effectiveness of ventilatory assistance.
|
|
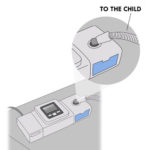
Step 11: Turn on the device
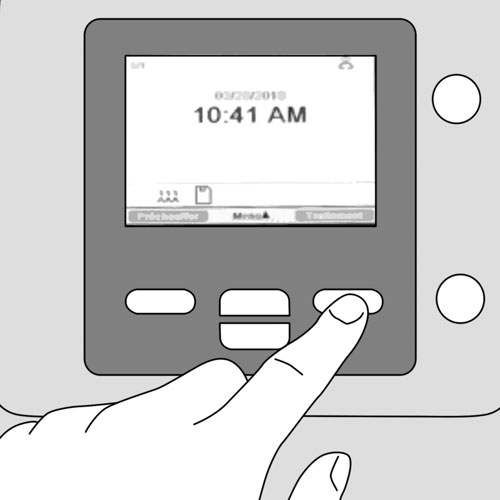
|
- Press the device start button.
- Then press the button on the right hand side under the word “Treatment” to start ventilatory assistance.
- Verify that the device beeps as it starts and that the alarm lights flash red and then yellow.
- Open and connect a source of oxygen, if prescribed, according to the method taught by your healthcare team
- The humidifier starts when the device is turned on.
- Make sure that the exhalation valve is not obstructed.
If your child uses another bi-level device model other than the BiPAP®A-30 or the BiPAP®A-40, you MUST refer to your child’s healthcare team for the specific instructions on how to correctly use the device.
Why ? This step allows your child to receive ventilatory assistance from the device.
It is always recommended to start the device AFTER placing the mask on your child for comfort and to ensure effective ventilation.
The exhalation valve allows release of exhaled air.
|
|
Step 12: Continue and supervise ventilatory assistance
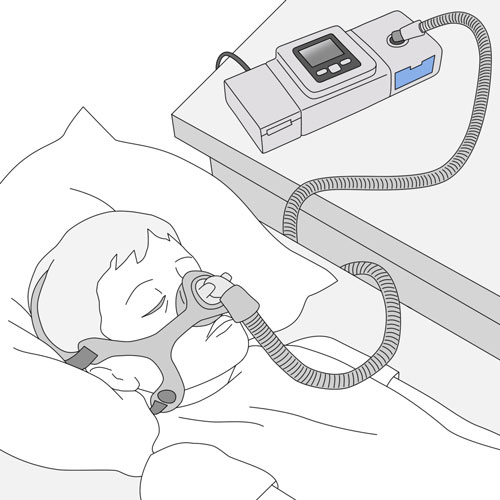
|
- Check that the device is working properly: your child should be receiving air flow and the pressure graph (green bar) on the device screen should be moving back and forth.
- Make sure that there are no significant air leaks around the mask and near the eyes; readjust the mask and straps if necessary.
- Make sure that there are no significant air leaks in the circuit: check the level of leaks displayed on the device screen and compare this to the acceptable levels as indicated by your child’s healthcare team. If there is an excessive air leak, correct the problem.
- Make sure that there is no tension or pulling on the ventilation circuit and on the mask,
- Ensure that the humidifier is on and functioning correctly (eg, temperature displayed, lights on).
- Verify that there is no accumulation of water in the tubing.
- Correct any device alarm situations, if any.
- Contact your child’s healthcare team for any persistent alarms.
Why ? This step ensures safe ventilatory assistance.
Air leaks may reduce the effectiveness of ventilatory assistance.
The addition of humidity to the air flow from the device helps to prevent irritation and overdrying of the lining of the airways.
|
|
Step 13: Discontinue ventilation, remove the mask and close the device
|
|
When the period of ventilatory assistance for the child is over:
- Remove the mask from your child’s face.
- Turn off the oxygen supply, if used.
- Press and release the device stop button.
- Confirm your intention to turn off the device by pressing the button on the right side under the word “OK”.
- The humidifier will turn off at the same time.
Why ? This step allows the ventilatory assistance to be discontinued safely and for the device to be turned off securely.
|
|
Step 14: Clean and store the equipment
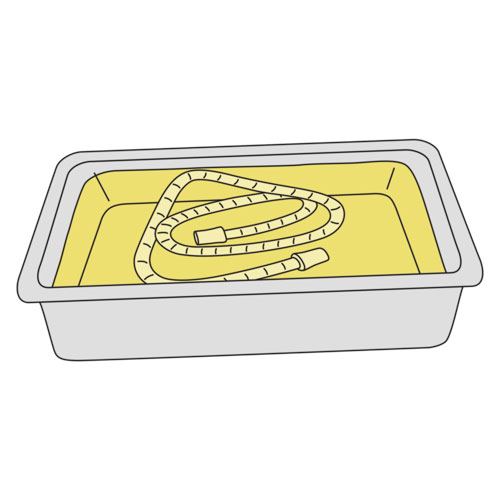
|
Clean and store the equipment according to the recommendations.
Why ? This step is required to prevent infections and to maintain the equipment in working order.
|
|
Step 15: Recovery

|
See the full description here
Summary:
The treatment is finished. Wash your hands again.
Be prepared to recognize the challenges faced and to provide positive feedback. Help your child recognize his/her strengths. Acknowledge the collaborative teamwork.
- Listen to what your child says about the parts of the procedure that were difficult or painful.
- Comfort your child and recognize your child’s collaboration with positive feedback.
- Highlight your child’s specific strengths that helped make the procedure positive.
- Discuss with your child what might be done the same or differently the next time the care is needed.
- Keep your promises if you have promised a reward, follow through.
- Reward yourself too.
|
|