Step 1: Anticipation

|
See the full description here
Summary:
Collaborate and form a team with your child. When you invest the time to form a strong team, children feel more comfortable and less anxious – this will help you complete the care with less stress – for you and your child.
Use these tips, from the start, to set the stage for a positive care procedure:
- Create the right moment: integrate the care in a routine.
- Alert your child to the needed care and communicate together.
- Form a team with your child: Encourage autonomy by offering realistic choices such as the method of distraction. Stay tuned to your child. Manage pain and anxiety, using distraction and positioning for comfort.
|
|
Step 2: Preparation

|
See the full description here
Summary:
- Prepare the environment: Identify a routine place for care. Close windows, doors and fans. Wash and dry the work surface and gather the needed materials for the care and to distract your child.
- Prepare your child: Get help if needed. Position your child for comfort to receive the care and start to use the selected distraction method.
- Prepare yourself: Find the right time when you are ready to provide the care safely. Review the list of care steps. Wash your hands.
Now that you are ready to start the care procedure, take the opportunity to encourage and praise your child.
|
|
Step 3: Procedure

|
See the full description here
Summary 3 key concepts:
- Safety: Carefully follow the care practice steps as you have been taught.
- Flexibility: Be ready to adjust according to your child’s reactions during the procedure. As needed, reposition or select an alternative distraction strategy. Follow your child’s pace and rhythm.
- Collaboration: Reassure your child, verbally and non-verbally. Acknowledge your child’s emotions and reactions. Help your child differentiate between the different sensations during a procedure.
|
|
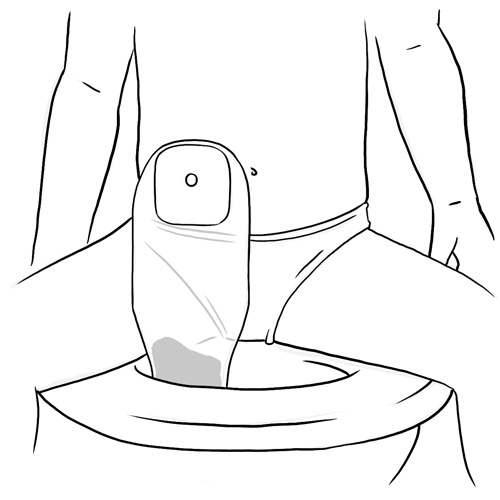
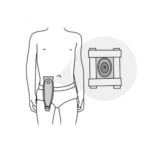
Step 4: Position your child
|
Place your child in one of the positions discussed with your enterostomal therapy nurse or your healthcare team, according to age, ability to cooperate and comfort.
Why ? This step helps with the care.
|
|
|
|
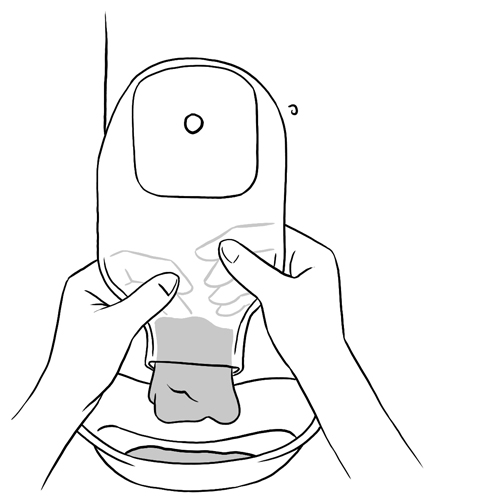
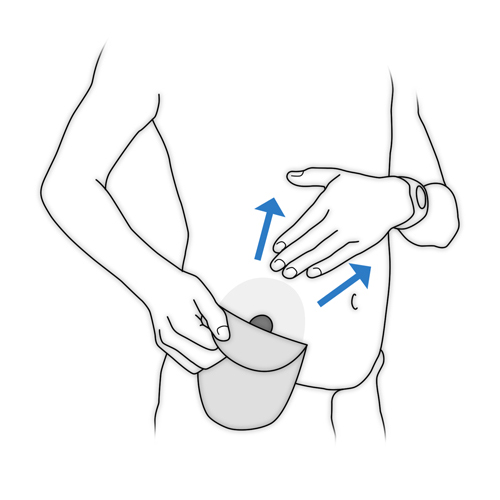
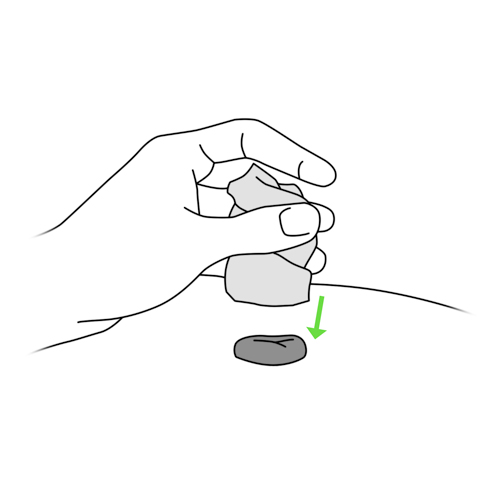
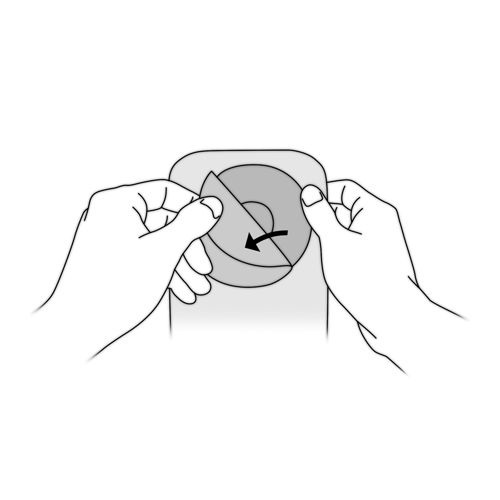
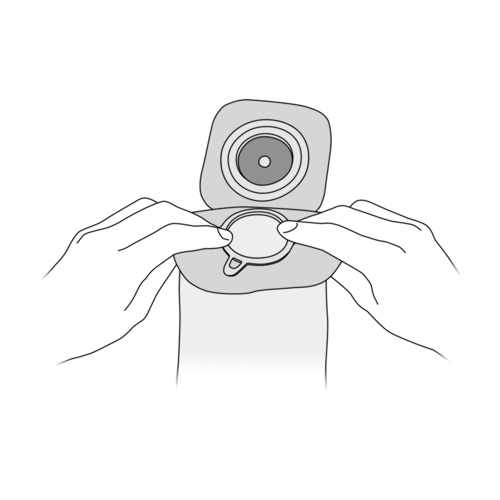
Step 6: Remove the collection device
|
- Using one hand, gently pull the abdominal skin above the stoma upwards.
- With the other hand, peel off the skin barrier from top to bottom.
- If there is a reusable clasp, remove it and keep it close at hand.
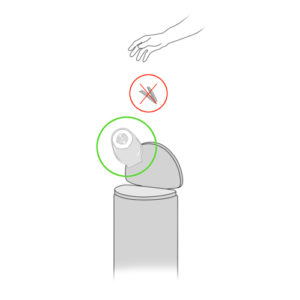
- Throw away the used device in the garbage.
Why ? This step avoids unnecessary stretching the skin and prevents irritation.
|
|
Step 7: Clean the stoma and the skin around it
|
This step can be done in the shower or bath.
- Rinse with water and pat the skin dry well with a clean towel.
- Check that the skin around the stoma is clean and completely dry before proceeding to the next step.
Why ? This step helps keep the skin around the stoma healthy and ensures that the skin barrier will stick well to it.
Any stool, soap or oil residues that remain can prevent the device from sticking well and cause irritation to the skin.
|
|
Step 8: Examine the stoma and the condition of the skin around it

|
- Examine the stoma and the condition of the skin around it. This should be in the same condition as the skin over your child’s stomach.
- It is normal to see the markings left from the previous skin barrier (little pressure marks on the skin around the stoma) and occasionally to see a few small drops of blood on the stoma.
- If the skin is red, swollen or your child complains of a burning sensation then the stoma is likely irritated.
- If the stoma or the skin around looks different than usual, consult your enterostomal therapy nurse or healthcare team.
Why ? This step helps to identify quickly if problems arise and thus helps prevent complications.
|
|
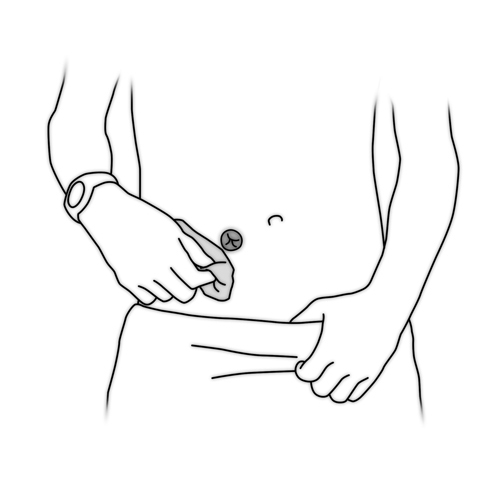
Step 9: Place a temporary absorbent protection over the stoma
|
- Place toilet paper on the stoma to catch any stool that might come out during the procedure.
- Keep this protection in place until you install the new device.
Why ? This step keeps the stoma clean and dry in preparation for the next steps.
|
|
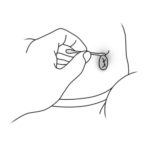
Step 10: Cut the opening in the skin barrier, if necessary
|
- The barrier should fit closely to the stoma, without touching it.
- Some skin barriers already have an opening cut that fits directly over the stoma. If this is the type of device that your child uses, go to step 12.
- If the skin barrier has to be cut: using a pen, draw the stoma on the back of the barrier as measured using the measuring guide.
- Using small fine scissors, cut the skin barrier to create the opening for the stoma and add 3 mm to the size of the stoma; for example, if the stoma measures 22 mm, cut the barrier at 25 mm.
Why ? A well-fitting skin barrier protects the skin around the stoma.
Cutting the skin barrier a little bit larger than the stoma allows for the natural movement of the stoma with the passage of stool, without causing irritation.
|
|
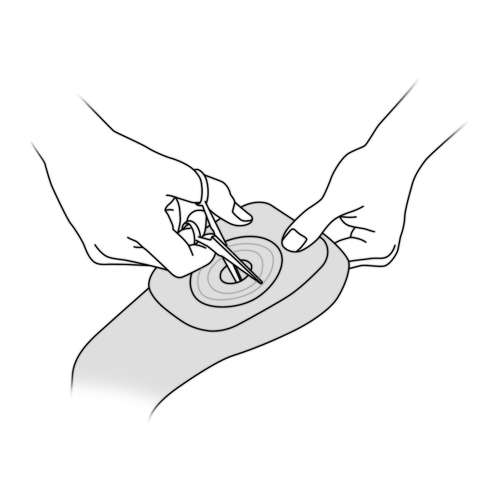
Step 11: Smooth out the cut opening of the skin barrier
|
- Using your finger, smooth around the edge that has been cut to ensure that there are no rough edges.
- Do this carefully, without making the opening bigger.
Why ? This step prevents a rough edge of a poorly cut collar from irritating the stoma or the skin around it.
|
|
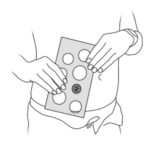
Step 12: Warm the skin barrier
|
- Place the skin barrier, still wrapped, on you or on your child to warm it up to body temperature.
- You can use your hands, skin surface or another source of gentle warmth, for a few minutes to soften the skin barrier.
Why ? This step helps the skin barrier stick better to the skin over stomach.
|
|
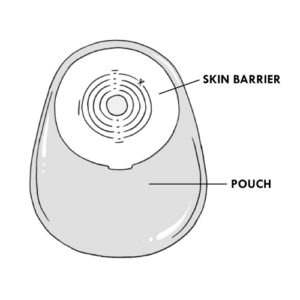
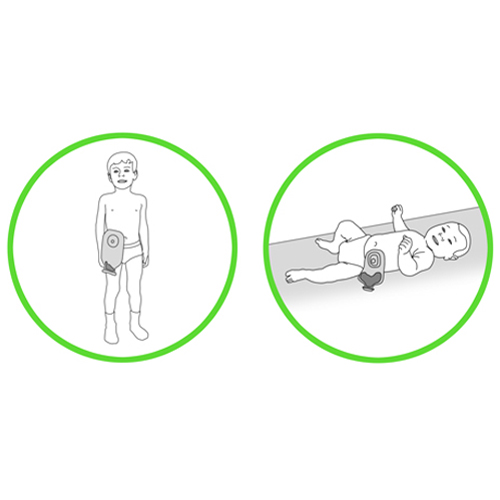
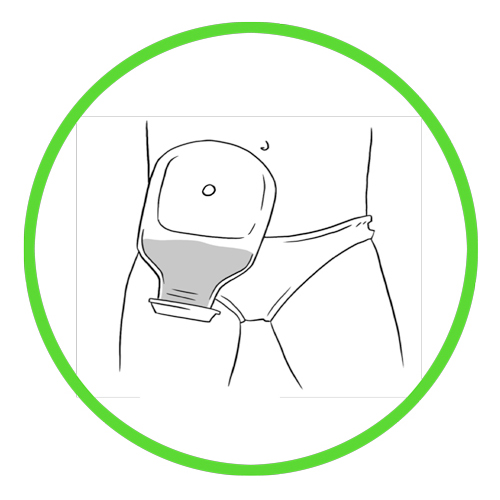
Step 13: Select the placement of the bag (one piece device)
|
If your child uses a two piece device, go to the next step.
Depending on the position that your child is usually in, place the bag as follows:
- if your child is usually lying down (eg, an infant), then place the bag so that it is perpendicular to the thigh (for drainage to the side).
- if your child is usually standing or sitting upright, then place the bag so that it drains downwards, parallel to the thigh.
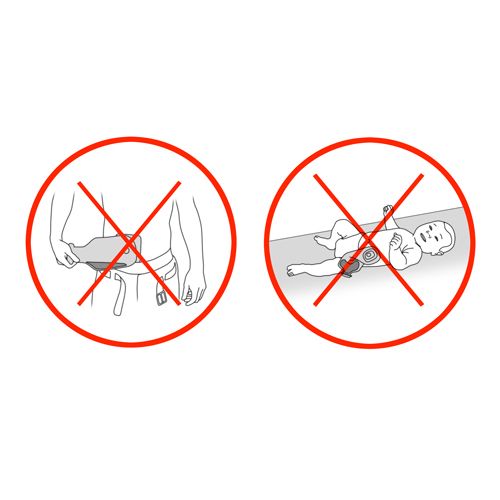
Why ? This step lets the bag fill more easily and ensures that the collection device is secure.
|
|
Step 14: Remove the plastic covering or the protective paper from the skin barrier
|
Why ? This step allows you to proceed with the treatment.
|
|
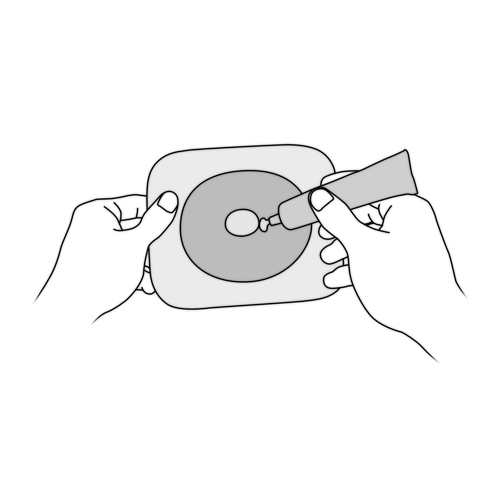
Step 15: Protect the skin around the stoma
|
- Check to see if the opening of the skin barrier is neatly trimmed and will fit properly.
- According to the method recommended by your enterostomal therapy nurse or your healthcare team, apply the stoma paste in either of the following ways:
- a layer on the back of the skin barrier around the opening or
- a ring of paste around the stoma.
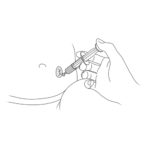
- To better control of the amount of the paste to be applied around the stoma:
- take a 10 cc syringe without a needle,
- remove the piston/plunger,
- squeeze in the amount of paste you need through the large end of the syringe,
- replace the piston,
- push gently on the piston to release a precise amount of paste where it is required.
- If your healthcare team recommends it, a special stoma powder can be used if the skin around the stoma is irritated and there is leakage.
- For ileostomy: always use paste to prevent liquid stool from leaking.
- For colostomy: use paste until your child is spending most of his/her time standing or sitting (around 2 years of age).
Why ? The height of the stoma and the unevenness of the surface of the skin around the stoma can prevent the skin barrier from sticking well.
This step protects the skin by creating a seal between the stoma and the skin surface if it touches stool.
|
|
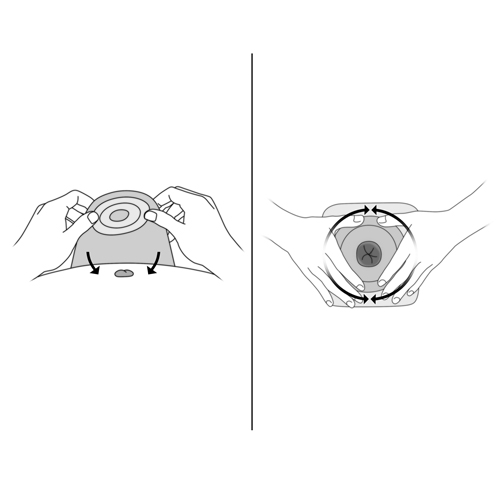
Step 16: Place the skin barrier around the stoma
|
- Remove the toilet paper that was protecting the stoma.
- Then, check the placement of the skin barrier before removing the adhesive film:
- hold the skin barrier by the edges,
- center it around the stoma,
- if it is a two piece device, consider the placement of the bag before you place it on the skin, perpendicular to the thigh of the child (draining to the side) for the child who is lying down on their back most of the time or parallel to the thigh of the child (draining downwards) for the child who is sitting or standing most of the time,
- place it on the skin.
- Next, take off the protective film on the adhesive border of the skin barrier.
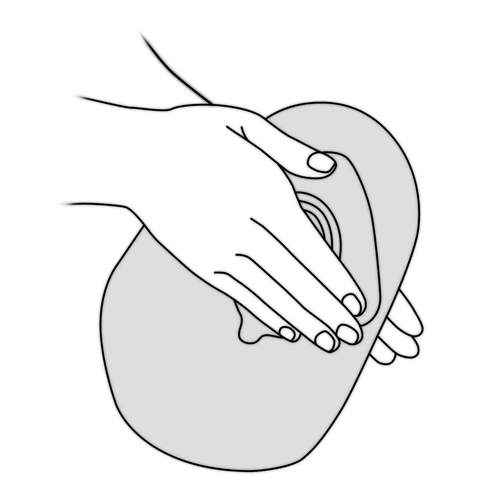
- Using your finger and your hand, make circles around on the protective barrier around the stoma to make it stick well to the skin.
- Gently press on the skin barrier for 1-2 minutes until the barrier sticks completely.
Why ? This step helps prevent folds in the skin around the stoma and ensures the barrier will stick well. The bag is positioned for comfort and to reduce the risk that the device will detach and leak the contents of the bag.
|
|
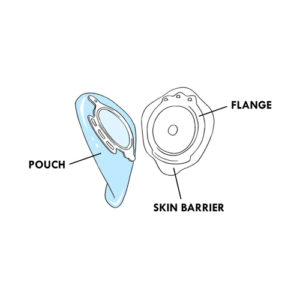
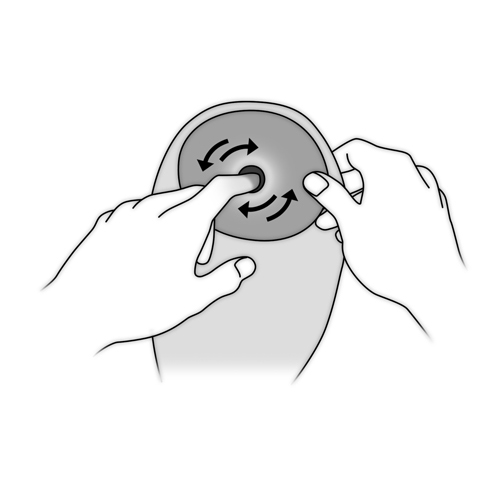
Step 17: Secure the bag (2 pieces device)
|
If your child uses a one piece device, go to the next step.
- Attach the collection bag to the skin barrier by fitting the bag around the flange of the skin barrier.
- Gently squeeze the bag to the flange, by pressing the two layers together with your fingers, starting at one point and moving in a circular motion to secure the seal all around the stoma opening.
Why ? This step is important to prevent leakage from the device.
|
|
Step 18: Empty air out of the bag
|
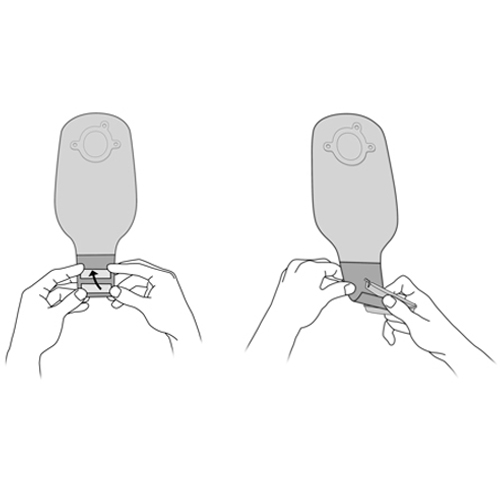
Step 19: Close the bag
|
Bag with an integrated closure:
- Roll or fold the end of the bag according to the manufacturer’s instructions.
- Press firmly on the closure so that there is a good seal to avoid leakage.
Bag with clasp:
- Put the clasp about 3 cm from the open end of the bag.
- Fold the bag once.
- Pull gently on the bottom of the bag to make sure that it is securely attached.
Why ? This step prevents leakage of stool.
|
|
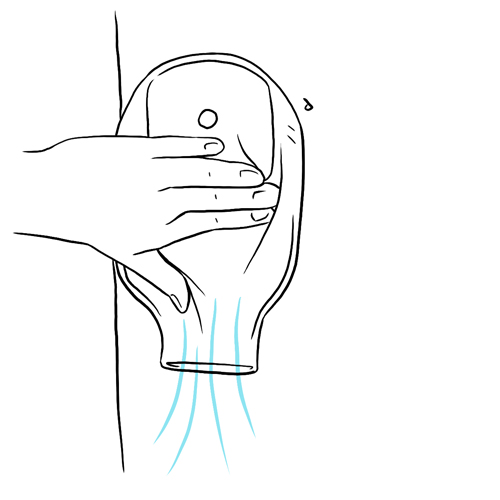
Step 20: Check that the skin barrier is completely sealed to the skin
|
Why ? This step allows you to identify quickly if there is any leakage and thus to avoid any irritation of the skin.
|
|
Step 21: Recovery

|
See the full description here
Summary:
The treatment is finished. Wash your hands again.
Be prepared to recognize the challenges faced and to provide positive feedback. Help your child recognize his/her strengths. Acknowledge the collaborative teamwork.
- Listen to what your child says about the parts of the procedure that were difficult or painful.
- Comfort your child and recognize your child’s collaboration with positive feedback.
- Highlight your child’s specific strengths that helped make the procedure positive.
- Discuss with your child what might be done the same or differently the next time the care is needed.
- Keep your promises if you have promised a reward, follow through.
- Reward yourself too.
|
|