Soins complexes à domicile pour enfants
https://complexcareathomeforchildren.com

Parenteral nutrition

What is it? How does it work?

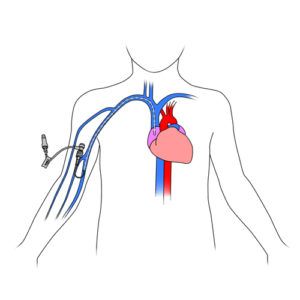
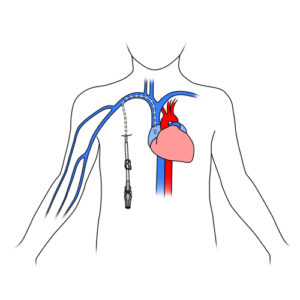
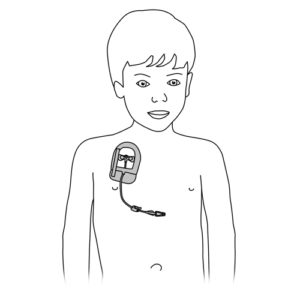
309e.Venous access device     309.1eSeparate parts of the venous access device

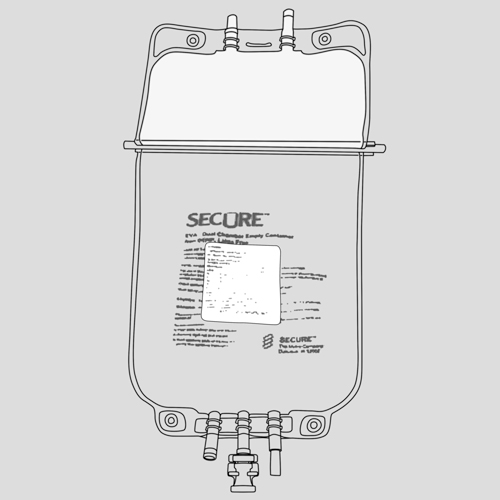
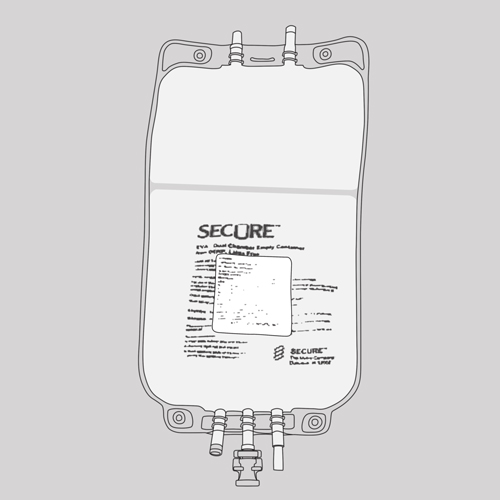
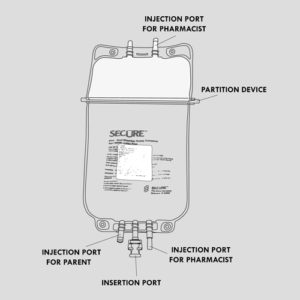
488e.Bag of nutrient solution with label before preparation with identified elements.FINAL

304.Central catheter with peripheral access on child.FINAL

305. Central catheter inserted in child.FINAL

307.Catheter central implantable chamber on child.FINAL

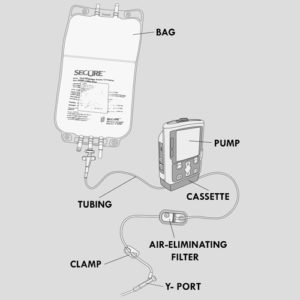
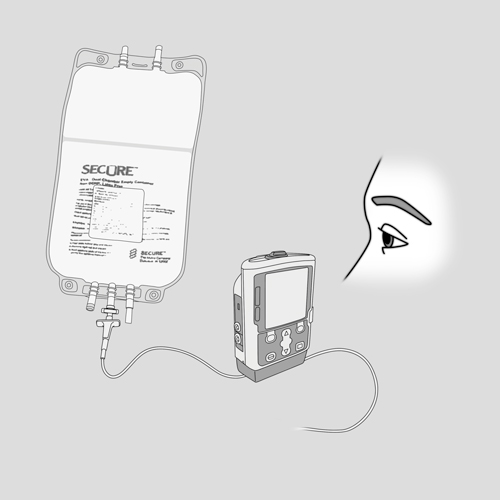
460e.VIP CADD Solis pump bag and tubing

The pump works with non-rechargeable batteries or a rechargeable battery.
It is programmed to automatically deliver the nutrition solution into your child’s catheter at the rate (speed) prescribed by the doctor.
The pump CADD®- Solis VIP was chosen to illustrate and detail the steps of the care methods concerned, as it is the model of pump frequently used for children.

Your child’s healthcare team will supervise the parenteral nutrition treatment and ensure that the equipment is functioning properly. Ask your healthcare team about specific recommendations for your child, including the procedure for changing the protective dressing which protects the insertion site of the catheter.

Refer to your healthcare team if the equipment used for your child is different from what is described in the care methods.


FAQ – Parenteral nutrition

When to consult your healthcare team

Intravenous catheter

Equipment for administering the nutrient solution

Dressing

Health

Your child:

Your child’s healthcare team will use your child’s regular appointments to verify the proper functioning of the catheter and parenteral nutrition equipment and will make adjustments to the care as required.

Do not hesitate to contact your healthcare team with any specific questions concerning your child.

WARNING: The information in this section is meant as a general guide to help parents and caregivers with common issues and is not intended to replace the care provided by your child’s healthcare team. 

Discuss your child’s unique needs with the healthcare team, including WHO and WHEN to contact when problems arise.


Redness, heat, swelling or tenderness or pain at the catheter entry site
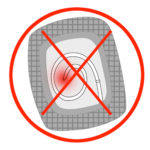
345.Insertion site red and swollen

Possible cause(s)

  • Infection or inflammation at the catheter entry site
  • Phlebitis (irritated vein)

What to do?

  • If the pump is running:
    • press the “STOP / START” button on the pump in order to stop the infusion,
    • close the clamp of the catheter tubing and the tubing of the pump.
  • Contact your healthcare team quickly.

Extended redness or itching of the skin under dressing

Possible cause(s)

  • Contact dermatitis (ie, irritation of the dressing on the skin)
  • Allergy to the adhesive of the dressing
  • Allergy to disinfectant solution
  • Reaction of the skin to the disinfection technique

What to do?

  • Contact your healthcare team who may suggest:
    • a change in dressing materials,
    • use of a topical corticosteroid,
    • a change in disinfection technique.

Cord-like sensation of the vein where the catheter is inserted (may be hard, red or tender to touch)

Possible cause(s)

Phlebitis (irritated vein)

What to do?

  • If the pump is running:
    • press the “STOP/START” button on the pump in order to stop the infusion,
    • close the clamp of the catheter tubing and of the tubing of the pump.
  • Contact your healthcare team quickly.

One or more of these symptoms: burning or pain at the entrance site of the catheter, cold skin around the entrance site of the catheter, swelling of the arm (PICC line), swelling around the catheter site, leakage at catheter entry site, change in skin color (whiteness or redness) around the catheter entry site

Possible cause(s)

  • Infiltration (the nutrition solution is leaking out of the vein and into the skin)
  • Phlebitis of the vein (irritated vein)

What to do?

  • If the pump is running:
    • press the “STOP/START” button on the pump in order to stop the infusion,
    • close the clamp of the catheter tubing and the tubing of the pump.
  • Immediately contact your healthcare team.
  • If your child’s arm with the catheter is swollen, lift it as much as possible.

For those with an implantable chamber catheter (eg, Port-a-Cath®): pain or swelling at the site of insertion of the reservoir during the administration of the solution or irrigation

Possible cause(s)

  • Disconnection from the implantable chamber of the catheter
  • Displacement of the catheter
  • Displacement of the noncoring needle

What to do?

  • If the pump is running:
    • press the “STOP/START” button on the pump in order to stop the infusion,
    • close the clamp of the catheter tubing and the tubing of the pump.
  • If during irrigation:
    • close the clamp of the catheter tubing,
    • stop attempting to flush the line.
  • Immediately contact your healthcare team.

Blood leaking at catheter insertion site

Possible cause(s)

  • Breakage or disconnection of the catheter or tubing
  • Recent catheter insertion
  • Child’s underlying health condition

What to do?

  • If there is continuous bleeding, put a compress over the dressing and apply firm pressure.
  • If the pump is running:
    • press the “STOP/START” button on the pump in order to stop the infusion,
    • close the clamp of the catheter tubing and the tubing of the pump.
  • Immediately contact your healthcare team.

Protective dressing is wet or damp due to leakage of blood, pus or other discharge

Possible cause(s)

  • Breakage or disconnection of the catheter or tubing
  • Blockage of the catheter
  • Displacement of the catheter
  • Displacement of the needle if the child has an implantable chamber device
  • Infection
  • Contact dermatitis
  • Child’s underlying health condition

What to do?

  • If the pump is running:
    • press the “STOP/START” button on the pump in order to stop the infusion,
    • close the clamp of the catheter tubing and the tubing of the pump.
  • Immediately contact your healthcare team.
  • If the dressing is falling off, put another dressing over it while waiting for the advice of your care team.
  • If the dressing is partially detached, do not remove it as you might remove the catheter by mistake.

Dressing is falling off, loose, punctured or torn

Possible cause(s)

Various causes

What to do?

  • If the dressing is falling off, tape the sides down.
  • If it is punctured or torn, install another clear adhesive dressing over the old one.
  • If the dressing is partially detached, do not remove it as you can remove the catheter by mistake.
  • Immediately contact your healthcare team.

Presence of blood in catheter tubing

Possible cause(s)

Return of blood (reflux)

What to do?

More residual solution than usual in the bag at the end of administration

Possible cause(s)

Pump malfunction

What to do?

Contact your pharmacy or healthcare team quickly.

More air bubbles than usual or presence of particles in the bag, whether the additives have already been added or not

Possible cause(s)

  • Contamination of the solution
  • Problems in preparing the solution
  • Heat-exposed bag

What to do?

  • Do not administer the medication.
  • Contact your pharmacy or healthcare team quickly.

Re-separation of the solution (before or during administration) after mixing the contents of the two chambers

Possible cause(s)

  • Contamination of the solution
  • Problems in preparing the solution

What to do?

  • Do not administer the solution.
  • If during the administration: press the “STOP/START” button on the pump and close the catheter tubing clamp and the pump tubing clamp.
  • Contact your pharmacy or healthcare team quickly.

Ambulatory infusion pump alarms

Possible cause(s)

Various

What to do?

  • Close the clamp of the catheter tubing and the tubing of the pump.
  • Press the “SILENCE” button to stop the alarm tone.
  • Look at the message on the screen.
  • Follow the instructions accordingly.
  • If a help screen is available for the alarm, follow the instructions provided.
  • If necessary, consult the pump instructions that you have been given.
  • If you still can not resolve the problem, contact your healthcare team.

Resistance or inability to irrigate (flush) the catheter

Possible cause(s)

  • Blockage or displacement of the catheter
  • Blockage of the tubing
  • Clamps are closed
  • Displacement of the needle in children with an implantable chamber device (PORT)

What to do?

  • Do not push the plunger of the syringe with saline solution or locking solution forcefully.
  • Make sure tubing clamps are fully open.
  • Check that the tubing is not pinched or bent.
  • Ask your child to:
    • move the arm on the side of the catheter,
    • turn on each side,
    • cough,
    • turn the head towards the opposite side of the catheter or to bear down (as if they were going to have a bowel movement).
  • If your child has an implantable chamber catheter (eg, Port-a-Cath®): check if the needle has moved out of the correct position.
  • If the problem persists:
    • close the clamp of the catheter tubing,
    • stop attempting to flush the line,
    • contact your healthcare team immediately.

Inadvertent disconnection of connector without needle or pump tubing

Possible cause(s)

  • Accident
  • Mishandling

What to do?

  • If the pump is running:
    • press the “STOP/START” button on the pump in order to stop the infusion,
    • close the clamp of the catheter tubing and the tubing of the pump.
  • Immediately contact your healthcare team.

Broken (leaking) catheter or malfunctioning equipment

Possible cause(s)

  • Mishandling
  • Catheter or other defective equipment
  • Blocked catheter

What to do?

  • You may notice a flow of blood or fluid at the point where the catheter or other piece of equipment is broken.
  • If the pump is running:
    • press the “STOP/START” button on the pump in order to stop the infusion,
    • close the clamp of the catheter tubing and the tubing of the pump.
  • If you can see where the equipment is broken or where the leakage is coming from:
    • close the clamp between the catheter and the point of leakage.
    • if there is no clamp, use the hemostat clamp, as your healthcare team has taught you, or bend the catheter in half and keep it folded in place with tape.
  • If you do not see where the leakage is coming from or where the equipment is broken: put a gauze compress on the dressing to absorb the leakage.
  • Immediately contact your care team.

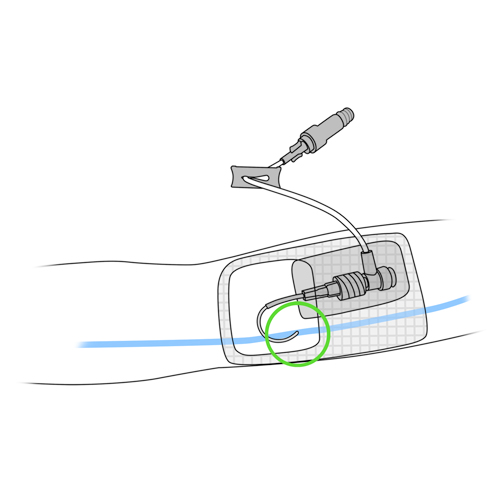
External displacement of the catheter (part of the catheter outside the vein shorter or longer than usual or catheter completely removed from the vein) with or without: pain in the ear, neck or shoulder on the side of the catheter, swelling in the neck, unusual sound heard by your child on the catheter side during flushing of the catheter or administration of the medication

Possible cause(s)

  • Accidental displacement of the catheter
  • Mishandling of the catheter
  • Improperly adjusted dressing
  • Child has moved excessively and displaced the catheter

What to do?

  • Never push the catheter back into the vein.
  • If the pump is running:
    • press the “STOP/START” button on the pump in order to stop the infusion,
    • close the clamp of the catheter tubing and the tubing of the pump.
  • If the catheter has been completely pulled out, put a clear dressing over the previous entrance site.
  • Immediately contact your healthcare team.

Unusual sound heard by your child on the catheter side during irrigation with or without: pain in the ear, throat pain

Possible cause(s)

Displacement of the internal (inside the body) portion of the catheter

What to do?

  • Close the clamp of the catheter tubing.
  • Stop attempting to flush the line.
  • Immediately contact your healthcare team.

Particular odor or a strange taste reported by your child during catheter irrigation

Possible cause(s)

Contact between the saline solution and the plastic of the syringe may activate your child’s sense of taste and smell

What to do?

  • This is commonly reported. There is no danger to your child’s health.
  • If the taste is very intense, contact your healthcare team.

One or more of these symptoms: nausea, vomiting, headache, blurred vision, cold sweats, pallor, tiredness or irritability, seizures

Possible cause(s)

  • Signs of hypoglycemia (low blood sugar)
  • Rapid termination of solution administration
  • Infection

What to do?

  • Take your child’s blood glucose, if possible.
  • Quickly give your child extra glucose (ask your child’s healthcare team for specific guidelines).
  • Immediately contact your healthcare team.

Most hypoglycemia can be avoided by gradually decreasing the rate of the infusion in the last hour of delivery. Ask your child’s healthcare team for more specific instructions.

One or more of these symptoms: headache, nausea, increased thirst, weakness, agitation, irritability, increased urination

Possible cause(s)

  • Signs of hyperglycaemia (high blood sugar)
  • Infection

What to do?

  • Take your child’s blood glucose, if possible.
  • Immediately contact your healthcare team.

One or both of these symptoms: dry skin, dry mouth, significant thirst, weakness, dizziness, decreased urination

Possible cause(s)

Dehydration

What to do?

  • Contact your healthcare team quickly.
  • Give oral rehydration solutions to your child (eg, Pedialyte™, Gastrolyte™), if recommended by your healthcare team.

One or more of these symptoms: faster breathing, difficulty breathing, swelling especially in the legs/feet or around the eyes, decreased urination, unexpected rapid weight gain

Possible cause(s)

  • Fluid overload in the body
  • Lack of protein in the blood
  • Infection

What to do?

  • Immediately contact your healthcare team.

Fever with or without general malaise: ≥ 38⁰C rectal or ≥ 37.5⁰C buccal or ≥ 37.5⁰C armpit

Possible cause(s)

  • Infection at the catheter entry site
  • Blood infection
  • Other infection

What to do?

  • Note the other discomforts of your child (eg, pain, chills, difficulty breathing, blood in the stool, vomiting with blood, drowsiness, etc).
  • Contact your healthcare team quickly.

One or more of these symptoms: swelling of the arm or side where the catheter is located, underarm pain in the arm where the catheter is located, swelling of the neck and face

Possible cause(s)

  • Phlebitis of the vein (irritated vein)
  • Blood clot in the vein with the catheter

What to do?

Immediately contact your healthcare team.


For specific advice on your child or any other questions, do not hesitate to contact your child’s healthcare team.
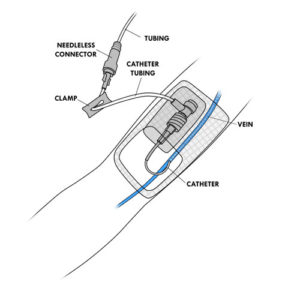
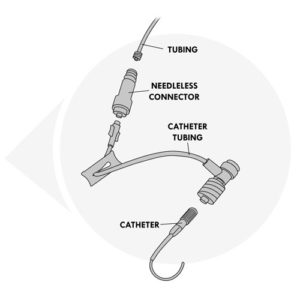
Everyday tips

Clothing

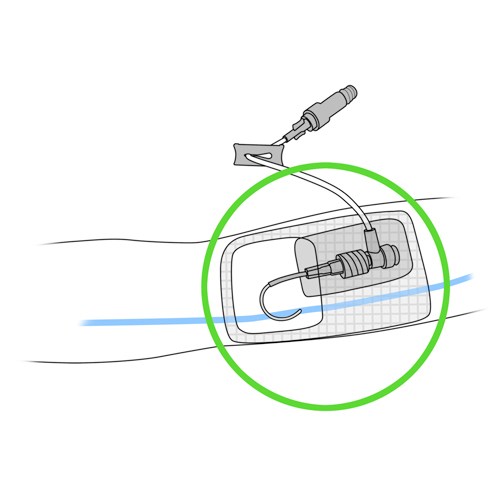
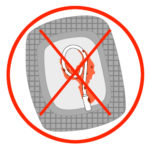
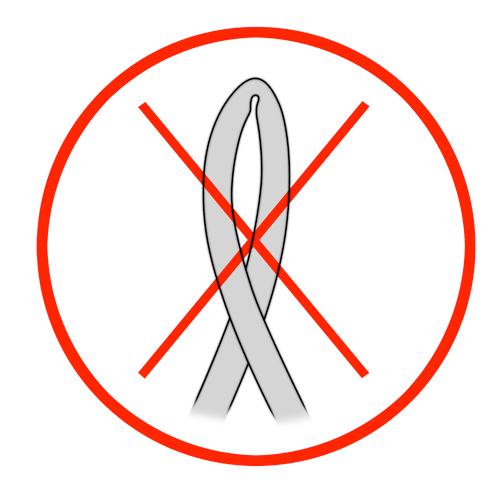
  • As the tubing can easily wrap around your child’s neck or arm, keep the tubing underneath the child’s clothing.
  • If your child is wearing one-piece pajamas or a “onesie”, place the tubing inside the garment and pull it out through the bottom or the opening at the feet; this will prevent the tubing from wrapping around your baby’s neck.
  • If your child is older, keep the tubing underneath clothing; in young children, run the tubing underneath a snug-fitting undershirt so that the child is less likely to touch the tubing.

Bathing and swimming

  • Avoid getting the dressing wet because it may fall off. Bathing in shallow water is preferable to a shower.
  • To protect the dressing from splashing, cover it with waterproof plastic wrap (eg, saran-wrap™) attached with tape so that the dressing stays dry.
  • Never put the catheter or dressing in the bath water, even if it has been covered in plastic.
  • Swimming is not permitted if your child has a peripherally inserted central catheter (“PICC line”), a central tunnel catheter (eg, Broviac®) or an implantable chamber catheter with the needle in place; otherwise, the dressing may become wet and peel off. If the catheter is not protected, it may come out or become infected.
  • Your child can bathe and swim if he / she has an implantable chamber catheter (Port-a-Cath®) and the needle is not in place.

Sleeping

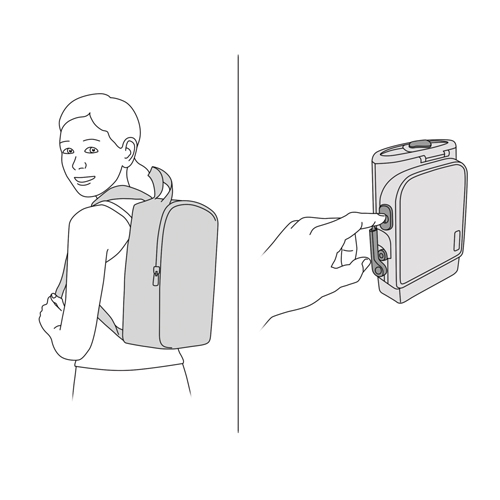
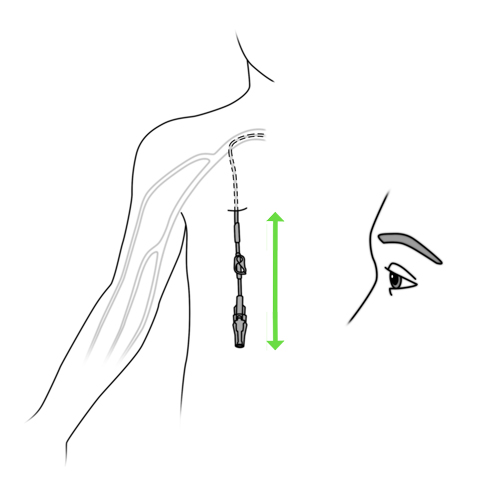
  • It is recommended to leave parenteral nutrition bag with the pump in an opaque storage bag or backpack to protect it from light. The parenteral nutrition bag must never be more than 30 cm above or below the level of the pump.
  • The storage bag or backpack may be placed upright in the corner of the bed; check with your child’s healthcare team to find the best location.
  • If available, a hospital style intravenous pole can be used to hang the parenteral nutrition bag overnight. Ask your child’s healthcare team how you can obtain this type of pole.

Nutrition and hydration

Talk to your healthcare team about your child’s diet and hydration recommendations, based on their health status. Some children, especially those with shortened gut, may require extra hydration with intravenous fluids.

Activities

  • Your child can continue his regular daily activities (eg, writing, brushing teeth, etc) but must avoid:
    • activities causing significant sweating; the dressing could fall off,
    • activities which may cause accidental displacement of the tubing and the catheter (eg, gymnastics, contact/competition sports),
    • the use of scissors near the catheter and tubing,
    • close contact with pets who may chew the tubing or the infusion pump,
    • lifting heavy objects with the arm where catheter is placed,
    • bathing/swimming (unless your child  has an implantable chamber catheter (eg, Port-a-Cath®) and the noncoring needle is not in place).
  • If your child’s healthcare team agrees, your child can return to school. Notify your school’s staff of your child’s treatment and care as needed.

Travel and transportation

  • Avoid exposing the pump and tubing to hot or cold temperatures. In cold weather, keep the pump and tubing under clothing and have your child wear a warm coat.
  • Use a cooler to store the nutrition solution bag and a bag to store equipment, including the “troubleshooting kit” described below.
  • When traveling by plane, keep the nutrition solution bag and equipment with you in the cabin. Request a letter from your child’s healthcare team which explains your child’s healthcare condition and need for parenteral nutrition.
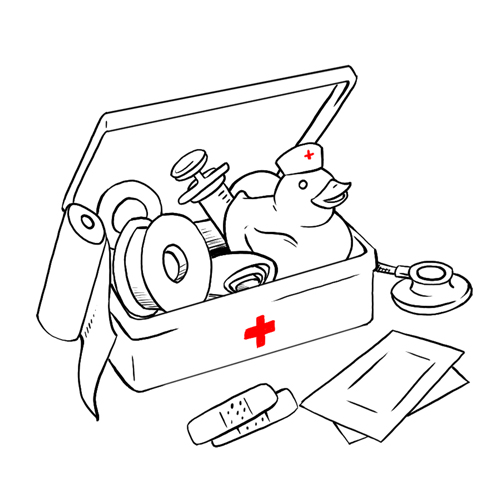
  • Healthcare travel insurance is recommended; check your existing policies or purchase insurance so your child is covered in the case that a medical issue comes up while traveling. Always have a “troubleshooting kit” on hand while your child is on IV treatment; take this on any trips away from home. The kit should contain the following items:
    • needleless connector,
    • extension tubing,
    • syringe pre-filled with saline solution and locking solution,
    • disinfecting pads,
    • transparent adhesive dressings,
    • clean gauze compresses,
    • adhesive tape to secure the dressing,
    • hemostatic clamp.

Others

If your child has a peripherally inserted central catheter (PICC line), the blood pressure should be not be measured in the arm with the catheter; this might damage the catheter or the vein.


Methods of care

Methods of care : Preparation of the parenteral nutrition solution and addition of additives

Indications

Considerations:

Frequency

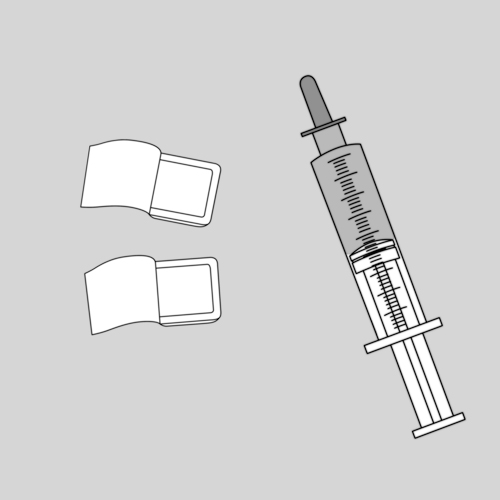
Required materials

Refer to your healthcare team if the material used or the sequence of steps taught is different from what is described in the care method.


Step 1: Prepare the material

  • Select and clean a workspace surface (eg, tabletop).
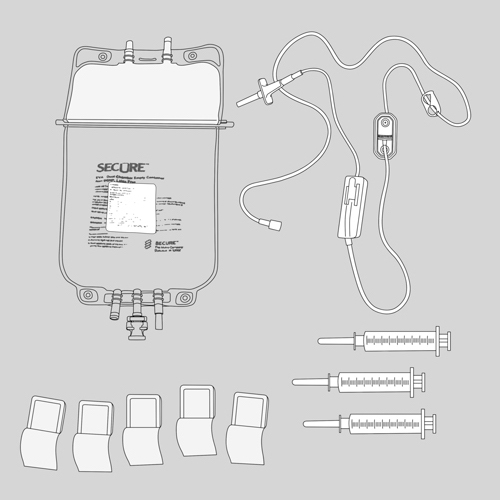
  • Gather the necessary equipment.
  • Open the packages (swabs, syringes, needles, filter needles, tubing) without touching the inner contents so that they remain clean.
  • Check that the new tubing is not damaged.
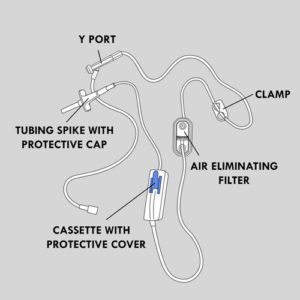
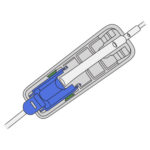
  • Check that the protective cover (often blue) is present over the cassette.

491.Attache bleue de la cassette de la tubulure

Why ?

This step ensures safety and allows the subsequent procedure.

Step 2: Check the parenteral nutrition bag

  • Remove the bag from its black envelope.
  • Check on the label that:
    • your child’s name appears,
    • the date of the solution has not expired,
    • the composition of the solution, the amount and duration of administration are the same as those prescribed for your child.
  • Inspect the bag thoroughly. It should not leak. If particles are visible in the bag or there are more air bubbles than usual, put the bag aside and contact your pharmacy or healthcare team; repeat the check with a new bag.
  • Check if the solution in the upper chamber of the bag (fat) is milky white and well blended. There should be no trace of fat droplets.
  • Check if the solution in the lower chamber of the bag (amino acids) is transparent. It generally has a consistency of egg white but it can vary according to the different additions made by the pharmacist.
  • Check that there are no small particles (precipitates or crystals) in the two chambers of the bag; a few bubbles may be apparent.
  • From one bag to another, the solution should always have the same color and consistency (unless the prescription has been changed). Notify your pharmacy or healthcare team if this is not the case.
  • Do not give solution if bag has been frozen.
Why ?

This step ensures the safety of the procedure.

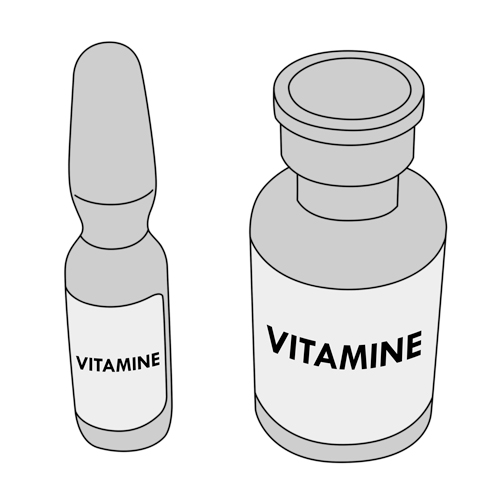
Step 3: Check the additive vials and the ampoules

Check on the labels on the box or the bag to verify that:

  • your child’s name appears,
  • the date of the solution has not expired (this information is also written on each vial and on each ampoule),
  • the name of each additive and the dose are the same as those prescribed for your child.
Why ?

This step ensures the safety of the procedure.

Step 4: Prepare the syringes

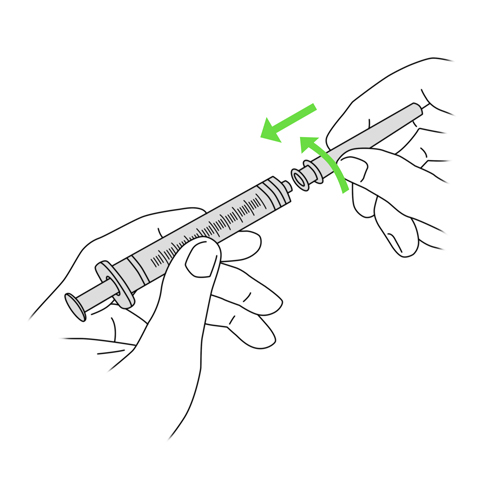
  • If syringes and needles are separated: without touching the syringe tip, screw the needle (with the protective cap still on) into it by turning clockwise about ¼ turn.
  • If you need to remove an additive from an ampoule, use the same procedure but with a filter needle.
  • Prepare the required number of syringes, one per each additive.
  • Keep the protective caps on the needles.
Why ?

This step allows the rest of the procedure.

Step 5: Disinfect the rubber septum of the vial

If you do not have an additive to add from a vial, go to step 8.

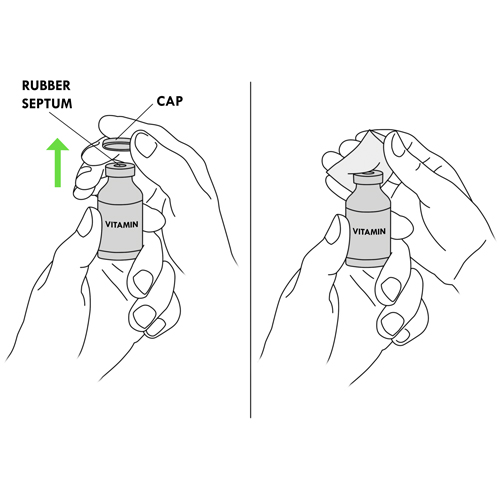
  • Remove the protective cap from each additive vial.
  • Use a disinfectant swab to vigorously scrub the septum (rubber cap) of each vial. Use a new swab for each vial.
  • Let the rubber cap dry completely.
  • Do not blow on the cleaned cap of the vials.
  • Make sure that nothing touches the cap in order to avoid contamination.
Why ?

The rubber cap of the vial is not sterile. Disinfection is necessary to prevent bacteria or particles from entering the additive.

Step 6: Remove the additive from the vial

  • Place the vial on the table.
  • Remove the protective cap from the needle of a syringe.
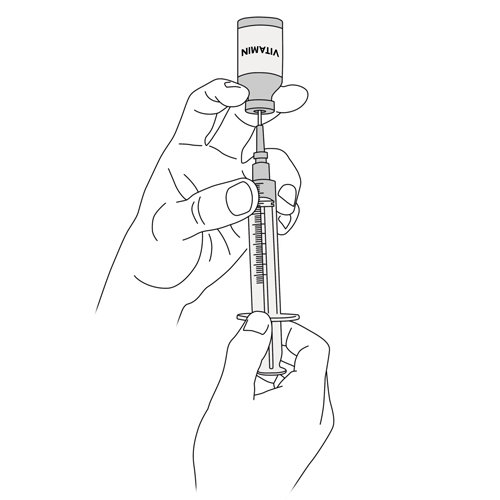
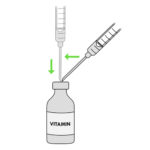
  • Pull the plunger of the syringe back to aspirate an amount of air equal to the amount of liquid to be drawn out of the vial.
  • Hold the syringe like a pencil with one hand and hold the vial on the table with your other hand.
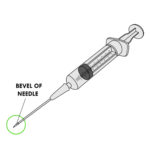
  • Push the needle through the center of the rubber cap of the vial with the needle of the syringe held at a 45⁰ angle and with the bevel of the needle (open part of the needle at the tip) pointing upwards.

485e.Tip of needle

  • Straighten the needle quickly to a 90⁰angle.

469e.Perforation of the rubber tip of a vial.FINAL

  • Push the air contained in the syringe into the vial by pushing on the plunger of the syringe.
  • Holding the tip of the needle in the solution, turn the vial upside down and upright. Make sure the tip of the needle remains in the solution.
  • Withdraw the amount of additive required.
  • Remove the needle from the vial.
Why ?

This way of piercing the vial reduces the possibility that small pieces of rubber will fall into the solution in the vial.

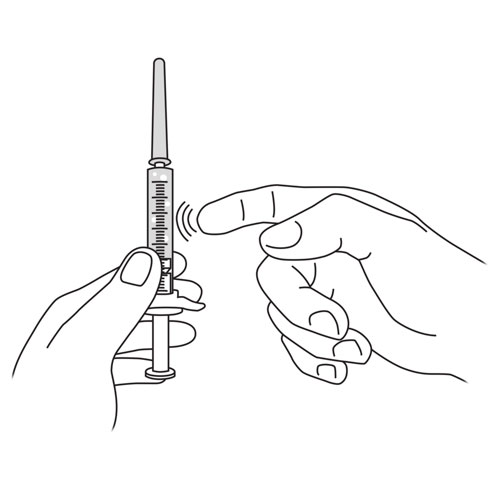
Step 7: Remove the air bubbles from the syringe

  • Hold the syringe vertically with the needle up.
  • Pull the plunger of the syringe down slightly so that all of the liquid in the needle collects in the syringe.
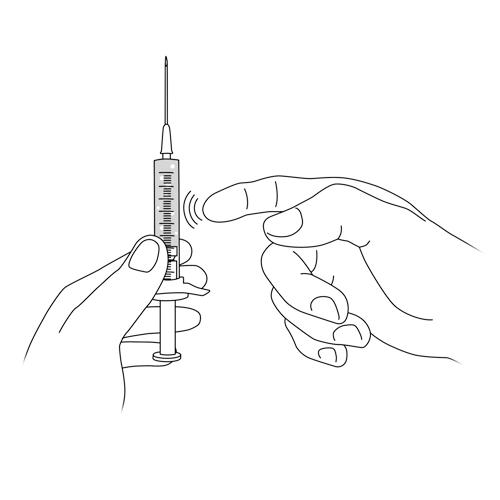
  • Tap the side of the syringe vigorously with your thumb and forefinger so that the air bubbles rise to the top.
  • Gently press the plunger of the syringe to release the bubbles.
  • Push gently on the plunger of they syringe until there is no air in the syringe and a drop of liquid appears on the tip of the needle.
  • Withdraw solution again from the vial if necessary until the quantity in the syringe is correct.
  • Replace the protective cap securely on the needle of the syringe.
  • Place the prepared syringe in front of the vial.

Additive to be taken from another vial: repeat steps 6 and 7 with a new syringe and a new needle.

Additive to be taken from an ampoule: go to the next step.

No other additives needed: go to step 13.

Why ?

This step is necessary to remove excess air from the syringe.

Placing the prepared syringe in front of the vial makes it possible to keep track of each syringe and know which additive is in each one.

Step 8: Disinfect the ampoule neck

If you do not have an additive to add from a ampoule, go to step 13.

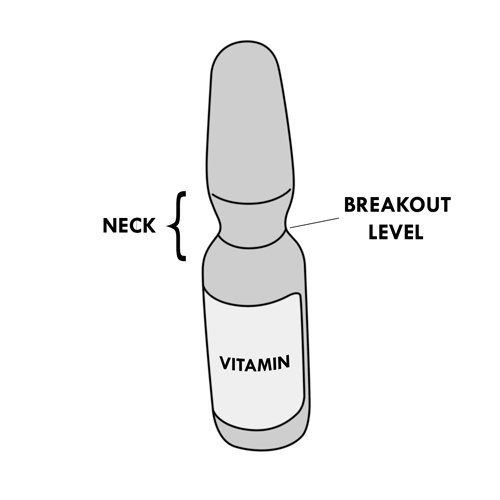
  • Holding the ampoule upright, gently move it in a circular motion on the table top surface so that any liquid in the top of the ampoule collects in the lower portion.
  • Using a disinfectant swab, thoroughly clean the narrow portion of the ampoule (neck) including the breakout level which is where the ampoule is designed to break open. Keep the empty envelope of the disinfectant swab for the next step. Let the ampoule dry completely.
Why ?

Disinfection is necessary to prevent bacteria or particles on the ampoule neck from entering the additive solution.

Step 9: Break the neck of the ampoule

  • Using the inside of the empty envelope which previously contained the disinfectant swab, hold the top of the ampoule and break the neck of the ampoule at the breakout level by pointing it away from you.
  • Throw the top of the ampoule into the sharps container.
Why ?

This prevents you from cutting yourself accidentally and prevents small pieces of glass from injuring your eyes.

Step 10: Remove the additive from the ampoule

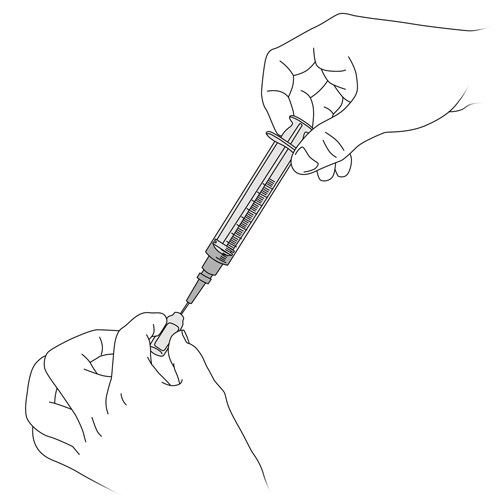
  • Remove the protective cap from the filter needle of a syringe, taking care not to touch the needle tip.
  • Hold the ampoule with one hand flat on the table.
  • Insert the tip of the filter needle into the ampoule
  • Keeping the bevel (open portion of the needle tip) inside the centre of the ampoule, pull back on the plunger of the syringe to withdraw the additive into the syringe. Make sure that you have withdrawn all of the contents of the ampoule.
  • Once all of the additive has been withdrawn from the ampoule, remove the needle from the ampoule.
  • Replace the protective cap securely on the filter needle of the syringe.
Why ?

When the ampoule is broken open, small particles of glass may fall into the additive solution. The use of the special filter needle ensures that no glass particles enter the syringe.


Step 11: Change the needle of the syringe

  • Pull the plunger of the syringe down slightly so that all of the liquid in the filter needle collects in the syringe.
  • Unscrew the needle from the syringe by turning it counterclockwise.
  • Dispose of it in the sharps container.
  • Without touching the tip, screw a new needle onto the syringe by turning clockwise about ¼ turn.
Why ?

The filter needle may contain glass particles so must be discarded and exchanged for a clean regular needle in preparation for injection of the additive to the parenteral nutrition bag.

Step 12: Remove the air bubbles and the excess volume of the additive from the syringe, if any

  • Hold the syringe vertically with the needle up.
  • Tap the side of the syringe vigorously with your thumb and forefinger so that the air bubbles rise to the top.
  • Gently press the plunger of the syringe to release the bubbles.
  • Push gently on the plunger of the syringe until there is no air in the syringe and a drop of liquid appears on the tip of the needle.
  • Continue to push gently on the plunger of the syringe until the correct amount of the additive remains in the syringe.
  • Place the prepared syringe in front of the ampoule.

Additive to be taken from another ampoule: repeat steps 9 to 12 with a new syringe and a new filter needle.

Why ?

This step is necessary for the to avoid the injection of air and to prepare the correct amount of additive safely.

By keeping the prepared syringe in front of the ampoule in question, you can keep track of which additive is in each syringe.

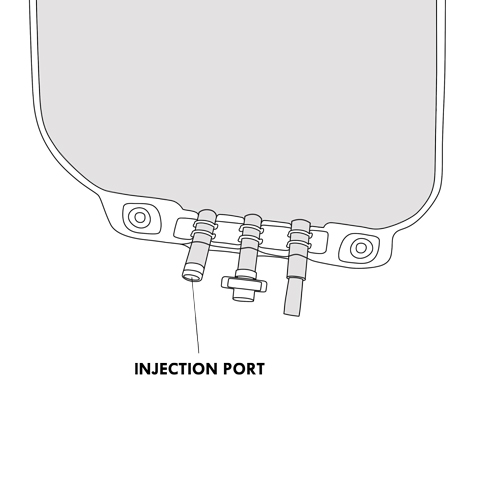
Step 13: Disinfect the injection port of the bag

  • Use a disinfectant swab to vigorously scrub the injection port of the lower chamber of the parenteral nutrition bag.
  • Let it dry completely.
  • Make sure that nothing touches the injection port to avoid contamination.
Why ?

Disinfection is necessary to prevent bacteria or particles present on the injection site of the bag from entering the bag during injection of the additives.

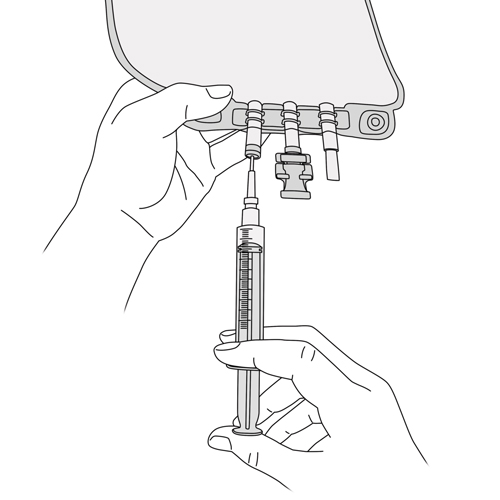
Step 14: Inject the additives into the bag

  • Place the bag flat on the table.
  • Remove the protective cap from the needle of the syringe.
  • Insert the entire needle into the centre of the bag injection port carefully.
  • Inject the additive by pushing on the plunger of the syringe.
  • Remove the needle from the injection port.
  • Replace the protective cap securely on the needle of the syringe.
  • Unscrew the needle from the syringe by turning it counterclockwise and place it in the sharps container.
  • Repeat steps 13 and 14 for each additive syringe to be injected into the bag.
  • Throw all used needles and ampoule bulbs into the sharps container.
  • Dispose of syringes and vials in the trash.
Why ?

This step allows you to add the elements necessary to complete the content of your child’s parenteral nutrient solution.

Step 15: Mix the bag solution

  • Mix the contents of the lower chamber of the bag by gently massaging it.
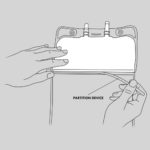
  • Remove the bar (partition device) between the upper and lower chambers of the bag.

  • Gently massage the entire bag.
  • Check the appearance and consistency of the solution; it should be homogeneous, milky and free of particles. It is yellowish in color if vitamins have been added.
  • If the solution does not have the usual color and appearance, do not administer it and contact your pharmacy or healthcare team.
Why ?

This stage finalizes the preparation of the solution and ensures the safety before its administration.

Step 16: Connect the tubing to the bag

  • Make sure the tubing clamp is securely closed.
  • Use a disinfectant swab to vigorously scrub the bag insertion port.
  • Let dry completely.
  • Open the insertion port by unscrewing the protective cap.
  • Remove the protective cap from the tubing spike with a rotating motion, as explained by your healthcare team.
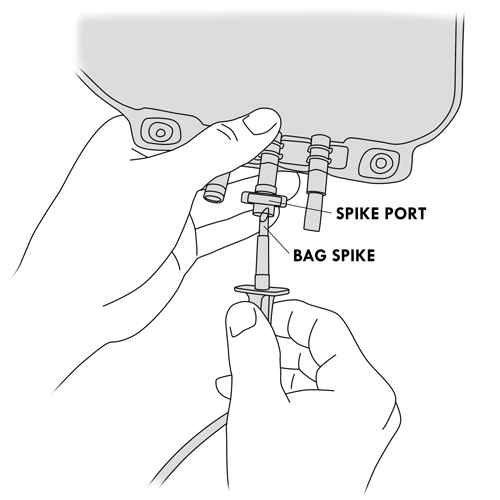
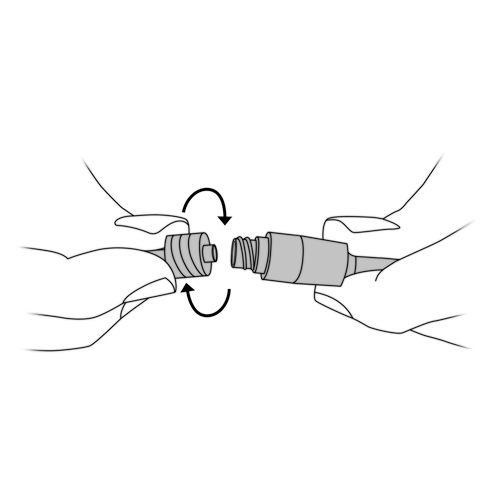
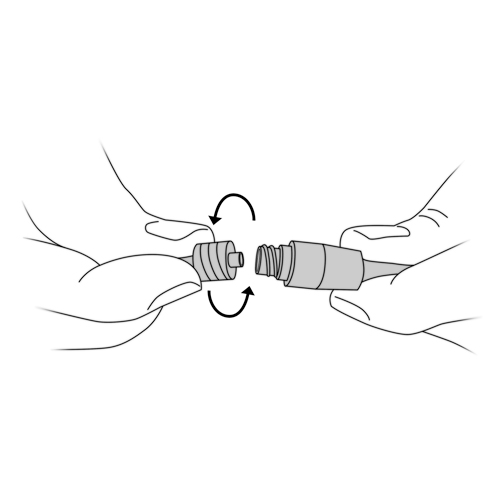
  • Holding the bag insertion port with one hand, insert the spike with the other hand by turning it about a quarter turn clockwise until the connection is tight.
Why ?

Once the bag is spiked, the tubing can be connected to the pump which will be connected to the catheter.


Step 17: Turn on the pump

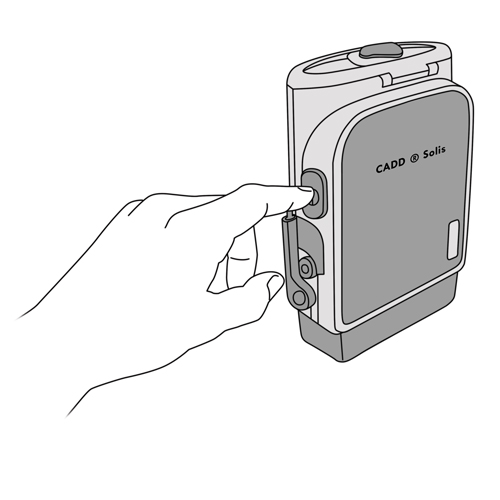
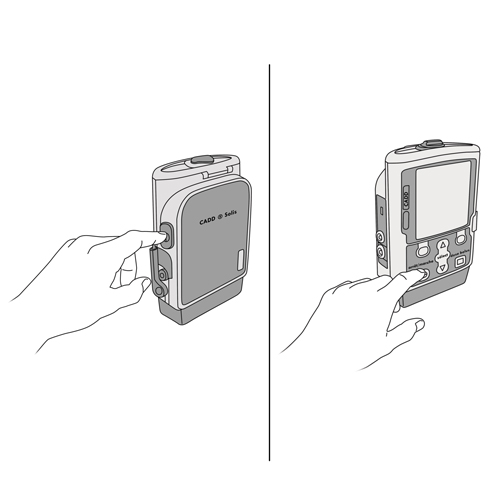
  • Press and hold the “Power switch” on the right side of the pump.
  • The pump does various self-tests and beeps six times after the tests are completed.
  • After the beeps, the home screen should appear.
Why ?

This step allows the rest of the procedure.

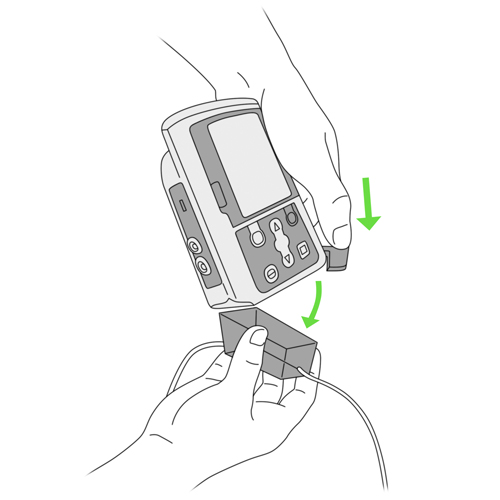
Step 18: Attach the cassette to the pump

  • Remove the small protective cover over the cassette (often blue in colour).
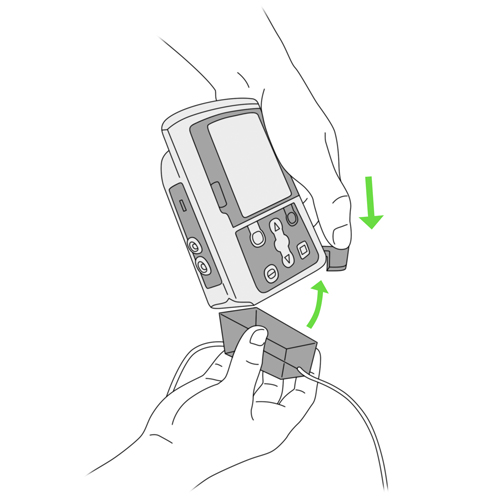
  • Attach the cassette to the bottom of the pump by first inserting the two hooks at one end of the cassette into the pump. This creates a lever.
  • Pull the entire cassette up towards the pump until it snaps into place.
Why ?

This step ensures the safe holding of the cassette at the pump and ensures the precision of the perfusion.

Step 19: Secure the cassette

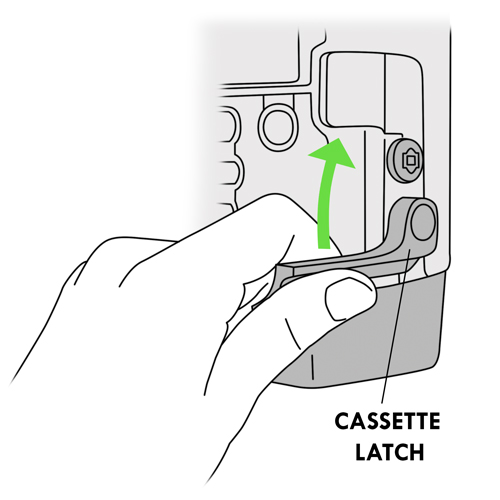
  • Lift the cassette latch lever in the closed position.
  • If you have strong resistance when fixing the cassette, it means that it is misplaced; try again.
Why ?

This step ensures that the cassette is securely attached to the pump.

Step 20: Reset the reservoir volume of the pump

  • The pump displays a question “Reset reservoir to XX ml?” (XX ml is the total volume of solution prescribed for your child and that must be received).
  • Select YES to reset the volume.
Why ?

This step allows the rest of the procedure.

Step 21: Empty the air from the tubing

  • Place the bag on the work table.
  • Raise the top of the bag about 30° or hang the bag.
  • Open the bag clamp.
  • Keep the protective cap on the end of the tubing to prevent contamination.
  • Let the tubing hang vertically with the filter perpendicular to the ground.

  • The pump display displays the message “Prime tubing?“.
  • Select Yes.
  • Select Prime.
  • Continue purging as required by selecting Yes or selecting No to complete the purge.
  • Ensure air bubbles are released from the filter by tilting or tapping it before continuing priming.
  • Do the same with the Y-port when the liquid is being returned to this level.

  • You must stop the priming after removing air from the tubing.
  • Check that a drop appears at the end of the tubing.
  • When the air is removed, close the tubing clamp.
Why ?

This step ensures the security of the administration of the solution.

The high position of the top of the bag allows the air bubbles present in the solution not to drop and to interfere with the proper functioning of the filter. It must first be moistened with the solution to do its job well (prevent air and particles from accessing your child’s catheter).

Step 22: Administer the nutrient solution

If you administer the solution immediately:

If you administer the solution later:

  • Press and hold the “Power switch” on the right side of the pump.
  • When the message “Power down?” appears on the display, select “Yes“. The pump will then go out.
  • Keep the bag away from bright light until it is used (eg, put it in its black envelope or in the backpack).
.Reviser : Ross .Version : 1.0

Methods of care : Monitoring of the catheter site

Indications

Considerations:

Frequency

Required materials

If needed:

Refer to your healthcare team if the material used or the sequence of steps taught is different from what is described in the care method.


Step 1: Anticipation

See the full description here

Summary:

Collaborate and form a team with your child. When you invest the time to form a strong team, children feel more comfortable and less anxious – this will help you complete the care with less stress – for you and your child.

Use these tips, from the start, to set the stage for a positive care procedure:

  • Create the right moment: integrate the care in a routine.
  • Alert your child to the needed care and communicate together.
  • Form a team with your child: Encourage autonomy by offering realistic choices such as the method of distraction. Stay tuned to your child. Manage pain and anxiety, using distraction and positioning for comfort.

Step 2: Preparation

See the full description here

Summary:

  • Prepare the environment: Identify a routine place for care. Close windows, doors and fans. Wash and dry the work surface and gather the needed materials for the care and to distract your child.
  • Prepare your child: Get help if needed. Position your child for comfort to receive the care and start to use the selected distraction method.
  • Prepare yourself: Find the right time when you are ready to provide the care safely. Review the list of care steps. Wash your hands.

Now that you are ready to start the care procedure, take the opportunity to encourage and praise your child.

Step 3: Procedure

See the full description here

Summary 3 key concepts:

  • Safety: Carefully follow the care practice steps as you have been taught.
  • Flexibility: Be ready to adjust according to your child’s reactions during the procedure. As needed, reposition or select an alternative distraction strategy. Follow your child’s pace and rhythm.
  • Collaboration: Reassure your child, verbally and non-verbally. Acknowledge your child’s emotions and reactions. Help your child differentiate between the different sensations during a procedure.

Step 4: Position your child

Position your child:

  • to easily reach the catheter entry site,
  • in one of the positions discussed with your healthcare team,
  • consider your child’s age and ability to collaborate.
Why ?

This step allows you to more easily view the catheter entry site and keeps your child comfortable.

Step 5: Check the catheter site

  • The catheter entry site should not change in appearance.
  • If the site has ANY of the following features:
    • red, hot, swollen or sensitive to touch,
      345.Insertion site red and swollen
    • redness, sensitivity under the dressing or a cord-like feeling along the length of the vein where the catheter is inserted,
    • the skin is cold around the catheter, the arm is swollen and your child reports burning or pain at the entrance site of the catheter THEN:
  • Don’t give the solution or press the “STOP / START” button on the pump in order to stop the infusion, if is running.
  • If your child is connected to the pump, then close the clamps of the catheter tubing and the tubing of the pump.
  • Contact your healthcare team quickly.
Why ?

This step allows you to quickly detect problems.

Step 6: Check the dressing

  • The dressing should be kept clean and dry at all times.
  • If the dressing is wet or blood stained, do not remove the old dressing. The catheter site should always be protected.
  • If the dressing is falling off, tape the sides down.
  • If the dressing is punctured or torn, install another clear adhesive dressing over the old one.
  • Immediately contact your care team.

Why ?

This step helps you quickly identify complications.

Step 7: Check all tubing

  • Tubing should not be pinched or bent.
  • Make sure the extension tubing is securely fastened. If necessary, use adhesive tape to keep the tubing in place.
Why ?

The placement of the tubing must allow good circulation of the medication without  obstruction.

Step 8: Check the outer length of the catheter, if applicable

  • The outer part of the catheter must remain the same length at all times; it should not move, neither inwards or outwards.
  • If you notice a change in length of the external portion of the catheter, DO NOT push the catheter back into the vein; contact your healthcare team immediately.
Why ?

This step will confirm the catheter has remained in the proper position. Allows quick action if the catheter has moved out of the proper position.

Step 9: Recovery

See the full description here

Summary:

The treatment is finished. Wash your hands again.

Be prepared to recognize the challenges faced and to provide positive feedback. Help your child recognize his/her strengths. Acknowledge the collaborative teamwork.

  • Listen to what your child says about the parts of the procedure that were difficult or painful.
  • Comfort your child and recognize your child’s collaboration with positive feedback.
  • Highlight your child’s  specific strengths that helped make the procedure positive.
  • Discuss with your child what might be done the same or differently the next time the care is needed.
  • Keep your promises if you have promised a reward, follow through.
  • Reward yourself too.
.Reviser : Ross .Version : 1.0

Methods of care : Catheter irrigation

Indications

Considerations:

Frequency

Required materials

Refer to your healthcare team if the material used or the sequence of steps taught is different from what is described in the care method.


Step 1: Anticipation

See the full description here

Summary:

Collaborate and form a team with your child. When you invest the time to form a strong team, children feel more comfortable and less anxious – this will help you complete the care with less stress – for you and your child.

Use these tips, from the start, to set the stage for a positive care procedure:

  • Create the right moment: integrate the care in a routine.
  • Alert your child to the needed care and communicate together.
  • Form a team with your child: Encourage autonomy by offering realistic choices such as the method of distraction. Stay tuned to your child. Manage pain and anxiety, using distraction and positioning for comfort.

Step 2: Preparation

See the full description here

Summary:

  • Prepare the environment: Identify a routine place for care. Close windows, doors and fans. Wash and dry the work surface and gather the needed materials for the care and to distract your child.
  • Prepare your child: Get help if needed. Position your child for comfort to receive the care and start to use the selected distraction method.
  • Prepare yourself: Find the right time when you are ready to provide the care safely. Review the list of care steps. Wash your hands.

Now that you are ready to start the care procedure, take the opportunity to encourage and praise your child.

Step 3: Procedure

See the full description here

Summary 3 key concepts:

  • Safety: Carefully follow the care practice steps as you have been taught.
  • Flexibility: Be ready to adjust according to your child’s reactions during the procedure. As needed, reposition or select an alternative distraction strategy. Follow your child’s pace and rhythm.
  • Collaboration: Reassure your child, verbally and non-verbally. Acknowledge your child’s emotions and reactions. Help your child differentiate between the different sensations during a procedure.

Step 4: Prepare the materials

  • Select and clean a workspace surface (eg, tabletop).
  • Gather the necessary equipment.
  • Check that the saline syringe is at room temperature.
Why ?

This step ensures safety and allows the rest of procedure.

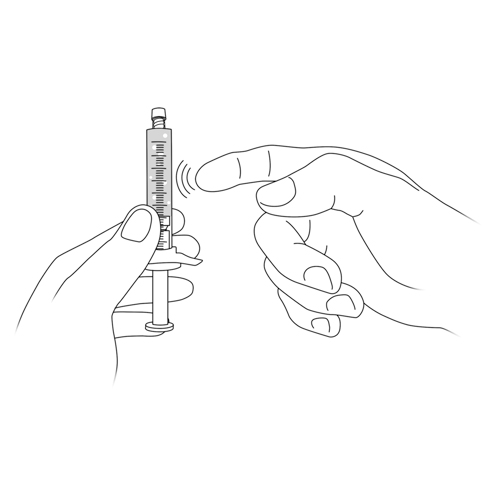
Step 5: Remove the air bubbles from the saline syringe

  • Hold the syringe vertically with the protective cap facing up.
  • Push the plunger of the syringe to release it.
  • Strike the syringe vigorously with your thumb and forefinger to raise the air bubbles.
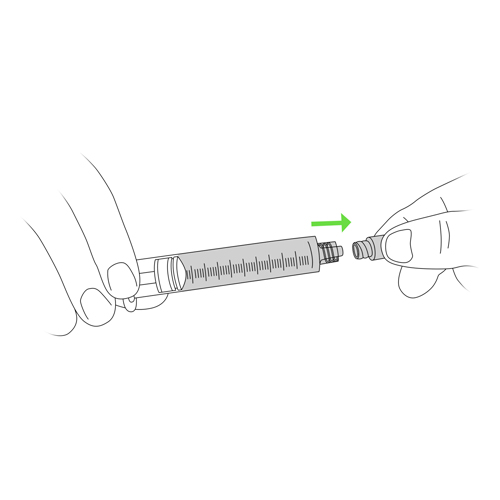
  • Partially unscrew the protective cap.
  • Gently push the plunger until there is no more air in the syringe and a drop of liquid appears at the junction of the protective cap and the end of the syringe.
  • Screw the protective cap back onto the syringe tip.
  • Place the syringe on your table.

If necessary, refer to the technique taught by your healthcare team, pharmacy or manufacturer’s recommendations.

Why ?

This step is necessary for the security of the administration of the solution.

Step 6: Position your child

Position your child:

  • to securely reach the catheter entry site,
  • in one of the positions discussed with your healthcare team,
  • depending on comfort, age and ability to collaborate.
Why ?

This step facilitates the work.

Step 7: Monitor the catheter site

Refer to steps 5 through 8 of the care method “Catheter site monitoring”.

Why ?

This step allows you to quickly detect problems.

Step 8: Disinfect the needleless connector

  • Use a disinfectant swab to vigorously scrub the top and sides of the needleless connector.
  • Allow the connector to dry completely by holding it in one hand.
  • Do not blow on the connector.
  • <span style="text-decoration: underline;">Do not touch</span> the connector between the time of disinfection and the syringe connection.
Why ?

This step is necessary to prevent contamination (transmission of bacteria).

Step 9: Remove the protective cap from the saline syringe

  • Take the saline syringe with one hand and remove the protective cap with the other.
  • Take care that nothing touches the tip of the syringe to avoid contaminating it.
Why ?

This step allows the procedure to continue safely.

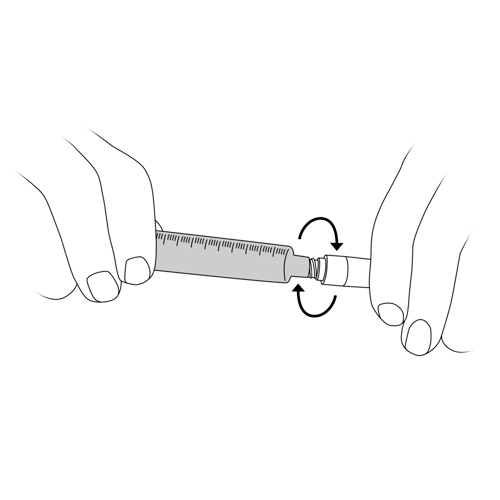
Step 10: Screw the syringe onto the needleless connector

  • Take the needleless connector between the thumb and forefinger of one hand.
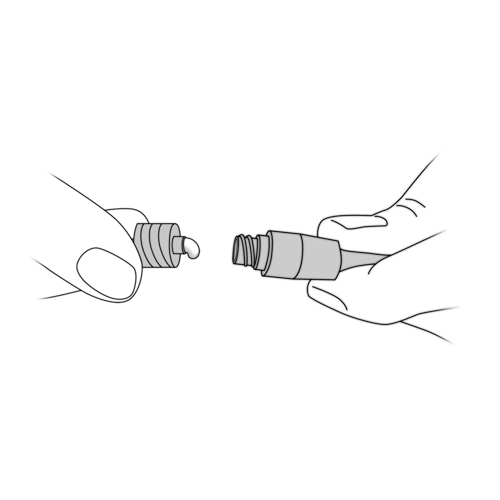
  • With the other hand, push the syringe into the connector.
  • Fasten the syringe by turning it about a quarter turn clockwise until the connection is solid.
  • Never use a needle to inject into the needleless connector.
Why ?

This step allows the rest of the procedure.

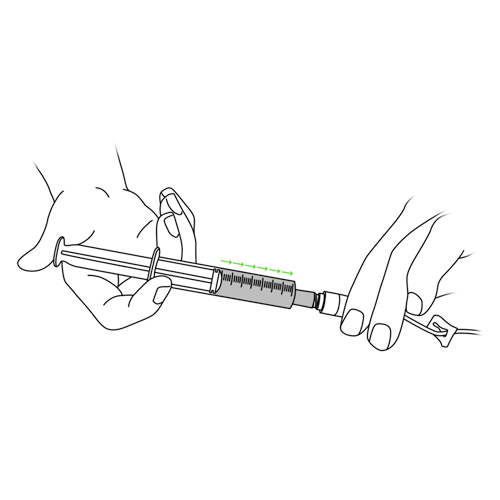
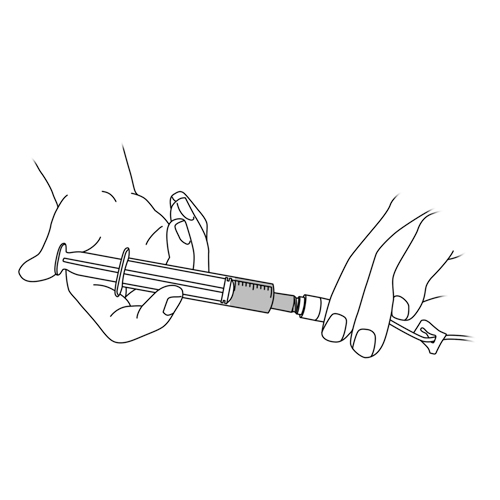
Step 11: Irrigate the catheter with the saline solution

  • Open the clamp of the catheter tubing.
  • Press the plunger of the syringe to push 1 ml at a time: using a brisk start-stop technique with each ml that is pushed (this helps keep the catheter from getting blocked).
  • When the entire solution is injected, close the clamp of the catheter tubing.
Why ?

This step removes deposits that accumulate in the catheter and prevents it from blocking.

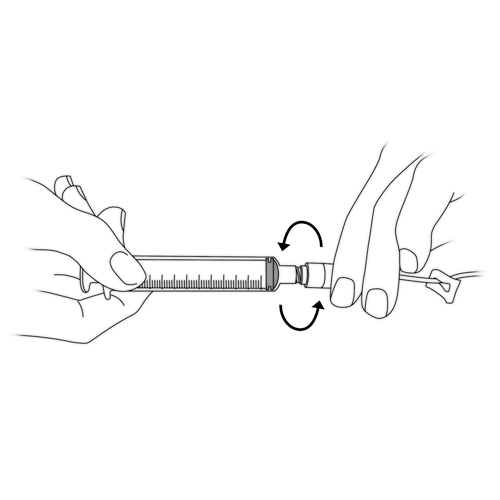
Step 12: Disconnect the syringe from the needleless connector

  • Hold the needleless connector between the thumb and forefinger of one hand.
  • With the other hand, disconnect the syringe by turning it counterclockwise.
  • Dispose of the syringe in the trash.
Why ?

This step allows the rest of the procedure.

Using your two hands prevents the needleless connector from unscrewing instead of the syringe.

Step 13: Irrigate the catheter with the locking solution, if necessary

Why ?

This step prevents the formation of clots at the tip of the catheter when a prolonged delay is expected before its next use.

Step 14: Monitor the catheter site

Refer to steps 5 through 8 of the catheter site monitoring procedure.

Why ?

This step allows you to quickly detect problems.

Step 15: Recovery

See the full description here

Summary:

The treatment is finished. Wash your hands again.

Be prepared to recognize the challenges faced and to provide positive feedback. Help your child recognize his/her strengths. Acknowledge the collaborative teamwork.

  • Listen to what your child says about the parts of the procedure that were difficult or painful.
  • Comfort your child and recognize your child’s collaboration with positive feedback.
  • Highlight your child’s  specific strengths that helped make the procedure positive.
  • Discuss with your child what might be done the same or differently the next time the care is needed.
  • Keep your promises if you have promised a reward, follow through.
  • Reward yourself too.
.Reviser : Ross .Version : 1.0

Methods of care : Administration of parenteral nutrition solution

Indications

Considerations:

Frequency

Required materials


Refer to your healthcare team:

The steps outlined in the care method “Administration of parenteral nutrition solution” refer to the use of the CADD®-Solis VIP ambulatory infusion pump.


Step 1: Anticipation

See the full description here

Summary:

Collaborate and form a team with your child. When you invest the time to form a strong team, children feel more comfortable and less anxious – this will help you complete the care with less stress – for you and your child.

Use these tips, from the start, to set the stage for a positive care procedure:

  • Create the right moment: integrate the care in a routine.
  • Alert your child to the needed care and communicate together.
  • Form a team with your child: Encourage autonomy by offering realistic choices such as the method of distraction. Stay tuned to your child. Manage pain and anxiety, using distraction and positioning for comfort.

Step 2: Preparation

See the full description here

Summary:

  • Prepare the environment: Identify a routine place for care. Close windows, doors and fans. Wash and dry the work surface and gather the needed materials for the care and to distract your child.
  • Prepare your child: Get help if needed. Position your child for comfort to receive the care and start to use the selected distraction method.
  • Prepare yourself: Find the right time when you are ready to provide the care safely. Review the list of care steps. Wash your hands.

Now that you are ready to start the care procedure, take the opportunity to encourage and praise your child.

Step 3: Procedure

See the full description here

Summary 3 key concepts:

  • Safety: Carefully follow the care practice steps as you have been taught.
  • Flexibility: Be ready to adjust according to your child’s reactions during the procedure. As needed, reposition or select an alternative distraction strategy. Follow your child’s pace and rhythm.
  • Collaboration: Reassure your child, verbally and non-verbally. Acknowledge your child’s emotions and reactions. Help your child differentiate between the different sensations during a procedure.

Step 4: Prepare the parenteral nutrition bag and add the additives, if necessary

Instructions here.

Step 5: Position your child

Position your child:

  • to securely reach the catheter entry site,
  • in one of the positions discussed with your healthcare team,
  • depending on comfort, age and ability to collaborate.
Why ?

This step ensures the safety and allows the rest of the procedure.

Step 6: Monitor the catheter site

Refer to steps 5 through 8 of the care method “Catheter site monitoring”.

Why ?

This step helps to quickly detect problems.

Step 7: Irrigate the catheter with the saline solution

Why ?

This step removes deposits that accumulate in the catheter and prevents it from blocking.

Step 8: Connect the bag tubing to the needleless connector

  • Disinfect the needleless  connector.
  • Take the tubing with one hand and remove the protective cap with the other.
  • Make sure that nothing touches the end of the bag tubing to avoid contaminating it.
  • Take the needleless connector between the thumb and forefinger of one hand.
  • With the other hand, insert the end of the tubing.
  • Turn clockwise, about a quarter turn, until the connection is tight.
  • Open all clamps.
Why ?

This step allows the subsequent procedure and avoids contamination.

Step 9: Turn on the pump

  • Press and hold the “Power switch” on the right side of the pump.
  • The pump does various self-tests and beeps six times after the tests are completed.
  • The home screen appears then.
  • Press and hold the START/STOP button.
  • When “Start Pump?” appears on the home screen, select Yes.
Why ?

This step allows solution administration.

Step 10: Secure the bag

  • Place the parental nutrition bag, tubing and pump in the backpack and keep it close to your child.
  • Be careful to place the pump securely.
  • Verify that the tubing is not bent or pinched. If available, a hospital style intravenous pole can be used to hang the parenteral nutrition bag overnight.
Why ?

This step is used to protect the pump and ensure proper flow of the solution.

Step 11: Monitor the solution administration

  • Monitor the site of the catheter, dressing, tubing and pump operation, following the frequency recommendations of your child’s healthcare team.
  • Check that the parenteral nutrition bag empties gradually.
Why ?

This step makes it possible to quickly detect problems during the administration of the solution.

Step 12: Turn off the pump

When the pump signals the prescribed end of the infusion:

  • Press the “STOP / START” button on the pump.
  • When “Stop pump?” appears on the screen, select “Yes“.
  • Close the clamps of all tubing.
  • Press the “Power switch” on the right side of the pump to shut it off.
  • When the message “Power down?” appears, select “Yes“. The pump then powers off.
Why ?

This step allows the rest of the procedure.

Step 13: Disconnect the tubing from the needleless connector

  • Wash your hands again.
  • Hold the needleless connector between the thumb and forefinger of one hand.
  • With the other hand, disconnect the tubing from the bag by turning its end counterclockwise.
  • Put empty bag, pump and tubing aside.
Why ?

This step makes it possible to prepare for the irrigation of the catheter.

The use of both your hands prevents the needleless connector from unscrewing instead of the tubing.

Step 14: Irrigate the catheter with the saline solution

Why ?

This step removes deposits that accumulate in the catheter and prevents it from blocking.

Step 15: Irrigate the catheter with the locking solution, if necessary

Instructions here.

Why ?

This step prevents the formation of clots at the tip of the catheter when a prolonged delay is expected before its next use.

Step 16: Monitor the catheter site

  • Refer to steps 5 through 8 of the care method “Catheter site monitoring”.
  • At the end, make sure all the clamps are closed.
Why ?

This step allows you to quickly detect problems.

Step 17: Remove the cassette from the pump

  • Lower the cassette latch until it comes loose.
  • Throw the tubing and empty bag into the trash.
Why ?

This step prepares the pump for the next use.

Step 18: Recovery

See the full description here

Summary:

The treatment is finished. Wash your hands again.

Be prepared to recognize the challenges faced and to provide positive feedback. Help your child recognize his/her strengths. Acknowledge the collaborative teamwork.

  • Listen to what your child says about the parts of the procedure that were difficult or painful.
  • Comfort your child and recognize your child’s collaboration with positive feedback.
  • Highlight your child’s  specific strengths that helped make the procedure positive.
  • Discuss with your child what might be done the same or differently the next time the care is needed.
  • Keep your promises if you have promised a reward, follow through.
  • Reward yourself too.
.Reviser : Ross .Version : 1.0

https://complexcareathomeforchildren.com/parenteral-nutrition/

Disclaimer of Liability: By using this site, you acknowledge that you have read this disclaimer and agree to all of its terms. Before making any decisions regarding your health or if you have any medical questions, you should first consult a physician or qualified health care professional who can provide recommendations tailored to your specific needs. The information published on this site does not constitute a recommendation for treatment (preventive or curative), a prescription or a diagnosis and is not a substitute for the advice of a physician or qualified health professional.

As medical and technical knowledge is constantly evolving, the content of this site is made available for information purposes only. The contributors to this site, including clinical experts in pediatrics from across Quebec, make every effort to ensure that the information made available on this site is as accurate and reliable as possible, without guaranteeing the completeness or total absence of error of its content. The opinions contained in this site are the sole responsibility of the author(s) and are not binding on the contributors to this site. These opinions do not necessarily reflect the official viewpoint of the organizations mentioned, nor that of their directors or representatives. The contributors to this site cannot and will not assume any responsibility for the use of the published content or for the information otherwise accessible through any link or reference source. Any quotation or reference to a source external to this site is for informational purposes only and does not constitute an endorsement or claim, express or implied, regarding the content or validity of the information obtained from that external source.

All rights reserved: The contents of this site may not be reproduced or disseminated, in whole or in part, in any manner or by any means, electronic, mechanical, including photocopying, recording, or otherwise, or stored in a retrieval system of any kind that is not limited to private use, without the prior written permission of the copyright holder.

Copyright © 2024 Soins Complexes. Tous droits réservés/All rights reserved.