Step 1: Anticipation

|
- You and your child are a team. Encourage autonomy by making realistic choices about what they can do to help you.
- Make the care part of a routine.
- Announce the care and talk about it together.
|
|
Step 2: Preparation

|
- Prepare the environment: Identify a place to perform the treatment.
- Prepare yourself: Choose a time when you are ready to do the treatment. Review the method.
- Perform basic procedures, as taught by your healthcare team:
- Wash your hands with soapy water for at least 20 seconds.
- Dry your hands well with a clean paper or towel.
- Close the tap with the paper or towel.
- Close doors and windows or ventilation system.
- Wash two work surfaces (eg, table) with alcohol or a disinfectant wipe (eg, Sani-Cloth® Plus).
- Let the tables dry.
- Gather and inspect materials: put materials on a work surface; pay particular attention to bags (correct names, correct concentrations, correct volumes, expiration dates not exceeded) and medications (correct names, correct concentrations, correct doses, expiration dates).
- Put on a mask.
- Remove jewelry.
- Wash your hands with a 4% chlorhexidine solution for 2 minutes.
- Dry your hands well with a clean paper or towel.
- Close the tap with the paper or towel.
- Now touch only the dialysis equipment.
|
|
Step 3: Procedure

|
See the full description here
Summary 3 key concepts:
- Safety: Carefully follow the care practice steps as you have been taught.
- Flexibility: Be ready to adjust according to your child’s reactions during the procedure. As needed, reposition or select an alternative distraction strategy. Follow your child’s pace and rhythm.
- Collaboration: Reassure your child, verbally and non-verbally. Acknowledge your child’s emotions and reactions. Help your child differentiate between the different sensations during a procedure.
|
|
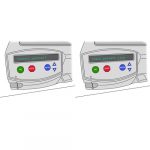
Step 4: Turn on the cycler
|
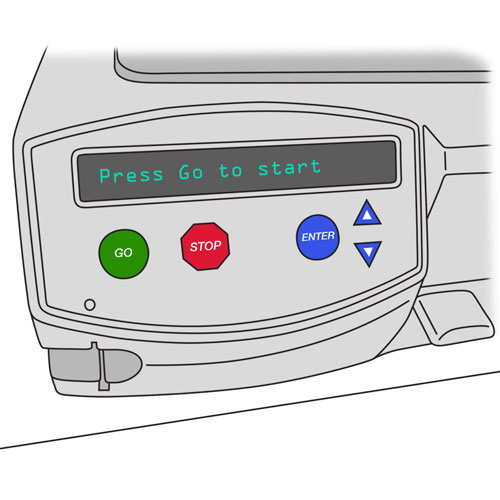
- Press the ON/OFF button on the back of the unit.
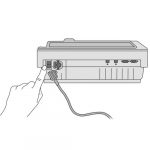
- The message “Press Go to start” appears on the screen.
Why ? This step opens the cycler and resets the internal functions.
|
|
Step 5: Check the dialysate bags
|
- Remove all bags from their packaging.
- Place them on the second well-cleaned work surface.
- Place the 5L Physioneal bags so that the injection ports are on top and the connectors are pointing up.
- Each bag should be in good condition, clean and dry.
- Make sure that:
- the solution in the bag or each bag chamber is clear (not discolored or cloudy and without small particles),
- there are no leaks when you lightly squeeze the bag or the large bag chamber,
- the seals are intact, if any,
- the pull ring is in place,
- the fins are in the correct position, if any,
- the injection port protective cap is in place.
Why ? This step ensures that the bags are in good condition for the safety of the rest of the procedure.
|
|
Step 6: Add medication to the bags, if necessary
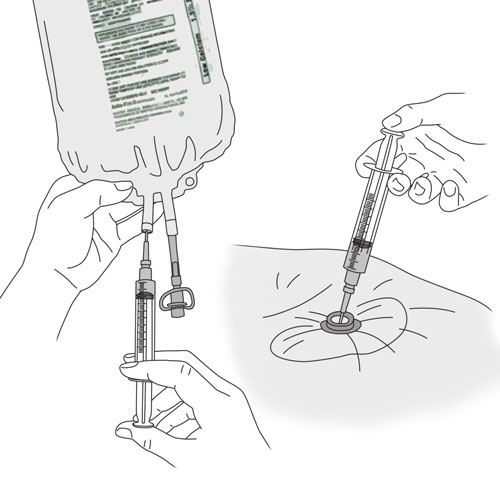
|
Proceed to the next step if you do not have any medication to add.
Refer to the method of care Addition of medication to the dialysate.
Why ? It is necessary to add the medication to the bags before mixing the solution.
|
|
Step 7: Prepare dialysate bags
|
If you are using only Dianeal or Extraneal bags, go directly to step 11.
If you are using 5 liter bags of Physioneal, go to the next step.
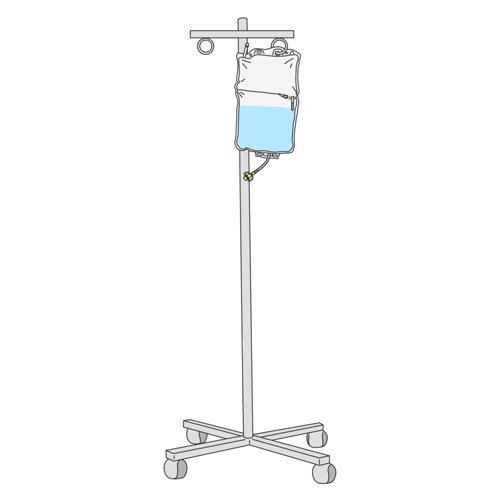
If you are using 2.5 liter bags of Physioneal:
- Break the cannula between the two chambers of the 2.5 liter Physioneal bag.
- Hang the bags on a hook or rolling pole to allow the dialysate to mix well.
- Wait until the top solution is completely drained into the bottom chamber. It may take a few minutes to mix the solutions.
- Be careful that the bag connector does not touch the roller pole.
- Go to step 11.
Why ? The break of the cannula between the two chambers of the 2.5 liter Physioneal bags allows the solutions to mix.
|
|
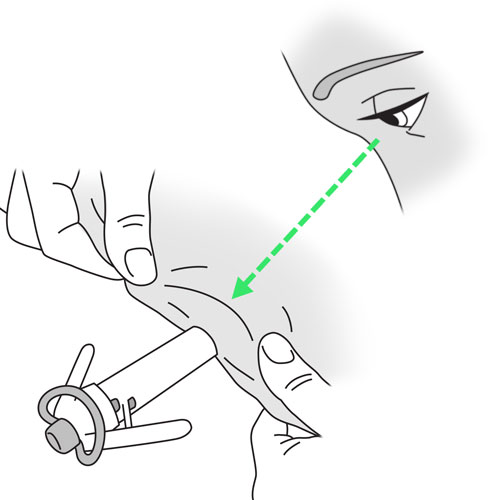
Step 8: Prepare the 5 liter Physioneal bags - Open the long seal
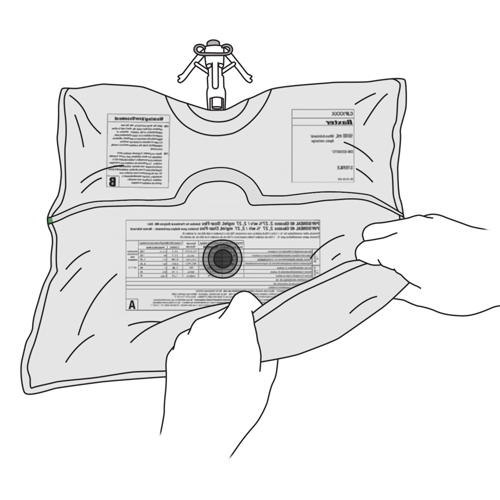
|
Go to step 11 if you are not using 5 liter Physioneal bags.
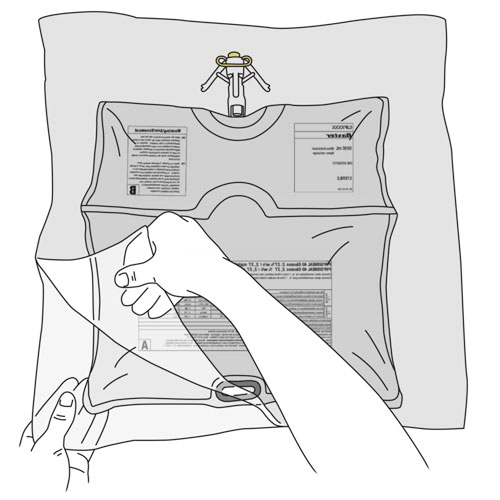
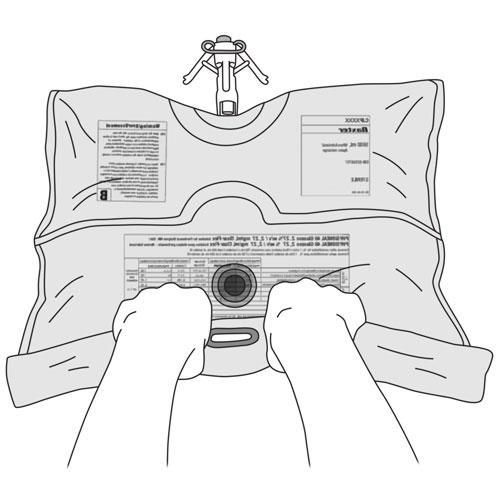
- Hold each side of the large chamber firmly with your hands facing out.
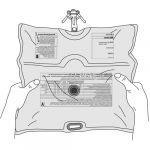
- Push the solution toward the center of the long seal.
- Finish opening the long seal in either of these ways:
- apply pressure to the large chamber from the corner, or
- press down on the large chamber with both hands.
- Make sure that the solution in the large chamber is completely emptied into the small chamber.
- Gently mix the solution by pressing both hands against the walls of the large chamber.
Why ? The opening of the long seal between the two chambers allows the mixing of the solutions.
|
|
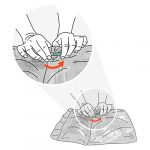
Step 9: Prepare the 5 liter Physioneal bags - Open the short seal
|
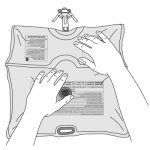
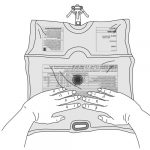
- Lift the large chamber by holding the bag firmly with both hands.
- Roll the bag toward the connector.
- Apply pressure by leaning over the bag.
- This pushes the solution towards the short seal to open it.
Why ? Breaking the short seal between the small chamber and the connector allows the solution to flow into the connector.
|
|
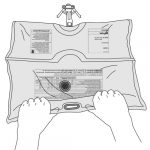
Step 10: Prepare the 5 liter Physioneal bags - Check the contour of the bag
|
- Look carefully all around the bag for leaks.
- Pay particular attention to the connector area.

Why ? This check ensures that the bag is watertight after handling.
|
|
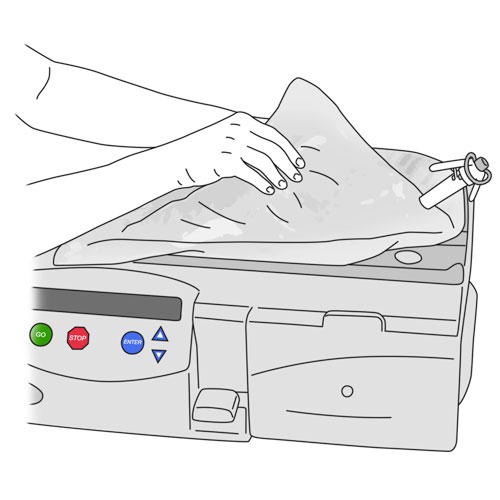
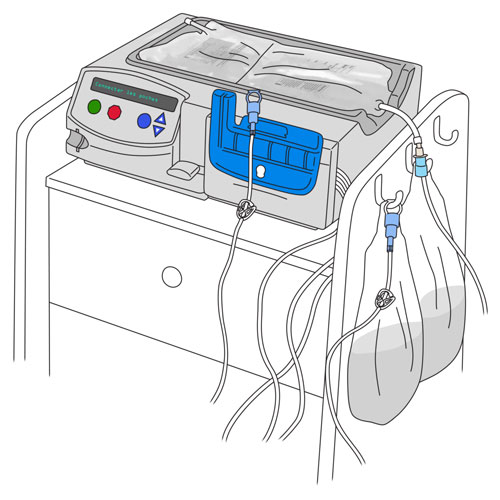
Step 11: Place the bag on the heater
|
- Place the appropriate bag on the cycler heater as directed by your healthcare team.
- If your child is receiving dialysate of the same concentration throughout the session: place one bag on the warmer.
- If your child is receiving dialysate of more than one concentration and large volumes per cycle: place the bag with the highest concentration on the heater, as directed by your healthcare team.
- If your child is receiving a mixture of dialysates of different concentrations and small volumes per cycle: place the empty bag on the heater. Make sure the bag clamp is securely closed.
Why ? Placing the appropriate bag on the heater to start the treatment allows it to be warmed up beforehand.
The dialysate should be administered at the temperature determined in the cycler programming for your child’s comfort.
|
|
Step 12: Prepare the cycler set with cassette
|
- Open the packages of the remaining materials.
- Place the materials on the second well-cleaned work surface.
- Close the six tubing clamps.
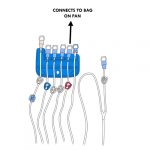
- Close the clamps of the 5-prong manifold set, if used.
Why ? This step secures the set with cassette and the rest of the materials, if used.
|
|
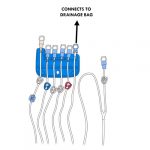
Step 13: Prepare the drainage bag and specimen bag (if needed)
|
- Close both clamps on the drainage bag (the tubing and the drainage port clamp).
- If recommended by your healthcare team, add another clamp on the drainage port tubing.
- If you need the specimen bag, make sure the clamp on its tubing is closed.
Why ? Closing the clamps prevents the flow of effluent through the tubing of these bags during treatment.
|
|
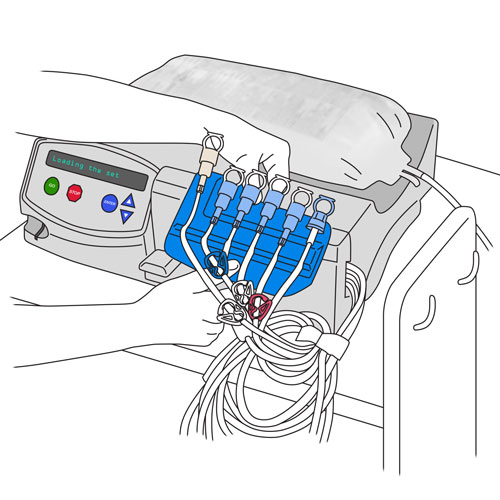
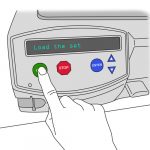
Step 14: Start the cycler

|
- Start the cycler by pressing the green GO button on the front of the unit.

- The message “Load the set” appears on the screen.
Why ? This is the first step in setting up the cycler.
|
|
Step 15: Open the cycler door
|
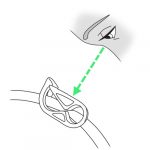
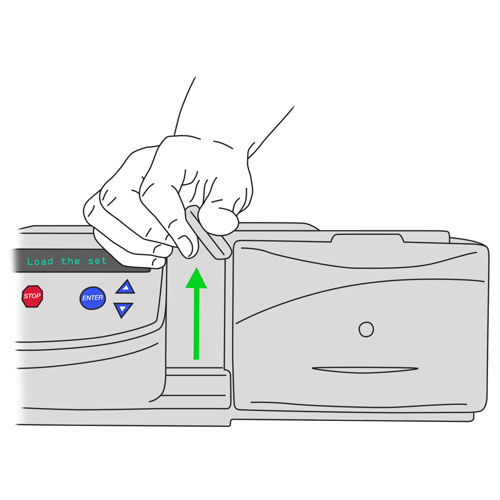
- Push the handle on the front of the cycler up; the door will open.
- Never force the door open.
Why ? Pulling the handle unlocks and opens the cycler door so that the cassette set can be installed.
|
|
Step 16: Install the cassette of the cycler set
|
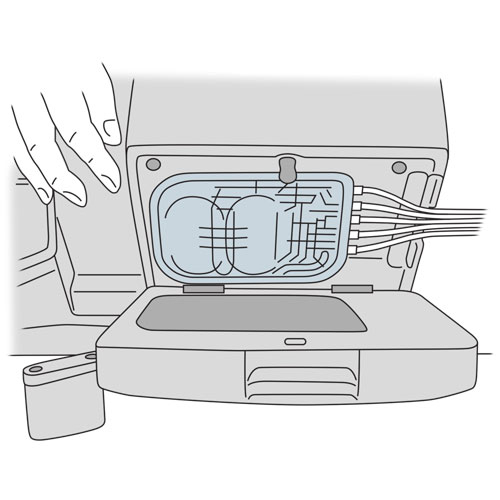
- Install the cassette in the only way possible: horizontally, with the lines pointing to the right of the unit.
- Press the lower portion of the cassette in before pressing the upper portion.
- Hold the specimen bag tubing in your hand as it is not attached to the organizer.
Why ? The installation of the cassette in the cycler allows the dialysis treatment to be performed.
|
|
Step 17: Close the cycler door
|
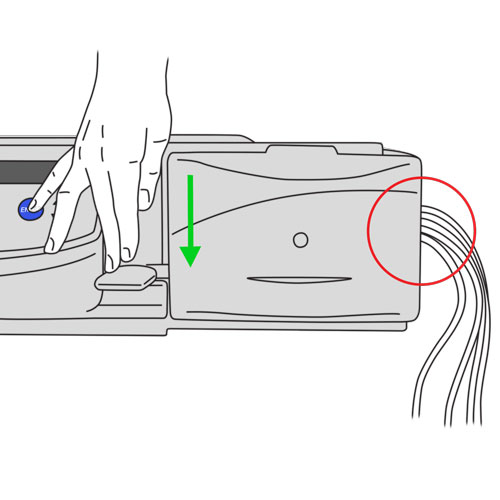
- Close the door and push the handle down.
- Make sure the cassette tubing is not bent or compressed where it exits the device.
Why ? This step locks the door and secures the cassette in the cycler.
|
|
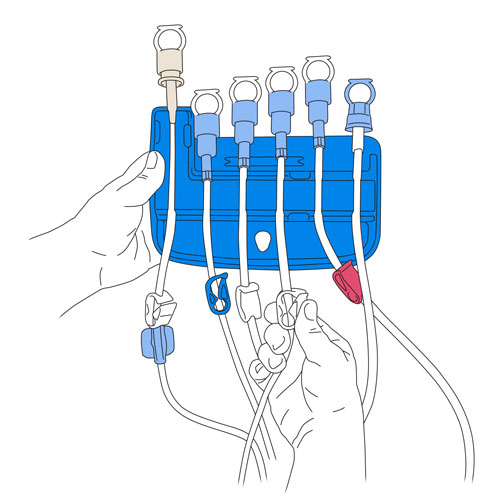
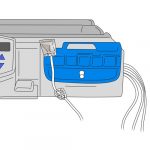
Step 18: Install the organizer of the cycler set
|
- Always hold the specimen bag tubing in your hand.
- Install the organizer on the front of the door by attaching the top then the bottom sections.
- Place the specimen bag tubing on the hook on the side of the cycler table.
Why ? This step secures the organizer on the cycler.
|
|
Step 19: Disinfect your hands

|
- Disinfect your hands with an antiseptic gel.
- Apply a generous amount to cover the entire surface of your hands.
- Rub until your hands are dry (20-30 seconds).
- Now touch only the dialysis equipment.
Why ? This hand disinfection prevents contamination for the rest of the procedure.
|
|
Step 20: Connect the specimen bag (if needed)
|
- Remove the protective cap from the specimen line and the tubing from the specimen bag.
- Connect the specimen line to the tubing of the specimen bag.
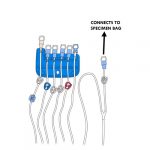
- Hang the specimen bag on the hook on the side of the cart or place it on the table.
- Leave the tubing clamp closed until the specimen bag is used.
Why ? This step allows the bag to be connected securely.
|
|
Step 21: Connect the drainage bag
|
- Remove the rightmost clampless line from the organizer (drain line) and remove its protective cap.
- Remove the protective cap from the drainage bag tubing.
- Connect the drain line to this tubing.
- Open the drain line clamp.
- Be careful not to touch the ends of the lines and connectors while connecting.
- Place the drainage bag on the table at the back of the cycler or on another clean surface. Do not place the bag on the floor until all connections are complete.
Why ? This step allows the bag to be connected securely.
|
|
Step 22: Prepare the connection of the bags

|
- Press the green GO button on the front of the unit.
- The message “Self testing” appears on the screen.
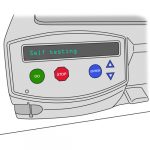
- When the automatic test of the cycler is completed, “Connect bags” appears on the screen.
Why ? This step allows you to perform the automatic test of the cycler before connecting the bags to check the correct operation of the cassette.
|
|
Step 23: Disinfect your hands
|
|
- Disinfect your hands with an antiseptic gel.
- Apply a generous amount to cover the entire surface of your hands.
- Rub until your hands are dry (20-30 seconds).
- Now touch only the dialysis equipment.
Why ? This hand disinfection prevents contamination for the rest of the procedure.
|
|
Step 24: Connect the bag to the heater
|
- Connect the bags to the other lines on the organizer, following the sequence from right to left.
- Remove the line with the red clamp from the organizer (heater line) and remove its protective cap.
If the bag on the heater is a 5 liter Physioneal bag: go to the next step.
If the bag on the heater is empty:
- Remove the protective cap from the empty bag tubing.
- Connect the heater line to the empty bag tubing.
- Open the clamp on the heater line and empty bag tubing.
- Go to step 24.
If the bag on the heater is a Physioneal 2.5 liter or Dianeal bag:
- Remove the pull ring from the bag.
- Connect the heater line to the bag connector.
- Open the clamp on the heater line.
- Break off the cannula in the bag connector.
- Go to step 24.
- Be careful not to touch the ends of the line and the connector or tubing during connection.
- Make sure the connector or tubing on the bag is secure.
Why ? This step allows the bag to be connected securely and ensures that the dialysate can flow through the system.
Removing the pull ring allows the bag to be connected to the heater line.
|
|
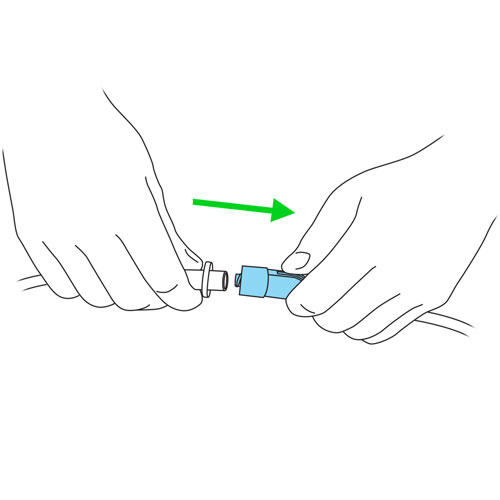
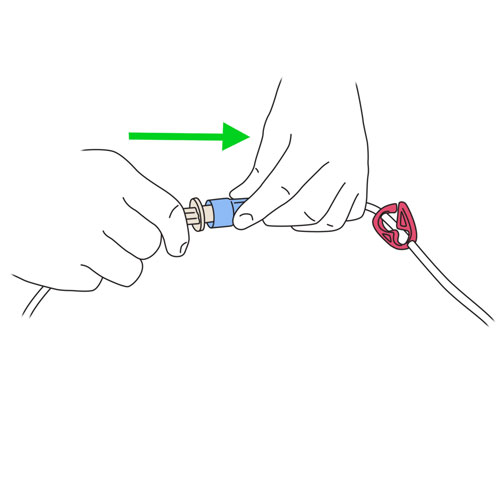
Step 25: Connect the Physioneal 5 liter bag to the heater
|
If you are not using a 5 liter Physioneal bag, go to the next step.
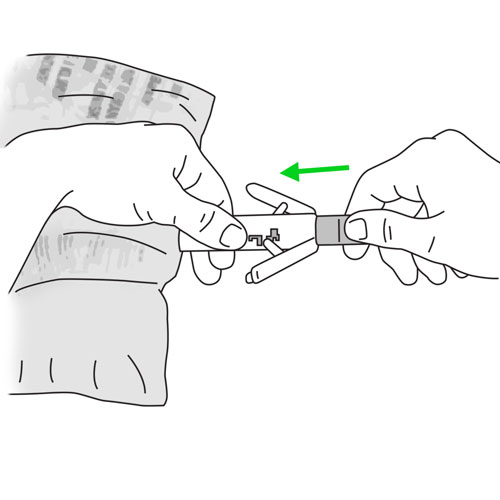
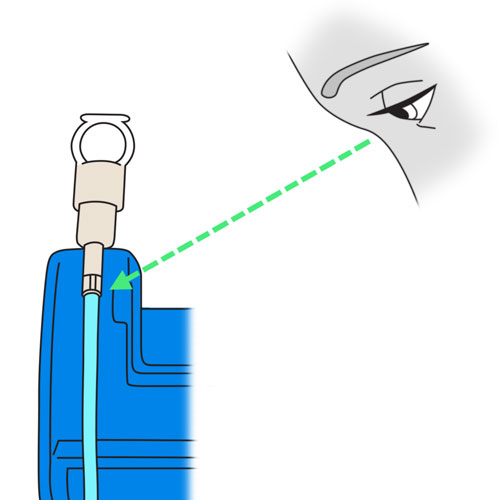
- Hold the connector with one hand and pull the pull ring with the other to remove it.
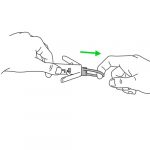
- Connect the heater line to the bag connector by turning until you feel resistance.
- Open the red clamp on the heater line.
- Close the wings of the bag connector with one hand; you will hear a “click”.
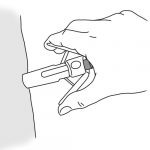
- Never put one hand on the connector and the other on the wings to close them.

- Make sure the wings are tightly closed.
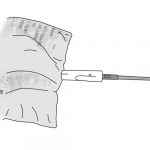
- Be careful not to touch the ends of the line and connector while connecting.
- Make sure the bag connector is secure.
Why ? This step allows the bag to be connected securely and ensures that the dialysate can flow through the system.
Removing the pull ring allows the bag to be connected to the heater line.
Closing the bag wings advances the connector cannula to puncture the bag and allow solution to flow into the tubing for treatment.
|
|
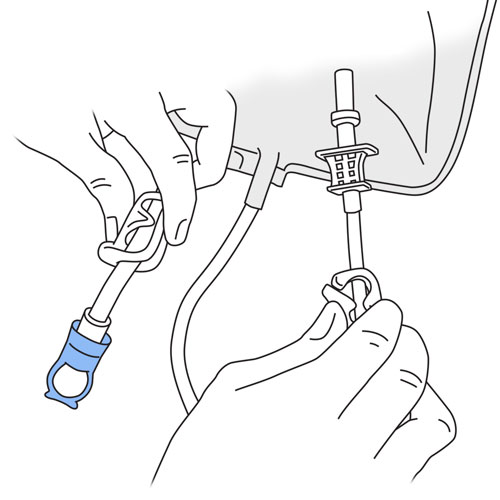
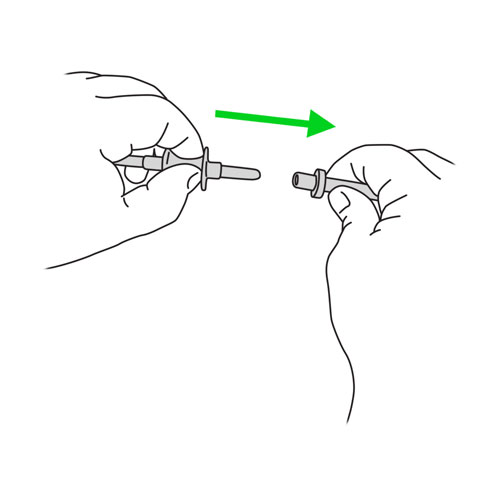
Step 26: Connect the dialysate bags

|
The Extraneal bag must always be connected to the line with the blue clamp (see next step).
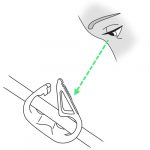
- Remove the line with a white clamp from the rightmost organizer (bag line) and remove its protective protective cap.
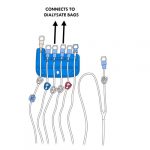
- Remove the pull ring from the bag.
- Connect the bag line to the bag connector.
- Open the bag line clamp.
- For the 5 liter Physioneal bag: Close the bag connector wings with one hand.
- For all other dialysate bags: Break the cannula in the bag connector.
- Repeat with the other bag line with a white clamp to connect a second bag.
- If you run out of lines, add the 5-prongs manifold set to this other bag line and connect the necessary bags.
- Be careful not to touch the ends of the line and connector while connecting.
- Make sure the bag connector is secure.
Why ? This step allows the bag to be connected securely and ensures that the dialysate can flow through the system.
Removing the pull ring allows the bag to be connected to the bag line.
Closing the wings on the Physioneal 5 liter bag advances the connector cannula to puncture the bag and allow solution to flow into the tubing for treatment.
|
|
Step 27: Connect the last injection bag, if needed

|
If you are not using a different concentration of dialysate for the last injection, go to the next step.
The Extraneal bag must always be connected to the line with the blue clamp.
The tubing with the blue clamp can also be used to connect an additional dialysate bag if you use the same solutions for the entire dialysis session.
- Remove the line with the blue clamp from the organizer (last fill line) and remove its protective cap.
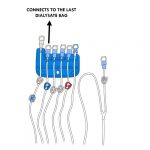
- Remove the pull ring from the bag.
- Connect the last fill line to the bag connector.
- Open the last fill line clamp.
- For Physioneal 5 liter bag: Close the bag connector wings with one hand.
- For all other dialysate bags: Break the cannula in the bag connector.
- Be careful not to touch the ends of the line and connector while connecting.
- Make sure the bag connector is secure.
Why ? This step allows the bag to be connected securely and ensures that the dialysate can flow through the system.
|
|
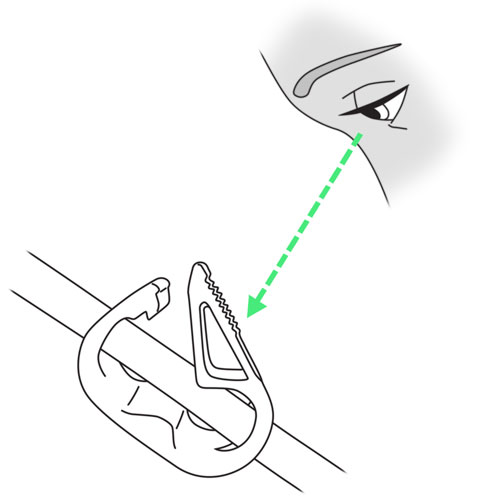
Step 28: Check the connections
|
- Make sure that only the clamps on lines connected to a dialysate bag are open and that the others are closed.
- If recommended by your healthcare team, clamp the extension branches and unused bag lines with a dialysis clamp.
- If a specimen bag is connected, make sure its tubing clamp and the specimen line clamp remain closed until the specimen is collected.
- Check that the connections between tubing and bags are tight (not leaking).
Why ? This step verifies that all connections are secure.
|
|
Step 29: Place the bags
|
- Hang the bags on the side of the cycler or leave them on the work surface.
- Place the drainage bag under the cycle table or on the floor on a pad.
Why ? This step allows the bags to be placed in the most appropriate location during treatment and ensures that the dialysate flows well.
|
|
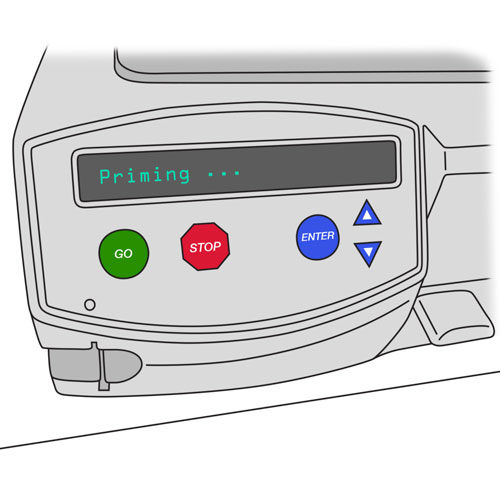
Step 30: Priming the lines
|
- Put a compress left in its package on the end of the patient line, if recommended by your healthcare team.
- Open the patient line clamp.
- Press the green GO button on the front of the unit.
- The message “Priming…” appears on the screen.
- When the vacuum is complete (takes about 10 minutes), the message “Connect yourself” appears on the screen alternating with “Check patient line”.
- Disinfect your hands with an antiseptic gel (eg, Stérigel®) and rub until your hands are dry (20-30 seconds).

- Close the patient line clamp.
Why ? The compress protects the end of the patient line.
The opening of the clamp allows the air to be removed from the lines (“priming” the lines).
|
|
Step 31: Check the dialysate level in the patient line
|
If the patient line is not primed properly (if there is still air in the patient line):
- Make sure the patient line clamp is open properly.
- Make sure the patient line is properly positioned on the set.
- Press the STOP button on the front of the cycler.
- Press the down arrow on the front of the cycler until “Reprime patient line” appears on the screen.
- Press the ENTER button on the front of the cycler.
- Press the ENTER button again. The cycler will ask you if you want to reprime the patient line.
- Repeat this step until the line is primed.
- Close the patient line clamp.
Why ? This step allows to check if the air vacuum is well done in the patient line (if the line is well “primed”).
|
|
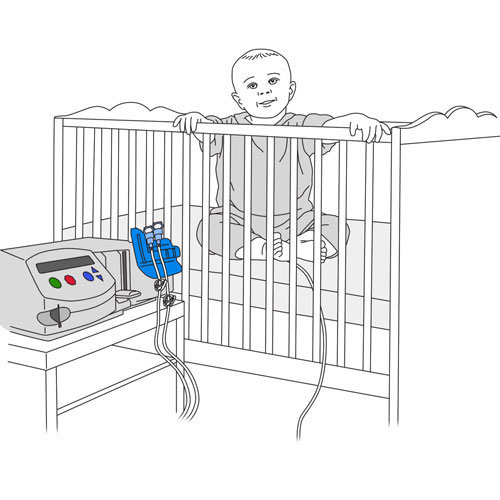
Step 32: Connect your child to the cycler, if desired
|
After assembling the cycler, connect the system to your child within four hours.
Why ? Connecting the system to your child allows the peritoneal dialysis treatment to begin.
|
|
Step 33: Recovery

|
See the full description here
Summary:
The treatment is finished. Wash your hands again.
Be prepared to recognize the challenges faced and to provide positive feedback. Help your child recognize his/her strengths. Acknowledge the collaborative teamwork.
- Listen to what your child says about the parts of the procedure that were difficult or painful.
- Comfort your child and recognize your child’s collaboration with positive feedback.
- Highlight your child’s specific strengths that helped make the procedure positive.
- Discuss with your child what might be done the same or differently the next time the care is needed.
- Keep your promises if you have promised a reward, follow through.
- Reward yourself too.
|
|