Step 1: Anticipation
|
See the full description here
Summary:
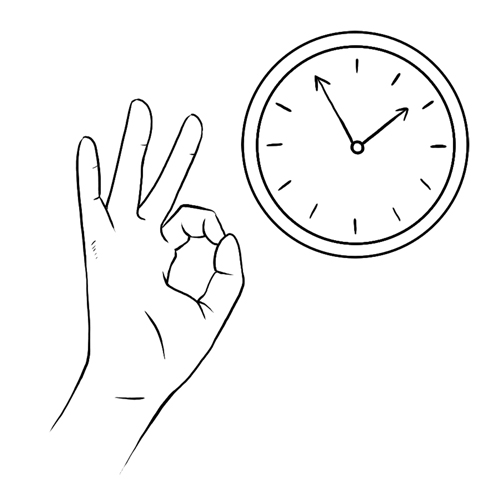
Collaborate and form a team with your child. When you invest the time to form a strong team, children feel more comfortable and less anxious – this will help you complete the care with less stress – for you and your child.
Use these tips, from the start, to set the stage for a positive care procedure:
- Create the right moment: integrate the care in a routine.
- Alert your child to the needed care and communicate together.
- Form a team with your child: Encourage autonomy by offering realistic choices such as the method of distraction. Stay tuned to your child. Manage pain and anxiety, using distraction and positioning for comfort.
|
|
Step 2: Preparation
|
See the full description here
Summary:
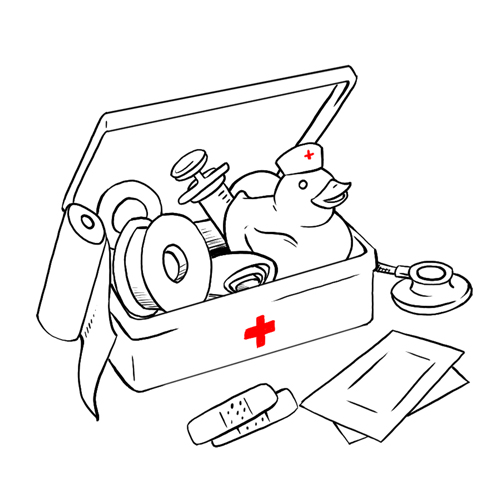
- Prepare the environment: Identify a routine place for care. Close windows, doors and fans. Wash and dry the work surface and gather the needed materials for the care and to distract your child.
- Prepare your child: Get help if needed. Position your child for comfort to receive the care and start to use the selected distraction method.
- Prepare yourself: Find the right time when you are ready to provide the care safely. Review the list of care steps. Wash your hands.
Now that you are ready to start the care procedure, take the opportunity to encourage and praise your child.
|
|
Step 3: Procedure

|
See the full description here
Summary 3 key concepts:
- Safety: Carefully follow the care practice steps as you have been taught.
- Flexibility: Be ready to adjust according to your child’s reactions during the procedure. As needed, reposition or select an alternative distraction strategy. Follow your child’s pace and rhythm.
- Collaboration: Reassure your child, verbally and non-verbally. Acknowledge your child’s emotions and reactions. Help your child differentiate between the different sensations during a procedure.
|
|
Step 4: Position your child
|
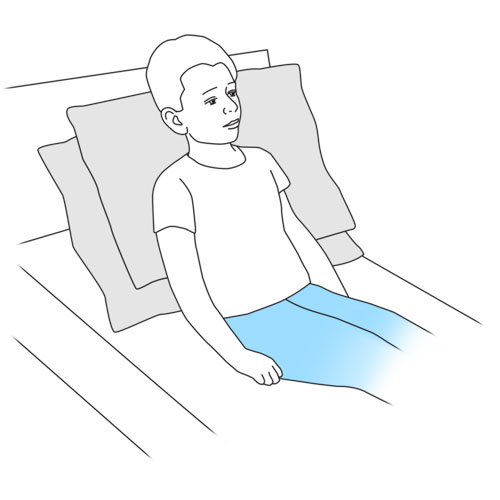
Position your child.
For the abdominal thrusts, lateral thoracic (chest) compressions and thoracic compressions techniques:
- Place your child if possible, in a sitting or semi sitting position.
- Make sure that your child’s head is well positioned and supported by using either rolled up towels, pillows, or cushions, as discussed with the healthcare team.
- If your child cannot be placed in a sitting position, place on his back, with the head of the bed slightly raised.
- If your child is in a wheelchair and abdominal thrusts or thoracic compressions are also applied during the cough assist technique, be sure to secure the wheelchair against a wall and apply the brakes.
For the directed cough technique:
- Your child must be in a sitting position.
- If your child is in a wheelchair, the brakes must be applied; secure the seatbelt or harness.
Why ? A sitting position optimizes coughing.
|
|
Step 5: Apply abdominal thrusts
|
Refer to step 6 of the technique for lateral thoracic compressions, step 7 of the technique for thoracic compressions or step 8 of the directed cough technique.
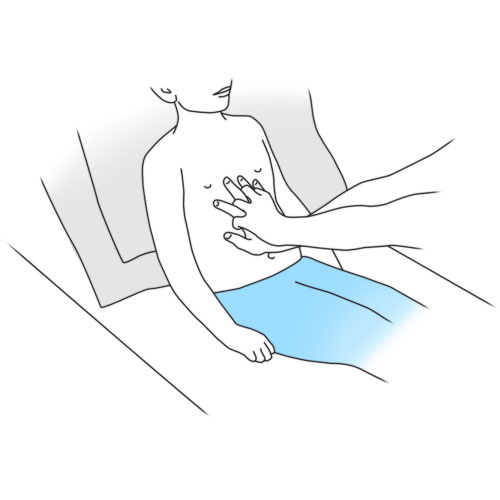
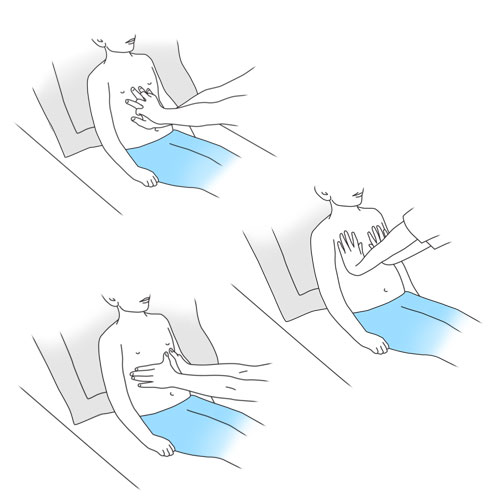
- Place the heel of your palm just above the belly button.
- Place your other hand on top of the other, intertwining the fingers of both hands and pointing them upwards.
- Keep your elbows straight.
- Ask your child to take a big breath in and to hold it in his lungs. Tip: If recommended by your child’s healthcare team, apply the pulmonary hyperinflation technique using a modified ventilatory bag; withdraw the interface immediately before proceeding to expiration.
- As soon as your child begins to exhale/cough, apply an upward thrust to his abdomen (eg, push in the shape of a J, to help your child cough. It is important that the pressure is applied firmly, rapidly and coordinated with your child’s cough.
- Have your child spit out the secretions, wipe with paper tissues.
- Continue to step 9.
Why ? This step allows the diaphragm to be pushed upwards to help your child push the air out from his lungs as he exhales.
This helps your child to cough and clear secretions more effectively.
|
|
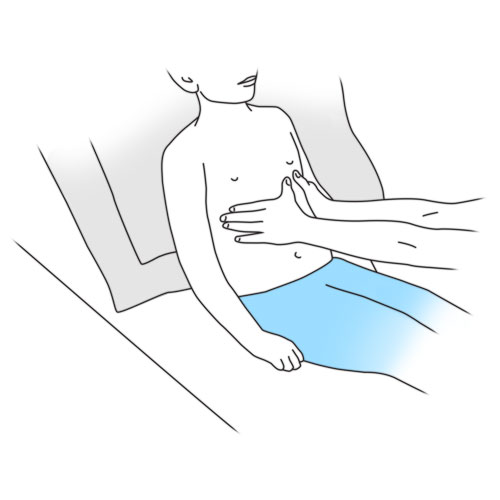
Step 6: Apply lateral thoracic (chest) compressions
|
Refer to step 5 of the technique for abdominal thrusts, step 7 of the technique for thoracic compressions, or step 8 of the directed cough technique.
- Place your hands on each side of your child’s thorax (chest), thumbs pointing upwards, fingers pointing towards the back.
- Ask your child to take a big breath in and to hold it in his lungs. Tip: If recommended by your child’s healthcare team, apply the pulmonary hyperinflation technique using a modified ventilatory bag; withdraw the interface immediately before proceeding to expiration.
- As soon as your child begins to exhale/cough, apply an upward compression of the chest to help your child cough. It is important that the pressure is applied firmly, rapidly and coordinated with your child’s cough.
- Have your child spit out the secretions, wipe with paper tissues.
- Continue to step 9.
Why ? This step provides support to the lateral thoracic muscles to push air out of the lungs.
This helps your child to cough and clear secretions more effectively.
|
|
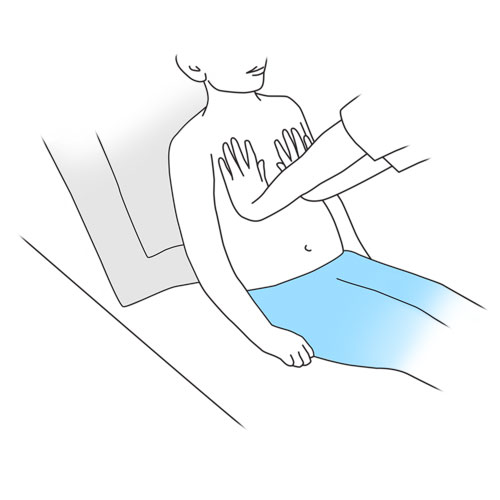
Step 7: Apply thoracic compressions
|
Refer to step 5 of the technique for abdominal thrusts, step 6 of the technique for lateral thoracic compressions, or step 8 of the directed cough technique.
- Place your hands flat on the front of each side of your child’s chest.
- Ask your child to take a big breath in and to hold it in his lungs. Tip: If recommended by your child’s healthcare team, apply the pulmonary hyperinflation technique – see Inspiratory aid – using a modified ventilatory bag; withdraw the interface immediately before proceeding to expiration.
- As soon as your child begins to exhale/cough, apply pressure to the thorax with your arms bent at the elbow. It is important that the pressure is applied firmly, rapidly and coordinated with your child’s cough.
- Have your child spit out the secretions, wipe with paper tissues.
- Continue to step 9.
Why ? This step helps the thoracic muscles at the front of the chest push air out of the lungs.
This helps your child to cough and clear secretions more effectively.
|
|
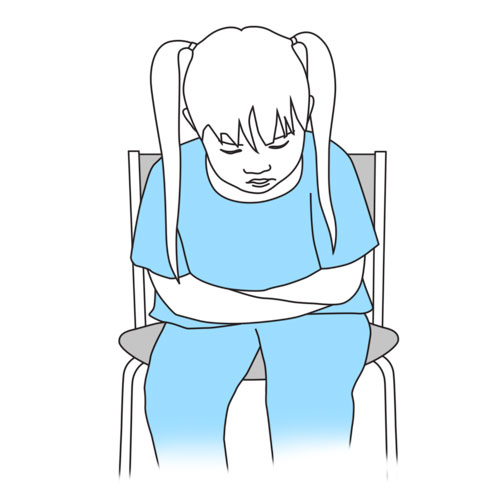
Step 8: Apply directed cough technique
|
Refer to step 5 of the technique for abdominal thrusts, or step 6 of the technique for lateral thoracic compressions, or step 7 of the thoracic compressions technique.
To begin:
- Secure your child with the seat belt on the wheelchair, if applicable.
- Place a rolled up towel across your child’s abdomen and place your child’s arms around the towel or cross your child’s arms over the belly button.
- Instruct your child to inhale as deeply as possible and hold his breath.
- Ask your child to cough as forcibly as possible while bending forwards and compressing the towel, if one was used.
- Have your child spit out the secretions, wipe with paper tissues.
- Continue to step 10.
Why ? This step allows your child to better cough and clear secretions from the respiratory tract as independently as possible.
|
|
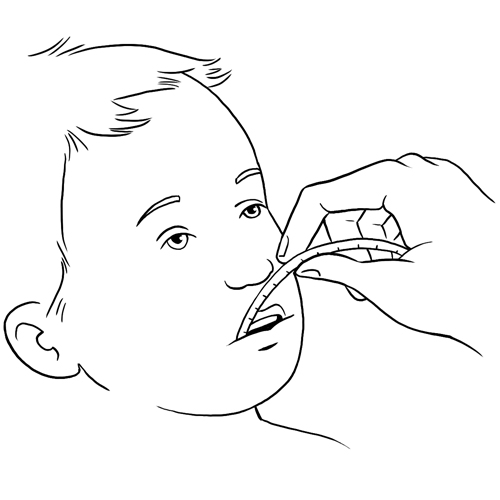
Step 9: Suction secretions as needed
|
If your child has difficulty clearing secretions from the mouth, nose, back of throat or tracheal cannula, use suction to clear your child’s secretions.
Why ? This step helps clear secretions from the respiratory tract.
|
|
Step 10: Repeat, as needed, the techniques which are most effective for your child
|
- Complete each session by repeating the maneuver (inspiration/expiration/abdominal thrust, lateral thoracic compression or thoracic compression), 3 to 5 times if needed until your child can effectively cough and clear the secretions.
- Repeat the session 5 to 8 times if the secretions are difficult to clear.
- Wait at least 10 minutes between sessions.
Why ? This step allows your child to better cough and completely clear secretions from the respiratory tract.
A break of 10 minutes between each session will prevent your child from getting too tired or dizzy.
|
|
Step 11: Recovery
|
See the full description here
Summary:
The treatment is finished. Wash your hands again.
Be prepared to recognize the challenges faced and to provide positive feedback. Help your child recognize his/her strengths. Acknowledge the collaborative teamwork.
- Listen to what your child says about the parts of the procedure that were difficult or painful.
- Comfort your child and recognize your child’s collaboration with positive feedback.
- Highlight your child’s specific strengths that helped make the procedure positive.
- Discuss with your child what might be done the same or differently the next time the care is needed.
- Keep your promises if you have promised a reward, follow through.
- Reward yourself too.
|
|
![]()