https://complexcareathomeforchildren.com
![]()
https://complexcareathomeforchildren.com
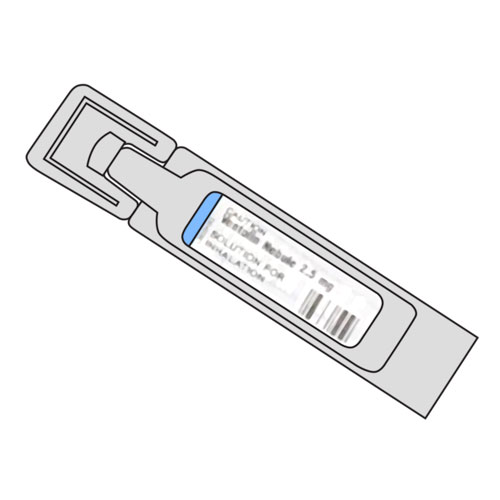
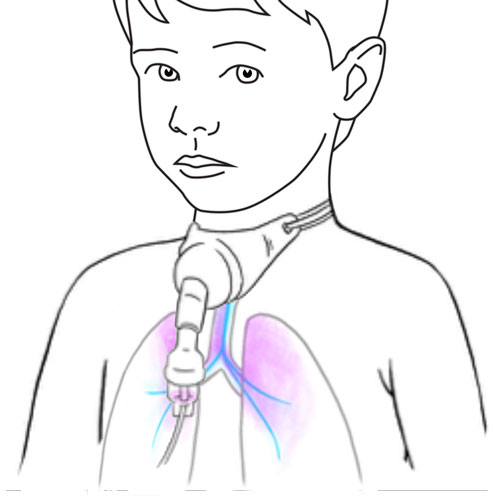
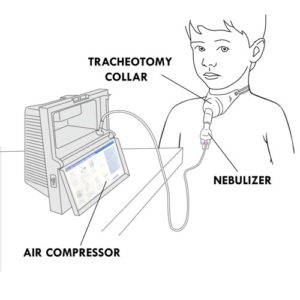
Small volume nebulizer:
Maintenance of the equipment
Below are suggested weekly maintenance methods that can serve as a guide.
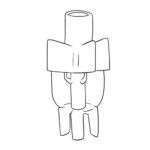
Tracheal collar:
Compressor and tubing:
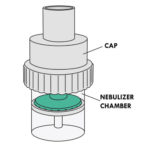
Nebulizer:
Equipment replacement
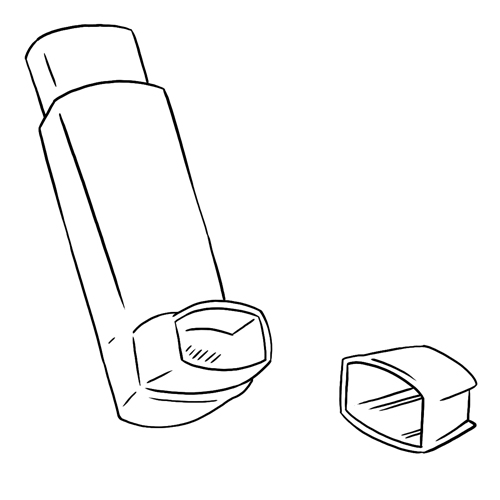
Metered dose inhaler (puffer) with a spacer:

Maintenance of the equipment
Below are general suggestions that can serve as a guide. The frequencies suggested may be different; follow the recommendations of your child’s healthcare team. Tip: For example, spacers must be cleaned as soon as a white powder deposit appears on the inside walls.
Metered dose inhaler (once a week):
Spacer (every 2 weeks):
Equipment replacement
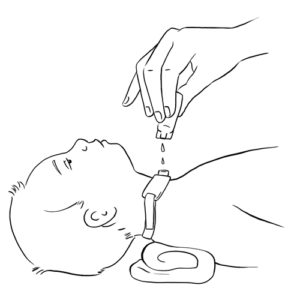
Instillation
Medication storage
As prescribed by your child’s healthcare team.
For a small volume nebulizer treatment:
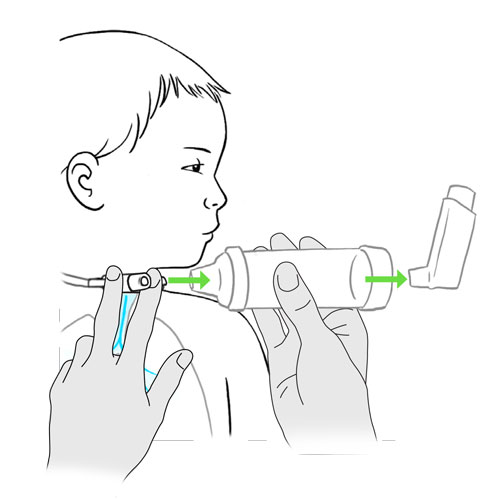
For a metered dose inhaler treatment:
If needed:
Always have equipment close at hand in case of an emergency.
Refer to your child’s healthcare team if the material or the sequence of steps you have been shown is different than those described.
Step 1: Anticipation
|
||
Step 2: Preparation
|
||
Step 3: Procedure
|
||
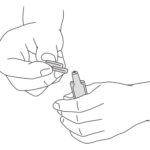
Step 4: Prepare the medication
|
||
Step 5: Add the medication to the nebulizer
|
||
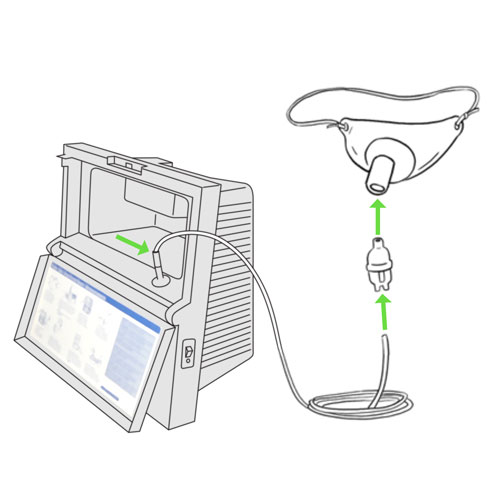
Step 6: Prepare the delivery system
|
||
Step 7: Position your child
|
||
Step 8: Suction the tracheobronchial secretions, if needed
|
||
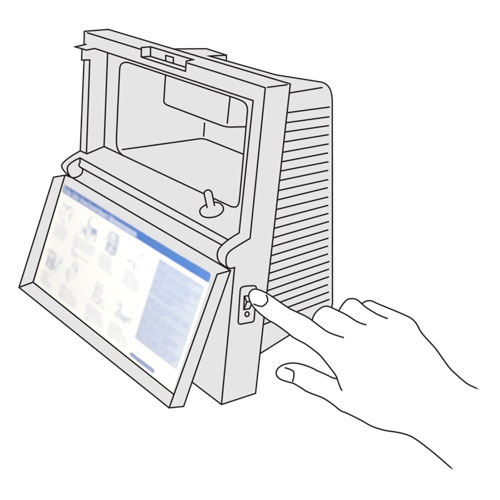
Step 9: Turn the compressor on
|
||
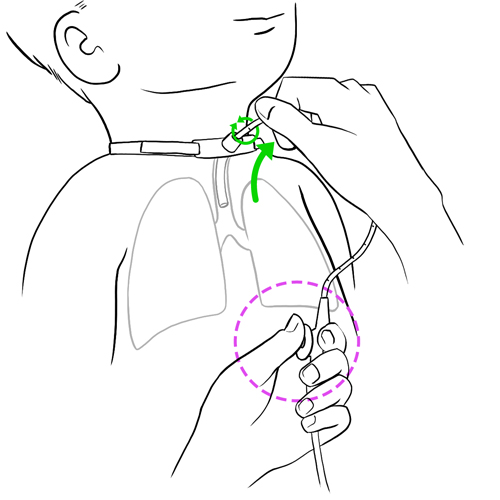
Step 10: Place the tracheal collar
|
||
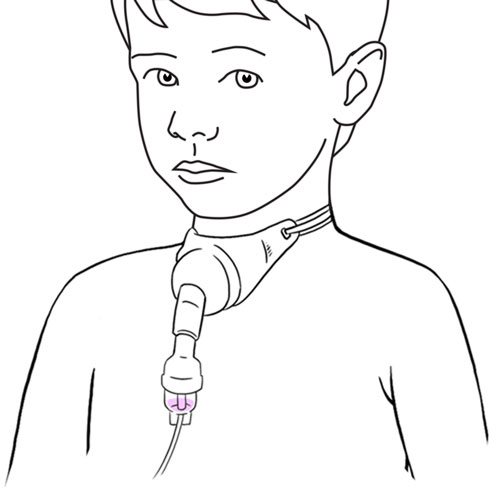
Step 11: Administer the medication
|
||
Step 12: Suction the tracheobronchial secretions, if needed
|
||
Step 13: Clean and store the equipment
|
||
Step 14: Recovery
|
Step 1: Anticipation
|
||
Step 2: Preparation
|
||
Step 3: Procedure
|
||
Step 4: Prepare the medication
|
||
Step 5: Position your child
|
||
Step 6: Prepare the medication delivery system
|
||
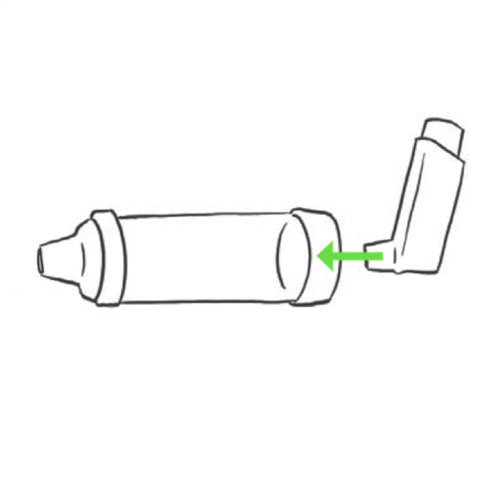
Step 7: Connect the spacer to the tracheal cannula connector
|
||
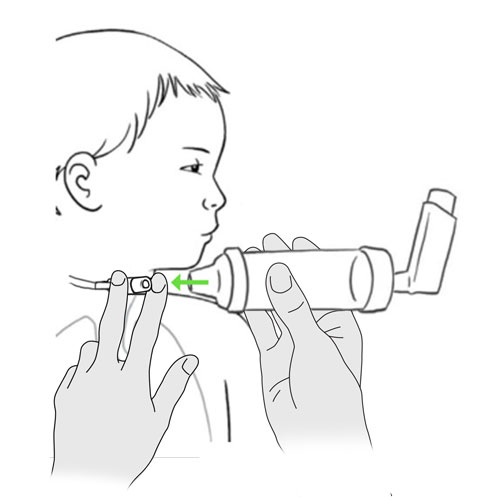
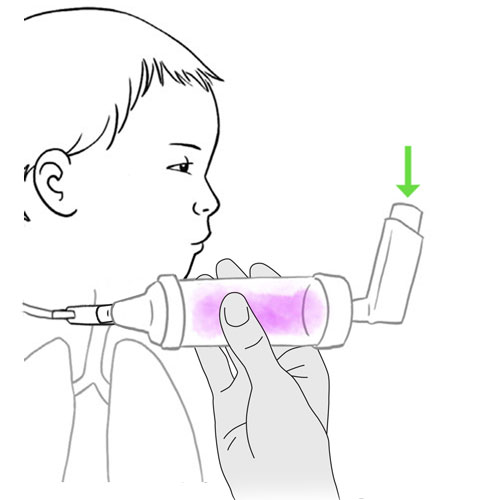
Step 8: Administer the medication
|
||
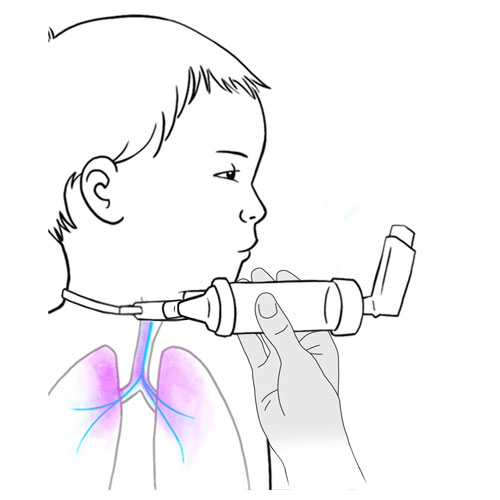
Step 9: Optimize entry of the medication to the lungs
|
||
Step 10: Repeat according to the prescribed dosage
|
||
Step 11: Remove and store the equipment
|
||
Step 12: Recovery
|
https://complexcareathomeforchildren.com/respiratory-support/tracheostomy-care/administration-of-medication-via-tracheostomy/
Disclaimer of Liability: By using this site, you acknowledge that you have read this disclaimer and agree to all of its terms. Before making any decisions regarding your health or if you have any medical questions, you should first consult a physician or qualified health care professional who can provide recommendations tailored to your specific needs. The information published on this site does not constitute a recommendation for treatment (preventive or curative), a prescription or a diagnosis and is not a substitute for the advice of a physician or qualified health professional.
As medical and technical knowledge is constantly evolving, the content of this site is made available for information purposes only. The contributors to this site, including clinical experts in pediatrics from across Quebec, make every effort to ensure that the information made available on this site is as accurate and reliable as possible, without guaranteeing the completeness or total absence of error of its content. The opinions contained in this site are the sole responsibility of the author(s) and are not binding on the contributors to this site. These opinions do not necessarily reflect the official viewpoint of the organizations mentioned, nor that of their directors or representatives. The contributors to this site cannot and will not assume any responsibility for the use of the published content or for the information otherwise accessible through any link or reference source. Any quotation or reference to a source external to this site is for informational purposes only and does not constitute an endorsement or claim, express or implied, regarding the content or validity of the information obtained from that external source.
All rights reserved: The contents of this site may not be reproduced or disseminated, in whole or in part, in any manner or by any means, electronic, mechanical, including photocopying, recording, or otherwise, or stored in a retrieval system of any kind that is not limited to private use, without the prior written permission of the copyright holder.
Copyright © 2026 Soins Complexes. Tous droits réservés/All rights reserved.