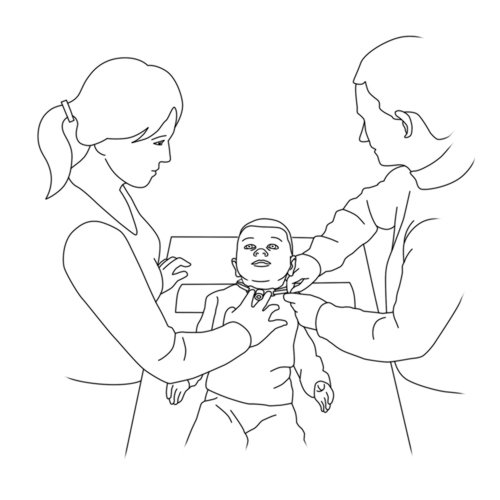
Step 1: Anticipation

|
See the full description here
Summary:
Collaborate and form a team with your child. When you invest the time to form a strong team, children feel more comfortable and less anxious – this will help you complete the care with less stress – for you and your child.
Use these tips, from the start, to set the stage for a positive care procedure:
- Create the right moment: integrate the care in a routine.
- Alert your child to the needed care and communicate together.
- Form a team with your child: Encourage autonomy by offering realistic choices such as the method of distraction. Stay tuned to your child. Manage pain and anxiety, using distraction and positioning for comfort.
|
|
Step 2: Preparation

|
See the full description here
Summary:
- Prepare the environment: Identify a routine place for care. Close windows, doors and fans. Wash and dry the work surface and gather the needed materials for the care and to distract your child.
- Prepare your child: Get help if needed. Position your child for comfort to receive the care and start to use the selected distraction method.
- Prepare yourself: Find the right time when you are ready to provide the care safely. Review the list of care steps. Wash your hands.
Now that you are ready to start the care procedure, take the opportunity to encourage and praise your child.
|
|
Step 3: Procedure

|
See the full description here
Summary 3 key concepts:
- Safety: Carefully follow the care practice steps as you have been taught.
- Flexibility: Be ready to adjust according to your child’s reactions during the procedure. As needed, reposition or select an alternative distraction strategy. Follow your child’s pace and rhythm.
- Collaboration: Reassure your child, verbally and non-verbally. Acknowledge your child’s emotions and reactions. Help your child differentiate between the different sensations during a procedure.
|
|
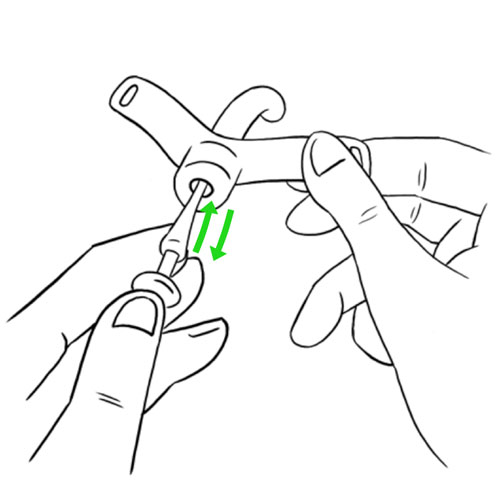
Step 4: Inspect the new cannula
|
- Hold the new cannula by the flanges.
- Insert and then remove the obturator to make sure it fits properly.
- Visually inspect the exterior and the interior of the cannula to make sure that it is not damaged or soiled.
Why ? This step ensures that the new cannula is clean and safe to use.
|
|
Step 5: Prepare the new cannula if so desired
|
- Leave the obturator in place in the cannula.
- Prepare the tracheostomy ties. Depending on your preference, this action can be done right away or after the tracheal cannula has been changed at the beginning of step 15.
- If your child uses a Velcro® band or one cotton ribbon: insert one end in the opening of one flange and secure in place.
- If your child uses two cotton ribbons, insert each end into the opening of each flange openings and secure in place.
- Lubricate the new cannula. Depending on your preference, this action can be done right away or at step 10.
- Place the cannula in a clean container intended specifically for this purpose (eg, new cannula package) while waiting.
Why ? The obturator aids in the insertion of the new tracheal cannula; the rounded tip protects the tracheostomy during insertion.
Placement of tracheostomy ties on the new cannula at this time facilitates manipulation and makes the procedure safer.
|
|
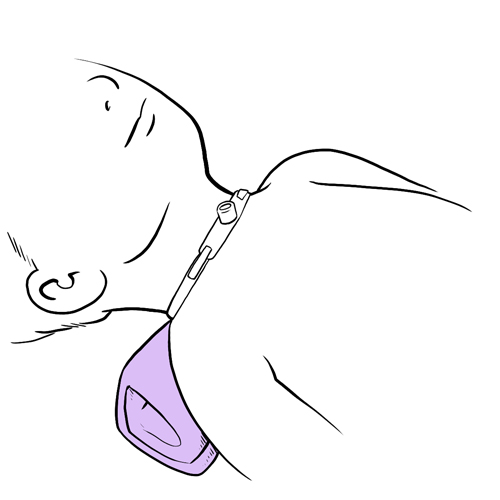
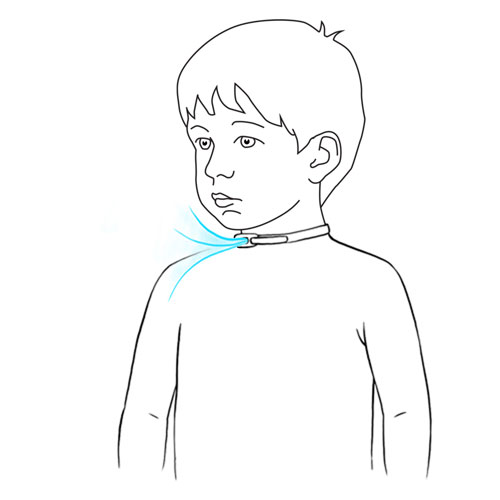
Step 6: Position your child
|
- Place your child on his back.
- Place a rolled towel under the shoulders (not under the neck) so as to allow the head to tilt backwards allowing better visualisation and access to the tracheostomy.
- This procedure can also be done in the sitting position if your child cooperates.
Why ? The lying down on the back position is favored in order to allow better visualisation and access to the tracheostomy.
|
|
Step 7: Suction the tracheobronchial secretions, if needed
|
- Suction tracheobronchial secretions if needed.
- Wash your hands after the procedure and before moving to the next step.
- Keep the suction device, catheters and a self-inflating manual resuscitator (ambu-bag) close at hand.
Why ? This step clears the airway, allowing better visualization of the tracheostomy site and easier insertion of the cannula. It adds to your child’s comfort.
|
|
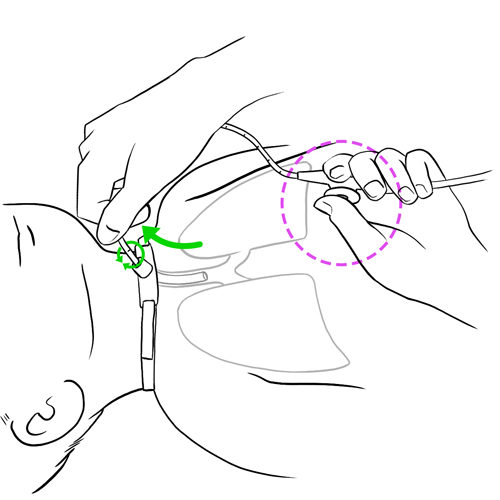
Step 8: Secure the tracheal cannula in place
|
- Ask the person helping you to secure the tracheal cannula in place by placing their fingers on the flanges.
- If your child moves his head a lot, comfort him and stabilize his head with one hand on the top of the head.
Why ? This step makes the procedure safer to perform.
|
|
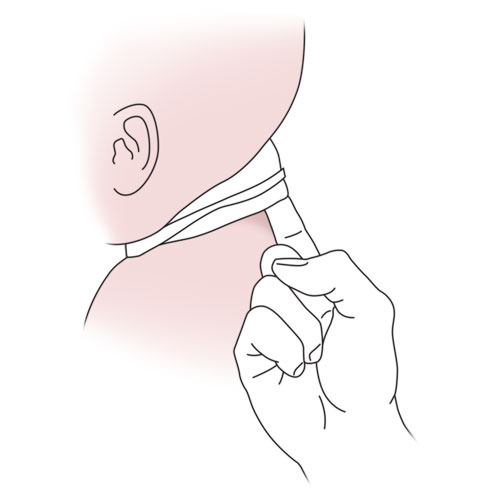
Step 9: Remove the old tracheostomy ties
|
Why ? This step allows you to proceed to changing of the cannula.
Once the tracheostomy ties have been removed, holding the cannula securely in place avoids decannulation if your child coughs or moves.
|
|
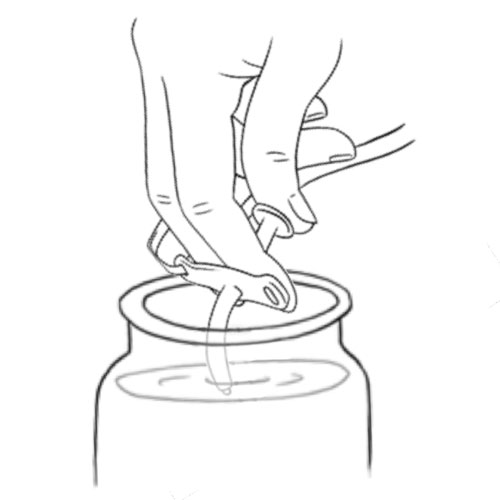
Step 10: Lubricate the new cannula, if not already done
|
- While the person helping you is keeping the tracheal cannula stable and in place, lubricate the tip of the new cannula, always holding the new cannula by its connector.
- If using a water soluble lubricant:
- add a bit of lubricant into the container of the new cannula (ex: original packaging) and,
- spread a small quantity of lubricant (size of a small pea), onto the tip and the sides of the cannula.
- If you use a liquid solution (sterile water, boiled water or saline solution):
- dip the tip of the cannula in the solution and,
- shake away any excess water.
- Do not touch the body of the tracheal cannula with your fingers.
Why ? This step is required to facilitate cannula insertion.
Shaking excess solution from the cannula decreases coughing during insertion.
|
|
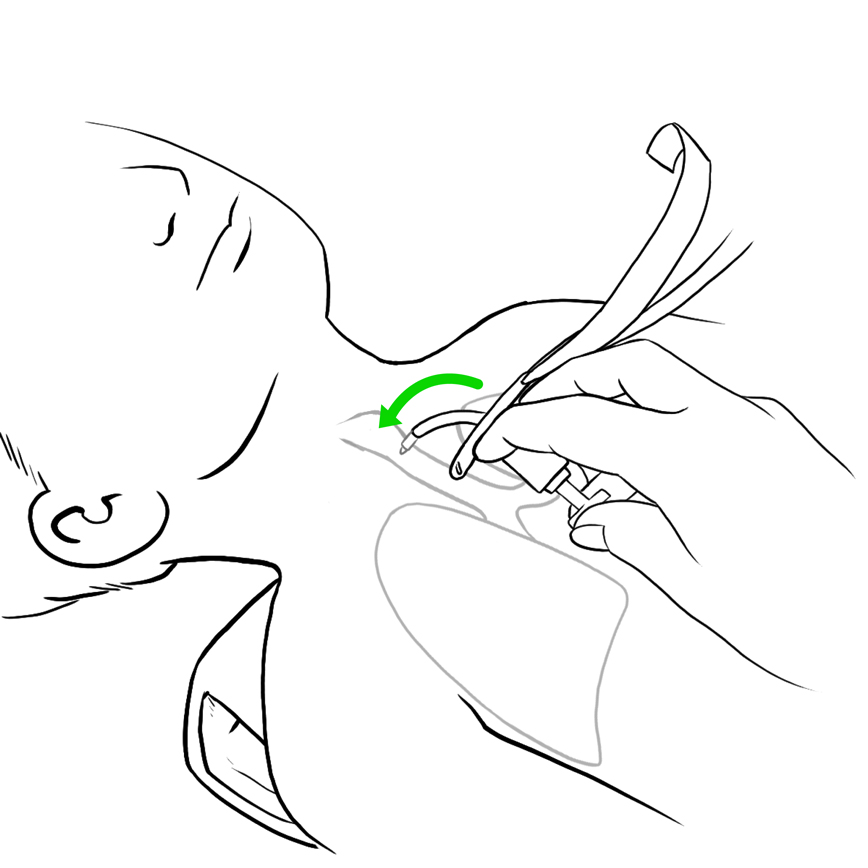
Step 11: Remove the old cannula
|
- If your child is on a respirator, disconnect him from the tracheostomy and press the alarm silence button to temporarily disarm the alarms.
- Observe your child’s breathing.
- During exhalation, the person assisting you gently removes the cannula by following its natural curve (upward arc motion).
- Take this occasion to examine the condition of the skin around the tracheostomy.
Why ? This step allows safe removal of the cannula without harming your child.
|
|
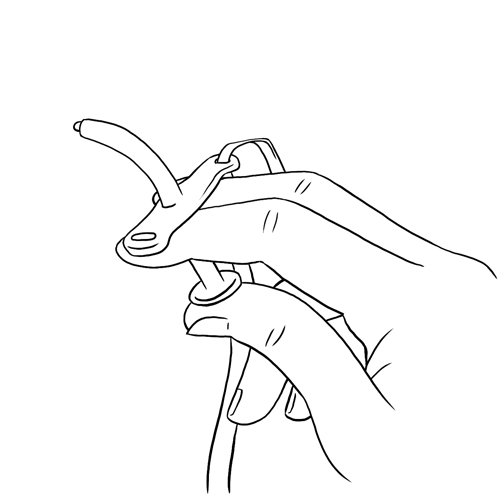
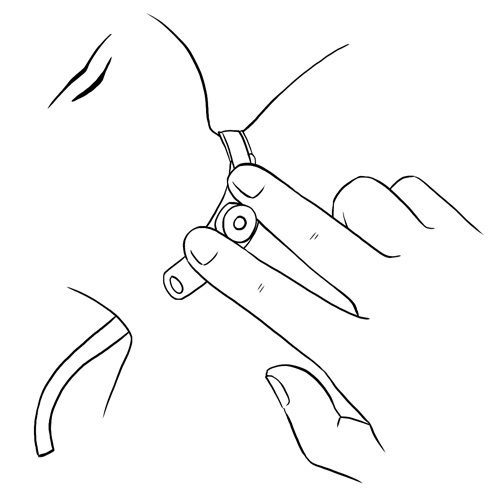
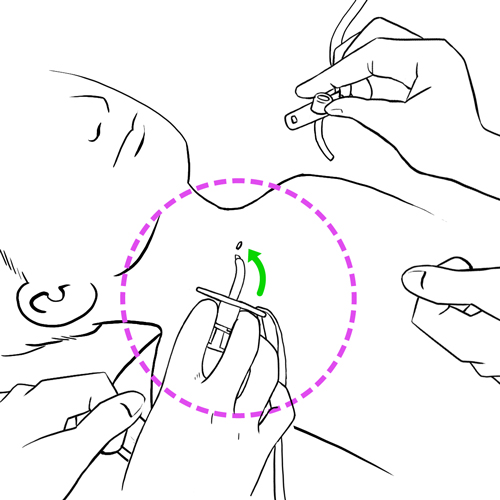
Step 12: Start the insertion of the new cannula
|
- Stand at your child’s side.
- Slightly tilt your child’s head backwards to enlarge the tracheostomy opening (stoma) as needed.
- Holding the cannula at 3 o’clock (or 9 o’clock) position, start inserting the cannula into the tracheostomy opening (stoma) turning it to 6 o’clock position always following the natural curve of the trachea.
It may be necessary to press down on the alarm silence button again to disarm the audible alarm.
Why ? This step allows for safe insertion of the cannula.
|
|
Step 13: Continue the insertion of the new cannula
|
- Continue inserting the cannula without forcing, always following the natural curve of the trachea.
- If you have difficulty starting the insertion of the cannula: tilt your child’s head backwards a little more, place your two fingers on opposite sides of the tracheostomy opening (stoma) and gently spread the opening as you insert the cannula.
- If the cannula does not glide in and you feel resistance: follow steps in section “Frequently asked questions/ Resistance or impossibility of tracheal cannula reinsertion”.
It may be necessary to press down on the alarm silence button again to disarm the audible alarm.
Why ? This step allows safe insertion of the cannula.
Resistance encountered at the start of insertion is likely due to the cannula touching the trachea wall.
|
|
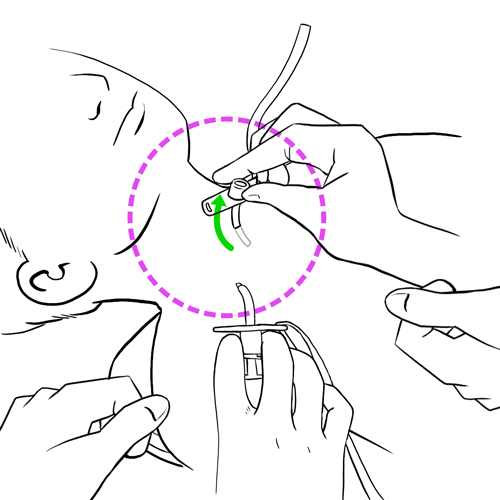
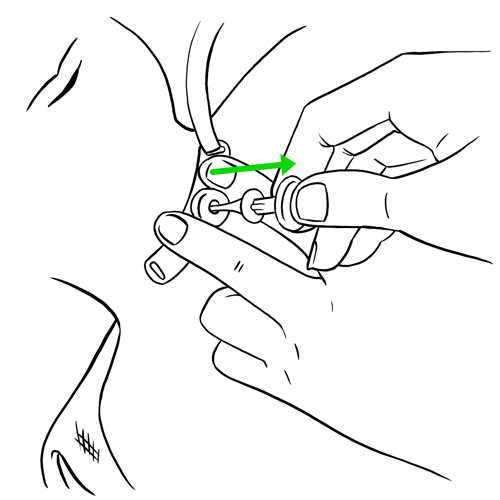
Step 14: Finish the insertion of the new cannula
|
Once the new cannula is completely inserted, hold it in place with one hand and immediately remove the obturator with the other hand.
It may be necessary to press down on the alarm silence button again to disarm the audible alarm.
Why ? Your child cannot breathe with the obturator in place.
|
|
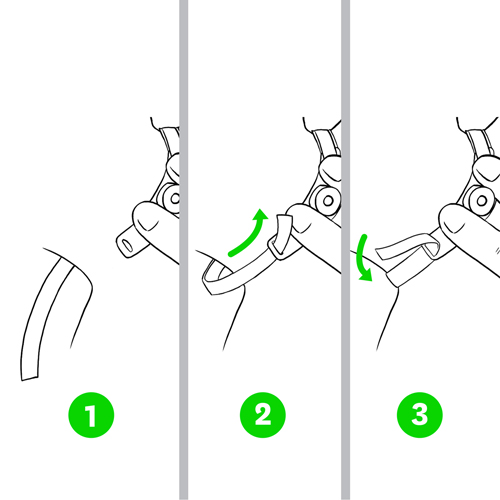
Step 15: Secure the cannula with the tracheostomy ties
|
- While you stabilize the cannula, have the person assisting you start or finish securing the tracheostomy ties.
Velcro® band
1 cotton ribbon
2 cotton ribbons
- If your child uses a respirator, reconnect the respirator circuit to the tracheostomy.
- If the respirator alarm hasn’t automatically reactivated, press the alarm silence button again to reactivate.
Why ? This step secures the tracheal cannula and decreases the risk of accidental decannulation.
|
|
Step 16: Verify the positioning of the new cannula
|
- Observe the rise and fall of your child’s chest to verify proper breathing or ventilation if your child uses a respirator.
- Wipe or suction secretions that may have accumulated during the tracheal cannula change.
Why ? This step allows validation of proper cannula position.
|
|
Step 17: Adjust the tension of the tracheostomy ties
|
- If required, place a new dressing around the tracheostomy and under the tracheal cannula flanges.
- Adjust the tension of the tracheostomy ties:
- Verify the tension by inserting the tip of a finger between the tracheostomy tie and the skin. Tip: Individuals with large fingers should use the tip of their small finger.
- Adjust, as needed, to ensure appropriate tension to secure the tracheal cannula.
Why ? A tracheostomy tie that is too tight can:
- cause irritation of the skin,
- can cause discomfort to your child when he cries, moves, laughs, eats,
- impedes effective cough.
A tracheostomy tie that is too loose can:
- allow the tracheal cannula to move and possibly damage the trachea,
- cause accidental decannulation.
|
|
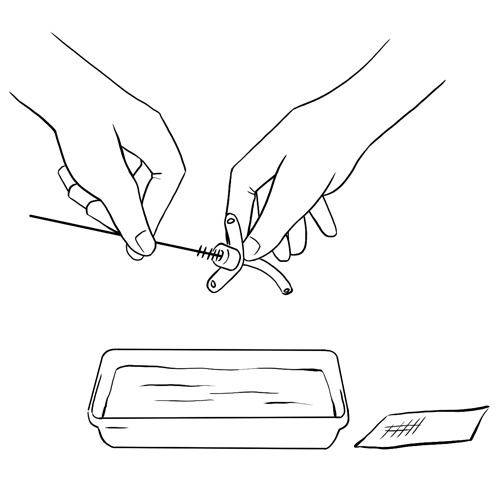
Step 18: Clean the reusable cannula or discard the disposable cannula
|
- Reusable cannula:
- Handle the cannula by its connector or by using a clean compress to avoid touching the body of the cannula with your fingers.
- Always clean the cannula immediately after the procedure, following the manufacturer’s specifications or your child’s healthcare team’s recommendations.
- Store the clean cannula in a bag used for this purpose (eg, cotton pouch) or in a clean and dry container with a lid.
- Disposable cannula:
Why ? This step is required to prevent infections during future uses of cannula.
|
|
Step 19: Recovery

|
See the full description here
Summary:
The treatment is finished. Wash your hands again.
Be prepared to recognize the challenges faced and to provide positive feedback. Help your child recognize his/her strengths. Acknowledge the collaborative teamwork.
- Listen to what your child says about the parts of the procedure that were difficult or painful.
- Comfort your child and recognize your child’s collaboration with positive feedback.
- Highlight your child’s specific strengths that helped make the procedure positive.
- Discuss with your child what might be done the same or differently the next time the care is needed.
- Keep your promises if you have promised a reward, follow through.
- Reward yourself too.
|
|