Step 1: Anticipation
|
See the full description here
Summary:
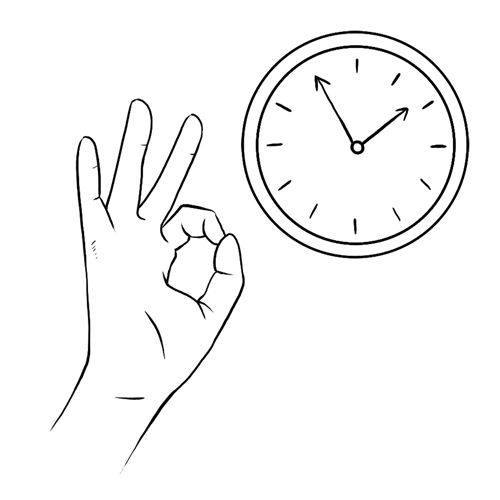
Collaborate and form a team with your child. When you invest the time to form a strong team, children feel more comfortable and less anxious – this will help you complete the care with less stress – for you and your child.
Use these tips, from the start, to set the stage for a positive care procedure:
- Create the right moment: integrate the care in a routine.
- Alert your child to the needed care and communicate together.
- Form a team with your child: Encourage autonomy by offering realistic choices such as the method of distraction. Stay tuned to your child. Manage pain and anxiety, using distraction and positioning for comfort.
|
|
Step 2: Preparation
|
See the full description here
Summary:
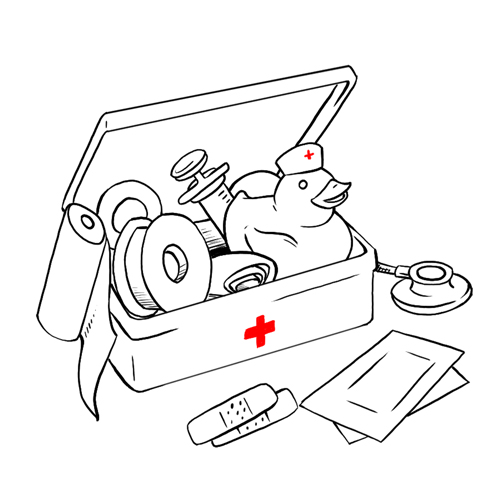
- Prepare the environment: Identify a routine place for care. Close windows, doors and fans. Wash and dry the work surface and gather the needed materials for the care and to distract your child.
- Prepare your child: Get help if needed. Position your child for comfort to receive the care and start to use the selected distraction method.
- Prepare yourself: Find the right time when you are ready to provide the care safely. Review the list of care steps. Wash your hands.
Now that you are ready to start the care procedure, take the opportunity to encourage and praise your child.
|
|
Step 3: Procedure

|
See the full description here
Summary 3 key concepts:
- Safety: Carefully follow the care practice steps as you have been taught.
- Flexibility: Be ready to adjust according to your child’s reactions during the procedure. As needed, reposition or select an alternative distraction strategy. Follow your child’s pace and rhythm.
- Collaboration: Reassure your child, verbally and non-verbally. Acknowledge your child’s emotions and reactions. Help your child differentiate between the different sensations during a procedure.
|
|
Step 4: Prepare the materials
|
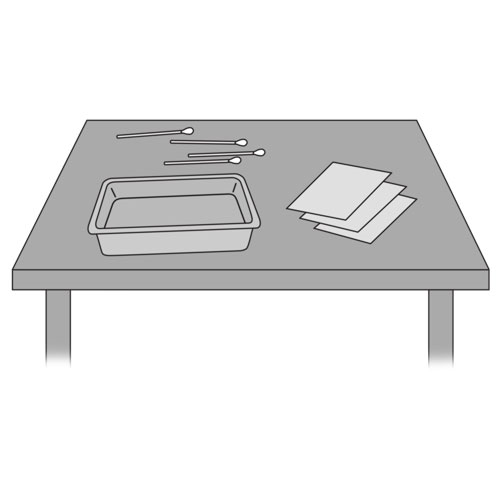
Why ? This step ensures the safety and the continuity of the procedure.
|
|
Step 5: Position your child
|
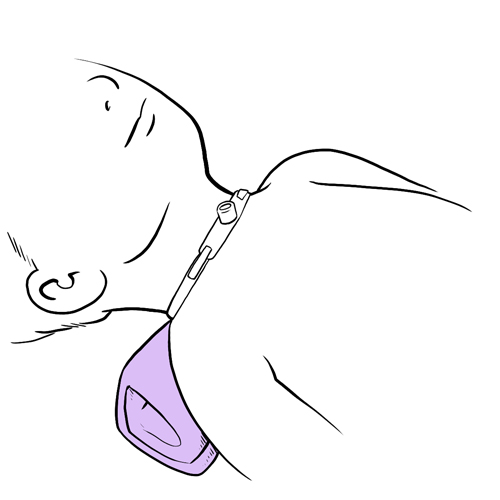
- If your child is on his back, place the rolled towel under his shoulders (not under his neck), so that his head tilts slightly backwards, exposing his neck and allowing better access to the cannula.
- The procedure can also be done with your child in the sitting position.
Why ? The lying down on the back position is favored in order to allow better visualisation and access to the cannula.
|
|
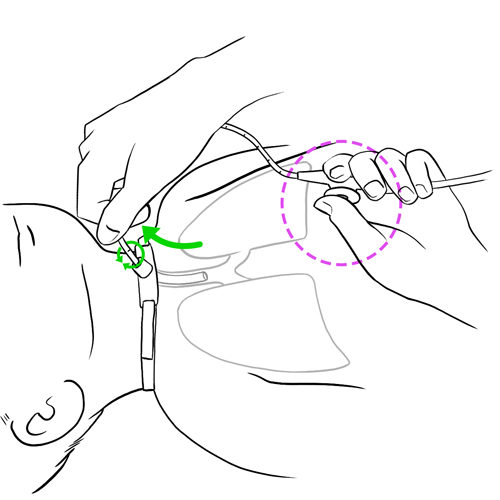
Step 6: Suction the tracheobronchial secretions, if needed
|
Why ? This step helps to clear secretions from the airways.
|
|
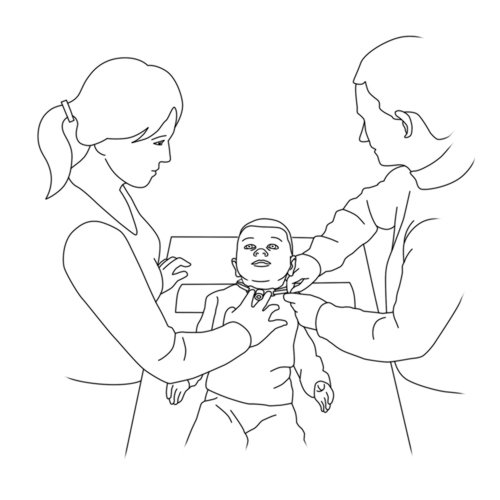
Step 7: Untie or loosen the tracheostomy ties, if needed
|
- Ask the person assisting you to secure the cannula by placing their fingers on the flanges.
- If your child moves his head a lot, comfort him and stabilize his head with one hand on the top of the head.
- If using a Velcro® band, detach one side of the Velcro® band or loosen the tension around the neck.
- If using cotton ribbon: untie/cut with scissors.
If the tracheostomy ties must be changed, secure the tracheal cannula and follow the steps outlined in the method of care “Changing the tracheostomy ties”:
Why ? This step helps to visualize the condition of the skin under the retaining ties.
Assistance from a second person makes the procedure safer and decreases the risk of decannulation.
|
|
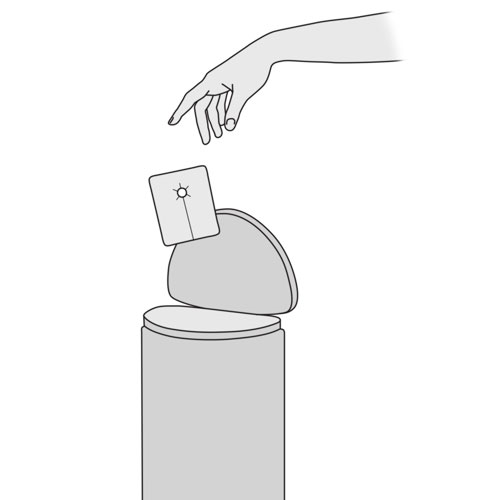
Step 8: Remove the dressing, if in place
|
- Remove the dressing that is in place.
- Check to see if it is damp, soiled with blood or secretions, then discard it.
- If the dressing is encrusted and stuck to the skin, dampen the dressing with the cleaning solution recommended by your child’s healthcare team and then gently remove it and discard it.
Why ? This step allows you to verify the skin around the tracheostomy.
|
|
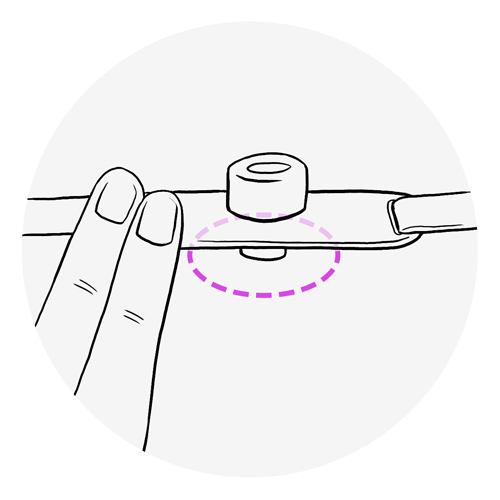
Step 9: Examine the skin around the tracheostomy and under the tracheal cannula flanges
|
- Examine the skin around the tracheostomy; it should resemble the skin on the rest of the neck.
- Check for redness, warmth, swelling, itchiness, small pimples, oozing or bleeding from the tracheostomy site.
- Check to see if the skin has a foul odour.
- Your child should not have any pain or sensitivity from the skin around the tracheostomy site.
- If any of the above signs are present, contact your child’s healthcare team for recommendations appropriate to your child’s condition.
Why ? This step helps you detect if any skin irritation is present.
|
|
Step 10: Clean the skin around the tracheostomy
|
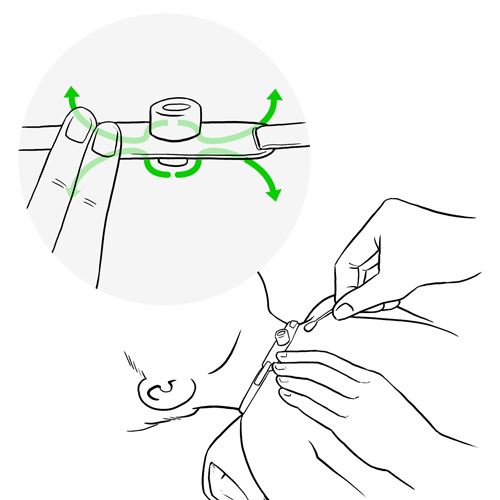
- Use cotton tips or compresses damped with the solution recommended by your child’s healthcare team (sterile or boiled water).
- A mild, non-prefumed, non-oily soap (eg, “Dove”) can also be used if recommended by your child’s healthcare team.
- Always clean the skin from the centre (closest to the tracheostomy) moving outwards towards the exterior; clean until there are no more secretions left.
- Discard cotton tip or compress after each single use.
- Make sure that no water enters the tracheostomy.
- Be sure to properly clean under and on the tracheal cannula flanges.
- If secretions are encrusted and stuck to the skin, dampen the dressing with the cleaning solution recommended by your child’s healthcare team.
- If encrusted secretions are difficult to remove, use a hydrogen peroxide solution, if recommended by your child’s healthcare team. Tip: This solution should cause a foam to appear when applied to the skin. If this is not the case, change the solution.
- Rinse immediately with a clean compress or cotton tip dampened with the cleaning solution (sterile or boiled water).
- Be sure to properly clean the skin under the tracheostomy ties and the folds in the neck.
Why ? This step helps to keep the skin around the site clean and healthy.
It also helps prevent any bacteria that may be present on the neck to be transferred to the inside of the tracheostomy where an infection could develop.
Cleaning the site from the centre towards the outside borders prevents the solution from dripping into the tracheostomy.
Hydrogen peroxide can irritate the skin if it is not rinsed off properly.
|
|
Step 11: Dry the skin around the tracheostomy
|
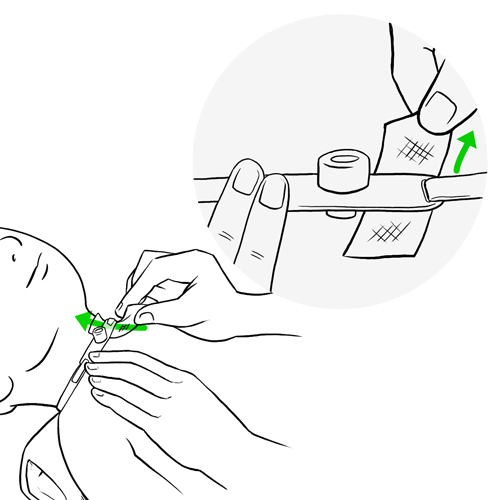
- Gently insert a dry compress under the two flanges.
- Dry the skin thoroughly from the centre (closest to the tracheostomy) moving outwards towards the exterior.
- Discard compress after each single use.
- Be sure to dry the skin thoroughly before moving to the next step.
Why ? Thorough drying of the skin prevents dampness that can cause irritation or infection.
|
|
Step 12: Place a dressing around the tracheostomy, if required
|
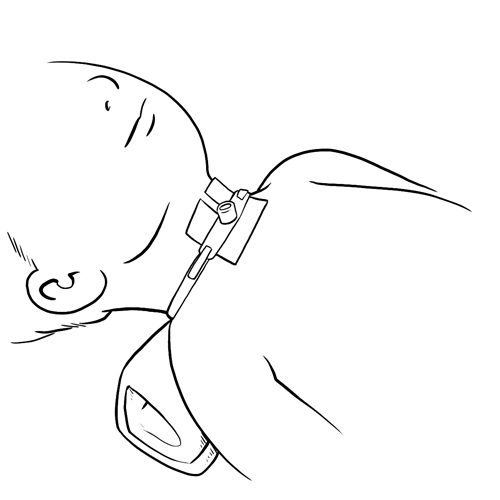
- If recommended by your child’s healthcare team, insert a drain dressing around the tracheostomy sliding it under the two flanges.
- Place the drain opening towards the top, under your child’s chin.
- Gently push the compress in place with your fingers or with the help of tweezers.
- Make sure that there are no folds under the flanges.
- Change the dressing during the day if wet or soiled.
Why ? A dressing can help protect the skin from dampness, irritation and infection.
|
|
Step 13: Adjust the tension of the tracheostomy ties
|
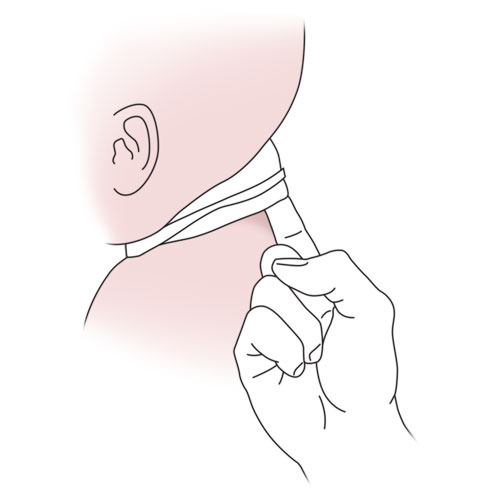
- Verify the tension by inserting the tip of a finger between the tracheostomy tie and the skin. Tip: Individuals with large fingers should use the tip of their small finger.
- Adjust, as needed, to ensure appropriate tension to secure the tracheal cannula in place.
If your child uses a simple tracheal cannula, proceed directly to step 16.
Why ? Proper placement and tightness of the tracheostomy ties prevent irritation of the skin and accidental decannulation of the tracheal cannula.
|
|
Step 14: Replace the inner cannula (if tracheal cannula with 2 parts)
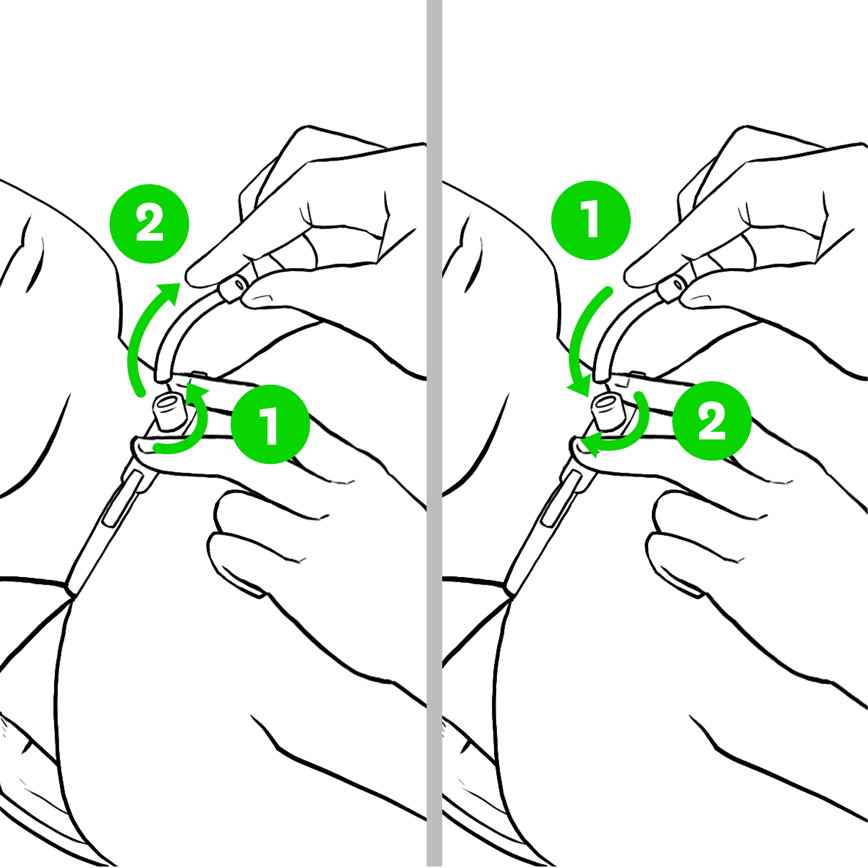
|
- Re-wash your hands before proceeding.
- While holding the flanges in place with one hand, unlock the soiled inner cannula according to the manufacturer’s specifications.
- Remove the inner cannula by gently pulling it in a downward direction following the natural curve of the cannula; place it on the working surface.
- Immediately insert the clean inner cannula into the external cannula without contaminating it.
- Lock the inner cannula in place according to the manufacturer’s specification.
Reusable inner cannula: go to the following step for cleaning procedure.
Single use inner cannula: discard the inner cannula and proceed to step 16.
Why ? This step is necessary in order to ensure the patency of the cannula; prevent mucus plugs and infections.
It is best to change the inner cannula last to avoid re-soiling the area while suctioning, cleaning the skin and changing the dressing.
|
|
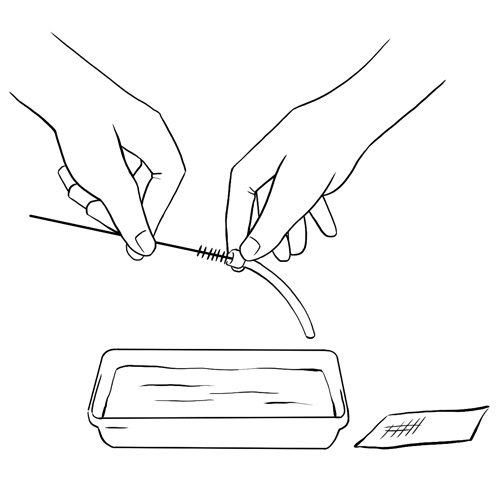
Step 15: Clean and store the re-usable inner cannula
|
The method below is a general guideline. Always follow the manufacturer’s specifications or your child’s healthcare team’s recommendations.
- Handle the cannula by the connector or by using a clean compress.
- Rinse the soiled inner cannula under warm tap water.
- Clean the interior and exterior of the inner cannula with warm soapy water and a small brush or cotton tip.
- Once cleaned, rinse the inner cannula under warm tap water to remove all traces of soap.
- If the inner cannula is still soiled after cleaning with soapy water, soak it in a hydrogen peroxide solution for 5 minutes or more if necessary; then rinse in warm tap water.
- Soak the cleaned inner cannula in a soaking solution (sterile water or boiled water) for about 5 minutes to remove any hydrogen peroxide residue.
- Once cleaned, remove from solution; always handle the inner cannula by the connector.
- Shake off any excess water.
- Dry the inner cannula with a clean compress without touching the body of the cannula with your fingers or let it air dry on a clean towel.
- Once completely dry, store the cleaned inner cannula in a clean, dry container with a lid until next use.
- Discard any leftover solutions.
Follow the manufacturer or your child’s healthcare team’s recommendations regarding the frequency with which the reusable inner cannula can be cleaned and reused.
Why ? This step is necessary in order to avoid any contamination that may cause infections.
|
|
Step 16: Recovery

|
See the full description here
Summary:
The treatment is finished. Wash your hands again.
Be prepared to recognize the challenges faced and to provide positive feedback. Help your child recognize his/her strengths. Acknowledge the collaborative teamwork.
- Listen to what your child says about the parts of the procedure that were difficult or painful.
- Comfort your child and recognize your child’s collaboration with positive feedback.
- Highlight your child’s specific strengths that helped make the procedure positive.
- Discuss with your child what might be done the same or differently the next time the care is needed.
- Keep your promises if you have promised a reward, follow through.
- Reward yourself too.
|
|
![]()