
WARNING: The information in this section is meant as a general guide to help parents and caregivers with common issues and is not intended to replace the care provided by your child’s healthcare team.
Discuss your child’s unique needs with your healthcare team, including WHO and WHEN to contact when problems arise.
Fever with or without general malaise: (≥ 38⁰C rectal or ≥ 37.5⁰C oral/armpit)
Possible cause(s)
- Infection of stoma site
- Other infection
What to do?
- Contact your healthcare team.
General irritability, poor appetite, fatigue or wanting to sleep more than usual (lethargy)
Possible cause(s)
- Change in baseline health of the child may indicate new infection of other problem
What to do?
- Note any other changes or symptoms that your child may have.
- Contact your healthcare team quickly.
One or more of these symptoms: decreased urination - increased thirst - dry lips and mouth - faster heart rate than usual - weight loss
Possible cause(s)
- Dehydration
What to do?
- Contact your healthcare team quickly.
- Give oral rehydration solutions to your child (eg, Pedialyte™, Gastrolyte™), if recommended by your healthcare team.
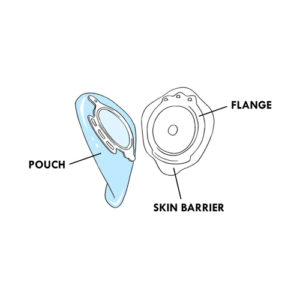
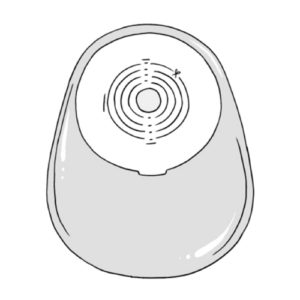
Skin protector does not stick properly to the skin
Possible cause(s)
- Too much stool in the collection bag
- Skin around the stoma is oily or wet
- Improper fit of the skin protector for the stoma
What to do?
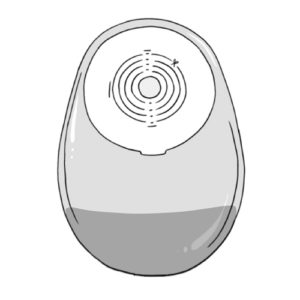
- Empty the bag when it is 1/3 full or almost 1/3 full if you anticipate going out with your child.
- Consult your enterostomal therapy nurse or your healthcare team if the skin around the stoma is irritated (eg, red, red bumps, small wounds).

- Do not clean the skin around the stoma with products that might be oily or leave a residue (creams, soap). Use only those recommended in the section Everyday tips, Bathing.
- Always dry the skin around the stoma after cleaning.
- Use the appropriate equipment for your child, adjusted to the length of the stoma to ensure that the skin barrier sticks well to the skin.
- Warm the skin barrier well in your hands before applying it.
- Change the collection device.
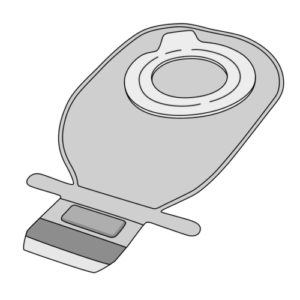
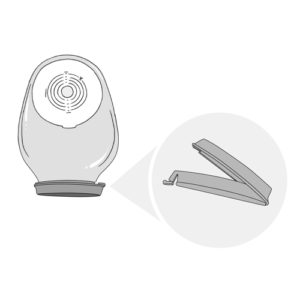
Detachment of the bag
Possible cause(s)
- Collection bag too full
- Collection bag poorly attached to the collar
- Excessive movement of collection bag
What to do?
- Empty the bag when it is 1/3 full or almost 1/3 full if you anticipate going out with your child.
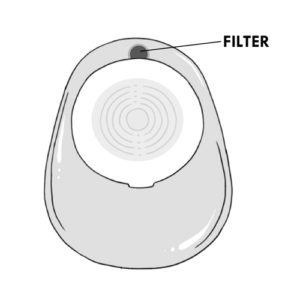
- If the bag fills with gas quickly, you can use a bag with a filter that permits the passage of air.

- Check whether the portion of the bag that fits the ring of the collar is secure.
- Secure the bag under snug but not tight clothing, especially if your child is young and active.
Unpleasant odors
Possible cause(s)
Incorrect installation of the collection device
What to do?
- Odor should not be a problem if the collection bag is closed properly and if the opening is kept clean after the bag has been emptied.
- Certain foods can cause more gas. Speak to the nutritionist about this.
- If the odor is strong, or it persists after emptying the bag, or while changing the collection device you can:
- use a bag with a filter.
- use an odor eliminator for toilets (put 1 drop in the water before you empty the contents of the bag there).
- clean the inside and outside of the bag opening with toilet paper or a damp washcloth.
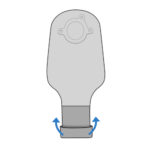
- for bags that have a clasp: roll the edge of the bag down (creating a rolled edge like a turtleneck) before emptying.
- use an odor eliminator in the bag after emptying it, according to the manufacturer’s instructions.
- use a bag with a filter.
- Discuss other possible “home remedies” as needed with your enterostomal therapy nurse or your healthcare team.
Irritated skin around the stoma: red, swollen, burning, presence of small red bumps, small wounds or slight bleeding
Possible cause(s)
- Leakage around the collection device
- Injury caused by an ill-fitting device
- Use of products irritating to the skin
- Watery stool
- Sweating
What to do?
- The skin around the stoma of your child should look the same as the skin over the chest and abdomen.
- It is important that the skin barrier fits closely to the stoma but without touching it.
- Do not use products such as powder, lotion, ointment that may prevent the skin barrier from sticking well.
- It can be challenging to avoid stoma irritation in the young child who is active and growing; speak with your enterostomal therapy nurse or your healthcare team as soon as possible as there are many special products that can be tried to solve your child’s specific problem.
Bleeding from the stoma
Possible cause(s)
- Friction between the stoma and the skin barrier
- Bleeding from the stoma itself or from inside the intestine
What to do?
- The skin on the inside of the stoma is fragile; it is normal that it bleeds very slightly (a few pinpoint drops) when touched.
- If appropriate, review how to cut the opening of the skin barrier, ensuring that the cut opening is smooth.
- If there is significant bleeding, apply firm pressure to the site of the bleeding with a clean cloth or gauze; contact your healthcare team immediately.
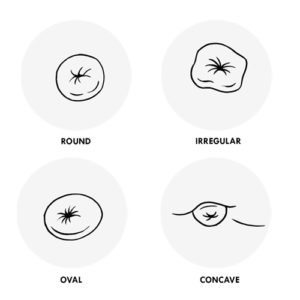
Movement of the stoma: sinks inward or sticks out by more than 0.5 centimeters from its usual position
Possible cause(s)
Causes vary: may happen with increased activity, coughing, etc.
What to do?
- The intestine can sometimes slide out through the stoma, like a hernia. Usually this does not cause pain.
- Contact your healthcare team immediately.
Watery stool
Possible cause(s)
- The body has difficulty in absorbing water
- Reaction of the body to certain foods or medications
- Infection
What to do?
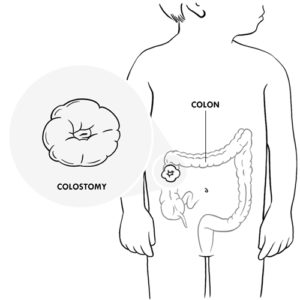
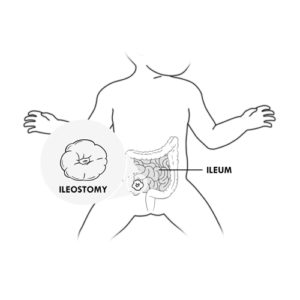
- The stool of an ileostomy may be liquid or pasty, and that of a colostomy may be semi-formed or formed.
- Talk with the nutritionist about foods that can change the consistency of your child’s stool.
- You can put a few cotton balls or an absorbent tampon into the collection bag to absorb the excess liquid and this will also make emptying easier.
- Powdered fibers (eg, “Metamucil®”) can be added to the bag so that the content can become jelly-like.
- It is particularly important if your child has an ileostomy, that you ensure your child drinks more than usual in order to prevent dehydration.
- If liquid stool is not normal for your child, or if there are more than usual, it is important to consult your healthcare team immediately.
Constipation
Possible cause(s)
- Certain medications/foods can constipate
- Low fluid intake
What to do?
- Children with colostomies may be constipated, ie, no bowel movement for two or more days.
- Ensure that your child drinks enough as recommended by the healthcare team.
- See the nutritionist or a member of the healthcare team if necessary.
Do not hesitate to refer to your healthcare team for any questions or specific advice related to your child’s condition.