WARNING: The information in this section is meant as a general guide for parents and caregivers with certain problems related to aspiration of secretions. It is not intended to replace the recommendations of your child’s healthcare team.
Discuss your child’s unique needs with the healthcare team, including WHO and WHEN to contact when problems arise.
Fever with or without general malaise: ≥ 38⁰C rectal or ≥ 37.5⁰C buccal or ≥ 37.5⁰C armpit
Possible cause(s)
- Respiratory infection
- Other infection
What to do?
- Contact your healthcare team quickly.
General irritability, poor appetite, fatigue or wanting to sleep more than usual (lethargy)
Possible cause(s)
- Change in baseline health of the child may indicate new infection or other problem
What to do?
- Note any other changes or symptoms that you child may have.
- Contact your healthcare team quickly.
One or more of these symptoms of breathing difficulties: shortness of breath, trouble breathing or noisy breathing - breathing more quickly - chest pain - coughing more than usual or has a weaker cough - faster heart rate than usual - chest retractions and/or nasal flaring - decreased oxygen saturation compared to their normal values - purple or gray lips, tongue or fingertips (cyanosis) - clammy skin\cold extremities - changes to behavior either fatigue or irritability - more comfortable breathing when sitting up - extends their neck and head backwards to take in a breath
Possible cause(s)
- Mucous plug moved further down the airways towards the lungs
- Bronchospasm: narrowing or constriction of the airways (eg, due to irritation, inflammation and/or secretions in the airways)
- Pneumothorax (a puncture in the lining of the lungs)
- Respiratory tract infection (eg, tracheitis, pneumonia)
What to do?
- Remain calm and reassure your child.
- Stop suctioning.
- Remove the suction catheter.
- Give prescribed medication, such as a bronchodilator (eg, Ventolin®) and/or oxygen if available and recommended by the healthcare team.
- If your child IS NO LONGER in respiratory distress: contact your child’s healthcare team.
- If your child continues to have difficulty breathing: contact your child’s healthcare team immediately.
- If your child is in SEVERE respiratory distress:
- Call 911 immediately.
- If required, begin manual ventilation and CPR as instructed.
One or more of these symptoms: decreased urination - increased thirst - dry lips and mouth - faster heart rate than usual - weight loss
Possible cause(s)
- Dehydration
What to do?
- Contact your healthcare team quickly.
- Give oral rehydration solutions to your child (eg, Pedialyte™, Gastrolyte™), if recommended by your healthcare team.
Blood-tinged secretions
Possible cause(s)
- Irritation of the trachea by:
- incorrect suctioning technique (too frequent, too deep or using a suction pressure that is too high)
- excessive cough
- Respiratory tract infection
- Insufficient humidification
- Insufficient hydration
What to do?
If fresh blood in the secretions:
- Remain calm and reassure your child.
- If bleeding continues, immediately contact your child’s healthcare team.
- Observe your child’s breathing to detect any signs of respiratory distress.
- If your child is in respiratory distress: remove the suction catheter and begin manual ventilation and CPR as instructed.
If blood streaks or pink secretions:
- Observe your child’s breathing to detect any signs of respiratory distress.
- Check the pressure of the suction device.
- Review suctioning technique; be sure to respect the length and depth of insertion of the suction catheter that is recommended.
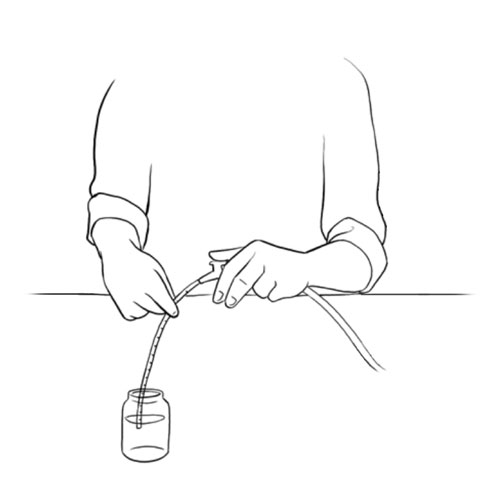
- Gently suction tracheal secretions; increase the level of humidity.
- Contact your child’s healthcare team.
Difficulty or impossibility to aspirate secretions
Possible cause(s)
- Equipment malfunction including any of the following:
- suction device battery charge depleted
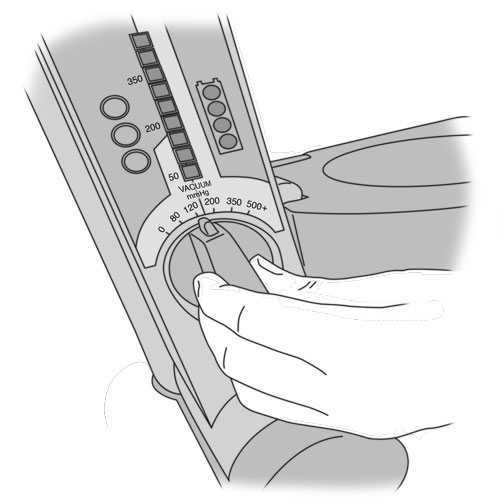
- suction regulator pressure too low
- suction device broken
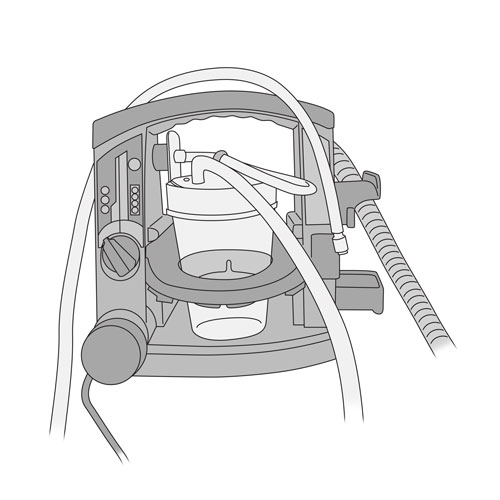
- canister containing secretion overfilled
- canister cover incorrectly closed
- suction tubing bent or pinched
- suction device incorrectly assembled
- suction catheter blocked
- Excess or very thick secretions are obstructing the airway
What to do?
- Quickly verify that the suction device is plugged into a working electrical outlet or that the battery is correctly charged.
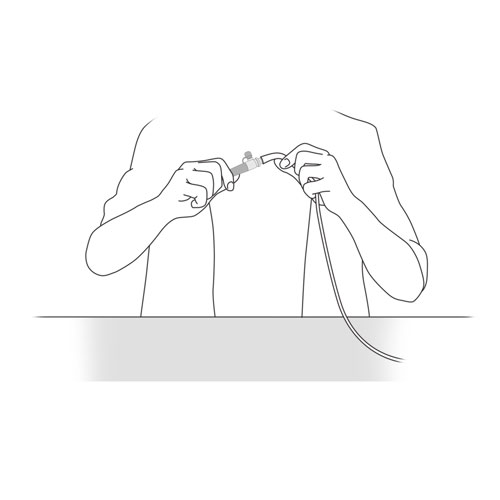
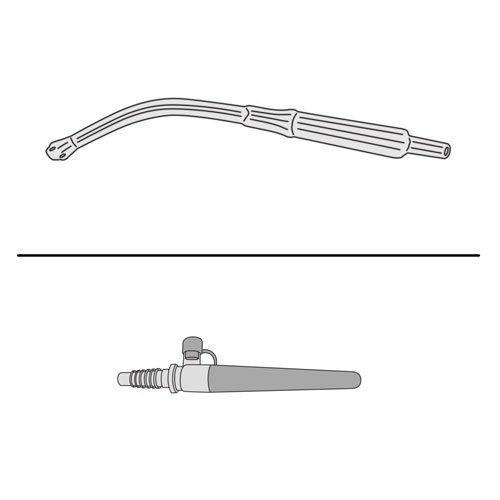
- If no power is available, use the manual mucous trap device, as instructed by your healthcare team.
- If the power supply is adequate, quickly verify that the suction device is in working order:
- Verify that the pressure on the suction regulator is set to the correct value.
- Empty the canister if full.
- Verify that the canister cover is closed correctly.
- Verify that the suction tubing is correctly installed and not blocked, pinched, bent or damaged in any way.
- Verify that that all parts of the suction circuit are correctly installed.
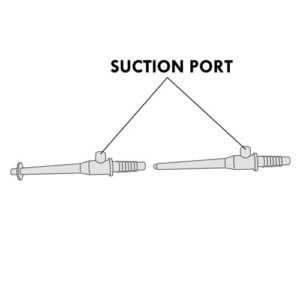
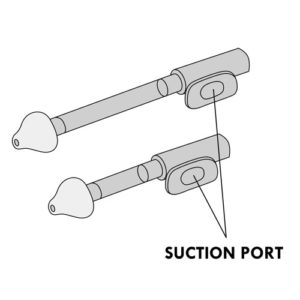
- Verify that the suction valve or port is working correctly.
- Verify that the suction catheter is not blocked.
- After these steps, if you are unable to suction secretions (obstruction of the tracheal cannula):
- Change cannula.
- Suction tracheal secretions if needed.
- If the problem is resolved:
- Observe your child’s breathing to detect any signs of respiratory distress.
- Inform your healthcare team.
- If you are still unable to suction secretions and your child IS in respiratory distress:
- Call 911 immediately.
- If required, begin manual ventilation and CPR as instructed.
- If you able still unable to suction secretions and your child IS NOT in respiratory distress: Immediately contact your child’s healthcare team.
- If you are able to aspirate secretions:
- Repeat the aspiration, using installation of saline drops, up to 2 more times, as needed.
- Review methods to prevent mucous plugs with your healthcare team.
Resistance or impossibility to insert the aspiration catheter into the tracheal cannula
Possible cause(s)
- Mucous plug in the tracheal cannula: may be caused by insufficient humidity, excess secretions and/or insufficient frequency of suctioning
- Foreign body in the tracheal cannula
- Incorrect insertion of catheter for aspiration
What to do?
- Never force the insertion of the catheter in the tracheal cannula.
- Gently but rapidly, attempt to suction tracheobronchial secretions.
- Instill saline drops into the tracheal cannula, as you have been taught by your healthcare team.
- If you are unable to suction secretions (the tracheal cannula is obstructed):
- Change the cannula.
- Suction tracheal secretions if needed.
- If the problem is resolved:
- Observe your child’s breathing to detect any signs of respiratory distress.
- Inform your healthcare team.
- If you are still unable to suction secretions and your child IS in respiratory distress:
- Call 911 immediately.
- If required, begin manual ventilation and CPR as instructed.
- If you able still unable to suction secretions and your child IS NOT in respiratory distress: Immediately contact your child’s healthcare team.
- If you are able to aspirate secretions:
- Repeat the aspiration, using installation of saline drops, up to 2 more times, as needed.
- Review methods to prevent mucous plugs with your healthcare team.
Resistance or impossibility to insert the aspiration catheter via the nose
Possible cause(s)
- Mucous plug or foreign body in the nostril
- Inflammation inside the nose, causing blockage of the nostril (eg, due to infection or allergy)
- Septum deviation of the nose
- Incorrect insertion of the catheter into the nose
What to do?
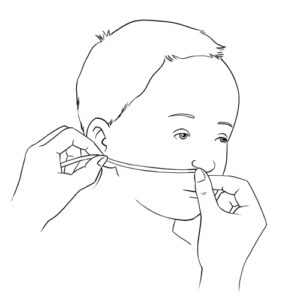
- Clean the nose, using saline drops, as taught to you by the healthcare team.
- Never force the insertion of the catheter into the nose.
- Review the method of nasal aspiration.
- Ensure that you are using the correct equipment and materials for nasopharyngeal suctioning.
- Rapidly contact your child’s healthcare team.
Vomiting during the aspiration of secretions
Possible cause(s)
- Aspiration too soon after the last meal
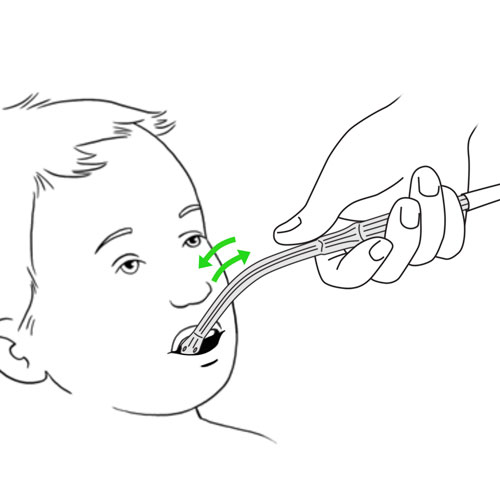
- Incorrect aspiration technique (eg, insertion of the suction device such as Yankauer suction tip too far back in the throat)
- Stimulation of the gag reflex during oral or nasopharyngeal suctioning
- Incorrect insertion of the catheter
What to do?
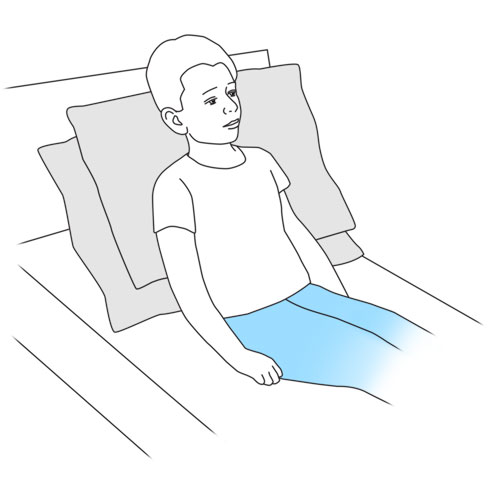
- Turn your child’s head to the side to avoid choking or passage of vomit into the lungs.
- If the secretions were aspirated during a meal, pause your child’s feeding.
- Clean your child’s mouth.
- Closely observe your child’s breathing to detect any signs of respiratory distress.
- Rapidly contact your child’s healthcare team.
To avoid vomiting:
- Minimize aspiration of secretions immediately after meals.
- Review the correct technique for aspiration of secretions.
- Gently insert the suction catheter to avoid stimulating the gag reflex.
Nosebleeds after nasopharyngeal aspiration
Possible cause(s)
- Agitated child, moving a lot during the aspiration procedure
- Incorrect insertion of the suction catheter
- Irritation of the nostril
- Excessive suctioning of the nose
- Suction pressure too high
What to do?
- Reassure your child.
- Apply direct pressure to the bridge of your child’s nose for a few minutes to stop bleeding; if possible, put your child in the upright or sitting position.
- If the bleeding persists, rapidly contact your child’s healthcare team.
To avoid nosebleeds:
- Review the correct technique for nasopharyngeal aspiration of secretions.
- Verify that the suction pressure regulator is correctly set, as recommended by the healthcare team.
- Verify that the catheter is well lubricated prior to insertion.
- Gently insert the catheter into the nose.
Prolonged cough or spasms of cough during aspiration of nasopharygeal or tracheobronchial secretions
Possible cause(s)
- Incorrect insertion of the suction catheter
- Bronchospasm: narrowing or constriction of the airways
- Respiratory tract infection
What to do?
- Stop suctioning.
- Remove the suction catheter.
- Reassure your child.
- Assess your child’s breathing and colour.
- If your child calms and stops coughing, gently re-insert the catheter to aspirate secretions.
- If the cough persists, consider administration of a bronchodilator such as Ventolin® and/or oxygen if available and recommended by the healthcare team.
- If your child shows signs of respiratory distress:
- Call 911 immediately.
- If required, begin manual ventilation and CPR as instructed.
- If the cough persists, rapidly contact your child’s healthcare team.
To prevent this problem: Review the correct technique for aspiration of secretions.
Pallor (paleness), blue lips or blue nails; oxygen desaturation, as indicated by a monitor
Possible cause(s)
- Low level of oxygen in the blood (desaturation or hypoxia)
What to do?
- Stop aspiration of secretions.
- Remove the suction catheter.
- Administer oxygen, if available.
- Closely observe your child.
- If your child is mechanically ventilated, reconnect your child to the ventilator.
- If your child remains in respiratory distress:
- Call 911 immediately.
- If required, begin manual ventilation and CPR as instructed.
- If your child improves, immediately contact your child’s healthcare team.
Weakness, fainting or loss of consciousness
Possible cause(s)
- Vagal stimulation
What to do?
- Stop aspiration of secretions.
- Verify the general and respiratory status of your child, following the training provided by your healthcare team.
- If your child is in respiratory distress: call 911 immediately and begin manual ventilation and CPR as instructed.
Suction device noisy
Possible cause(s)
- Break or leak in the suction device system (eg, cover not secured, catheter or filter incorrectly connected)
- Defective suction device
What to do?
- Verify that the suction device is correctly installed and connections are secured.
- If necessary, use the manual mucous trap device to aspirate secretions from the tracheal cannula
- If the problem persists, rapidly contact your healthcare team.
Suction device not working
Possible cause(s)
- Canister is overfilled
- Battery depleted
- Defective suction device
What to do?
- Verify that the suction device is plugged into a working electrical outlet or that the battery is correctly charged.
- Empty the canister if full.
- If the problem persists, rapidly contact your child’s healthcare team.
Do not hesitate to contact your child’s healthcare team for any questions or for specific advice related to your child’s condition.