
WARNING: The information in this section is meant as a general guide for parents and caregivers with certain problems related to invasive ventilation, non-invasive ventilation and manual ventilation. It is not intended to replace the recommendations of your child’s healthcare team.
Discuss your child’s unique needs with the healthcare team, including WHO and WHEN to contact when problems arise.
Fever with or without general malaise: ≥ 38⁰C rectal or ≥ 37.5⁰C buccal or ≥ 37.5⁰C armpit
Possible cause(s)
- Respiratory infection
- Other infection
What to do?
- Contact your healthcare team quickly.
General irritability, poor appetite, fatigue or wanting to sleep more than usual (lethargy)
Possible cause(s)
- Change in baseline health of the child may indicate new infection or other problem
What to do?
- Note any other changes or symptoms that your child may have.
- Contact your healthcare team quickly.
One or more of these symptoms of breathing difficulties: shortness of breath, trouble breathing or noisy breathing, breathing more quickly; chest pain; coughing more than usual or has a weaker cough; faster heart rate than usual; chest retractions and/or nasal flaring; decreased oxygen saturation compared to their normal values; purple or gray lips, tongue or fingertips (cyanosis); clammy skin\cold extremities; changes to behavior either fatigue or irritability; more comfortable breathing when sitting up; extends their neck and head backwards to take in a breath
Possible cause(s)
- Equipment malfunction
- Respiratory tract infection (eg, tracheitis, pneumonia
- Mucous plug
- Other health problems
What to do?
- Look at your child immediately; verify that your child is breathing effectively. If not, rapidly establish breathing using either the manual ventilatory bag or a spare ventilatory assistance device.
- If your child is in SEVERE respiratory distress:
- Call 911 immediately.
- If required, begin manual ventilation and CPR as instructed.
- If your child is in MILD respiratory distress:
- Try suctioning the secretions. (Link to Theme Aspiration of secretions)
- If your child has medications that have been previously prescribed for these symptoms (eg, Ventolin), administer themas prescribed or according to your child’s healthcare team.
- Contact your child’s healthcare team immediately.
One or more of these symptoms: decreased urination, increased thirst, dry lips and mouth, faster heart rate than usual, weight loss
Possible cause(s)
- Dehydration
What to do?
- Contact your healthcare team quickly.
- Give oral rehydration solutions to your child (eg, Pedialyte™, Gastrolyte™), if recommended by your healthcare team.
Child agitated, crying, uncomfortable and/or having difficulty falling asleep
Possible cause(s)
- Incorrect positioning of the mask
- Difficulty in adapting to ventilatory assistance
- Incorrect humidity setting of the device
- Respiratory infection or another health problem
What to do?
- This more commonly occurs when ventilatory assistance is first started in children; that is during the initial period of adaptation.
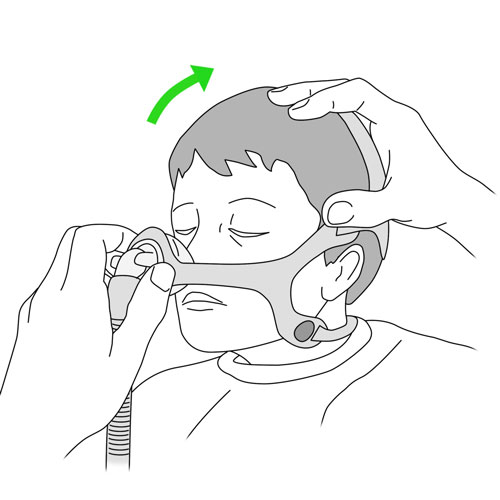
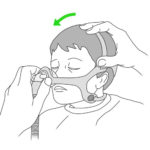
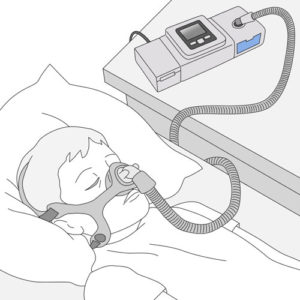
- Ensure that the mask fits correctly:
- the straps should be correctly positioned and not too tight;
- verify that there are no pressure points from the mask on your child’s face;
- verify that the mask is correctly placed, as recommended by your child’s healthcare team.
- Increase the humidity level gradually as needed in order to avoid condensation in the tubing.
- Ensure that there is a sufficient amount of water in the water chamber (eg, during the night).
- If the problem persists, contact your child’s healthcare team.
Bloated belly or abdominal distension during invasive or non-invasive ventilation
Possible cause(s)
- High air flow from ventilatory assistance device, air enters the lungs and the stomach
- Difficult coordination between the child’s breathing and the ventilation from the ventilatory assistance device
What to do?
- Occasionally present during the initial adaptation period to ventilatory assistance.
- Encourage your child to coordinate breathing with the ventilatory support from the device as taught by your healthcare team.
- If the problem persists, rapidly contact your child’s healthcare team.
- If your child’s abdomen becomes hard or tender to touch or if your child is agitated, in discomfort, reporting abdominal pain or crying for no obvious reason, then rapidly contact your child’s healthcare team.
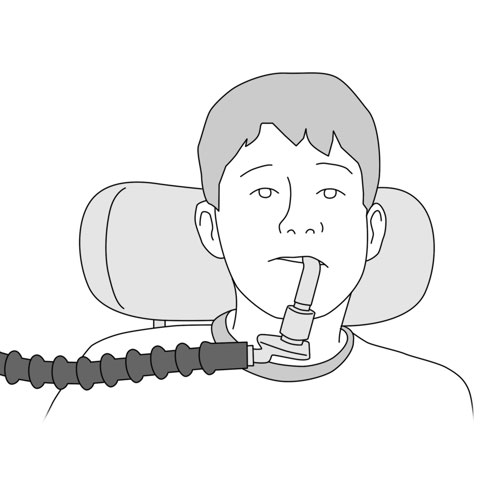
Difficulty to speak or swallow during non-invasive ventilation
Possible cause(s)
- Difficulty in coordination between the child’s breathing and the ventilation from the ventilatory assistance device
What to do?
- This is mainly observed during the initial adaptation period to ventilatory assistance.
- In order to speak or swallow, the child must coordinate their breathing efforts with the air flow of the ventilatory assistance device. It is easier for the child to speak and swallow during the expiration phase.
- If the problem persists, contact your child’s healthcare team.
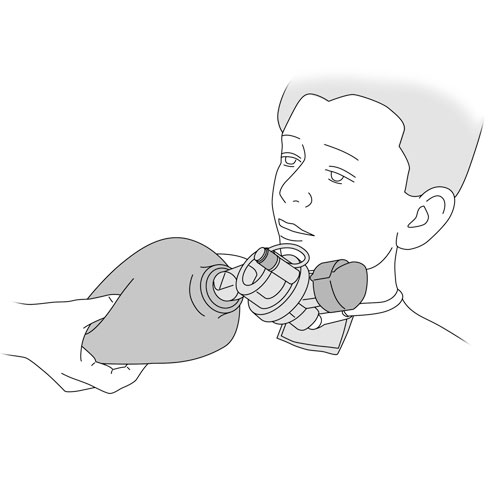
Vomiting during manual ventilation
Possible cause(s)
- Air pushed into the stomach rather than into the lungs
What to do?
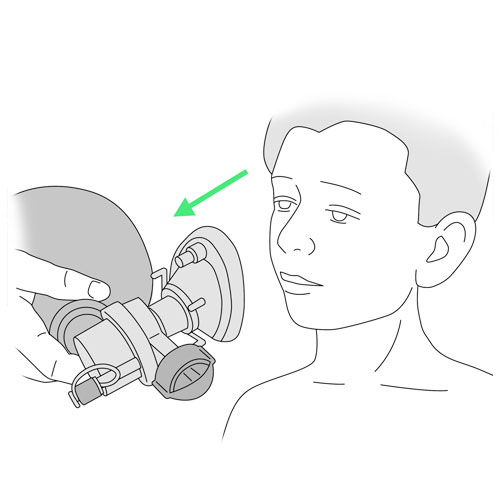
- Rapidly remove the face mask from your child.
- Suction the secretions.
- Clean your child’s face as needed.
- Monitor your child’s breathing after the vomiting; there is a risk that some of the vomit may have entered the lungs (aspiration). This would cause your child to have more difficulty breathing. Then rapidly contact your child’s healthcare team.
Distention of the abdomen during manual ventilation
Possible cause(s)
- Bag compressions too forceful
- Bag compressions too rapid
- Model of ventilatory bag inappropriate for the quantity of air required by the child
What to do?
- Review the technique for correct manual ventilation.
- Compress the ventilatory bag with less force.
- Ensure that the correct model of ventilatory bag is used. If needed, verify with your healthcare team.
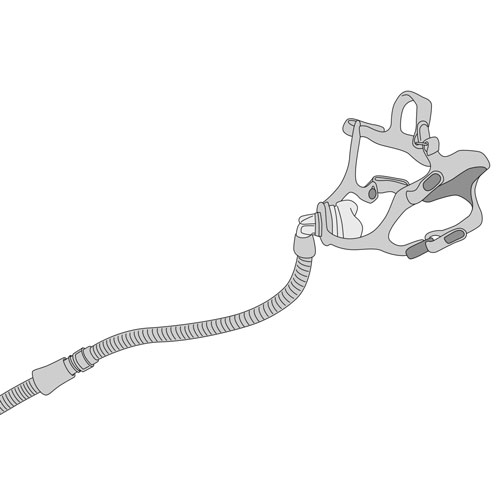
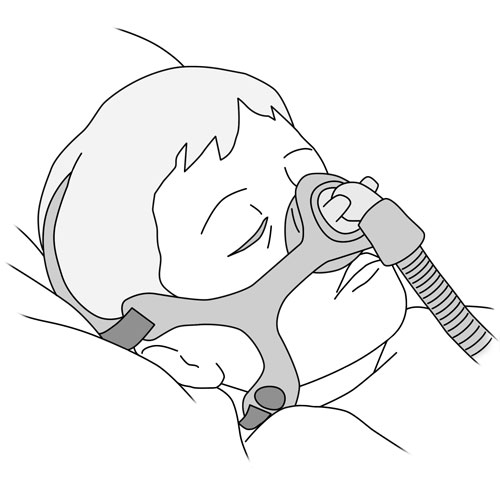
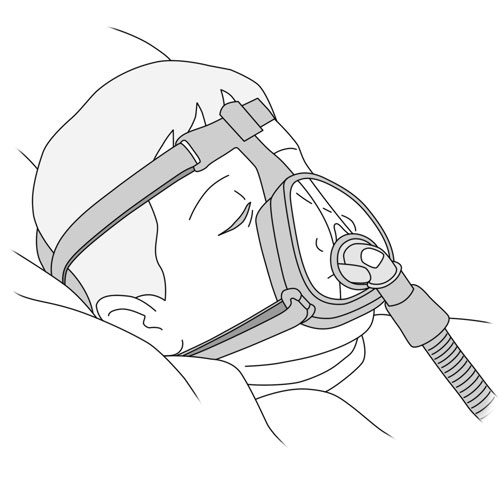
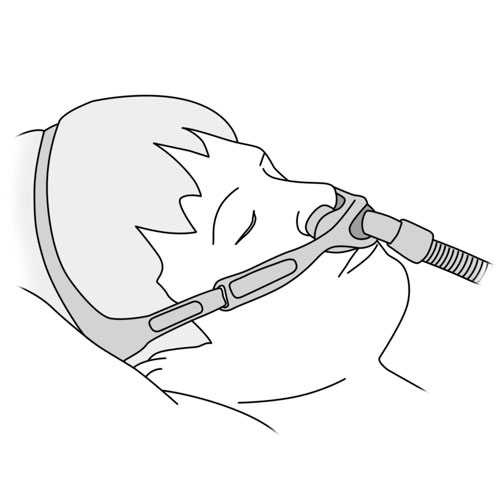
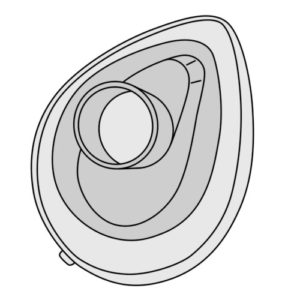
Problems related to the mask
Irritation (redness, sores) of facial skin and/or eyes redness, in the child who uses a mask
Possible cause(s)
- Mask incorrectly adjusted; too tight
- Mask not cleaned regularly
- Wrong mask type for the child
- Dry skin
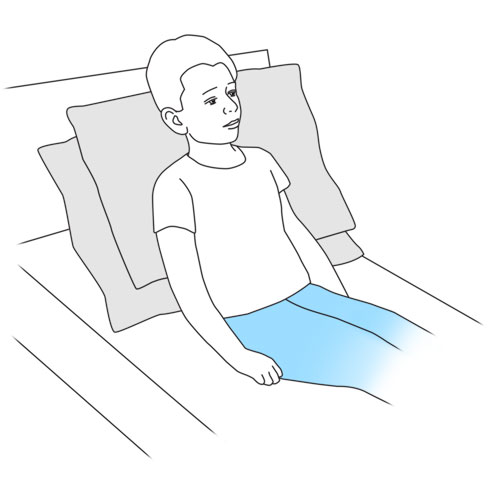
- Incorrect positioning of the child during mask use
- Air leaks around the mask
What to do?
- Verify that the mask is well placed; straps should not be too tight; follow the recommendations of the healthcare team.
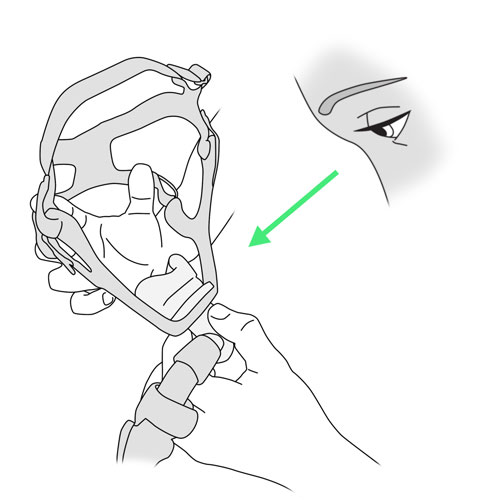
- Avoid rubbing or pushing the mask over the face during placement.
- Make sure that the child’s skin is well moisturized.
- Verify that there are no pressure points from the mask on the skin caused by the child’s position during use.
- Use a different type of mask or alternate between different models to vary the pressure points on the face so that the skin has a chance to heal.
- It is normal for the skin to be slightly red at the pressure points of the mask, for up to 3 hours after the mask is removed. If the redness persists after this period, rapidly contact your child’s healthcare team to avoid serious skin breakdown.
Dryness of the nose, in the child who uses a mask
Possible cause(s)
- Air leaks around the mask
- High air flow from the ventilatory assistance device
- Humidity level on the device set too low
- Nasal dryness present for other reasons (eg, seasonal variation)
What to do?
- This is commonly seen when ventilatory assistance is first started; the mucosa of the nose takes time to adapt to the air flow from the ventilatory assistance device.
- Verify that the mask is correctly placed and the degree of leaks is acceptable.
- As recommended by your healthcare team, use a water-based lubricant to hydrate the nasal mucosa.
- Increase the humidity level gradually as needed in order to avoid condensation in the tubing.
- Ensure that there is a sufficient amount of water in the water chamber (eg, during the night).
- Increase your child’s hydration during waking hours (eg, drink more water).
- Verify that your child’s nasal hygiene is optimized, follow the recommendations of your healthcare team.
- Increase the level of humidity in the environment.
- If the problem persists, contact your child’s healthcare team.
Nose or sinus congestion, in the child who uses a mask
Possible cause(s)
- High air flow from the ventilatory assistance device
- Air leaks around the mask
- Your child sleeps with an open mouth
- Humidity level on the device set too low
- Respiratory infection
- Seasonal allergies
What to do?
- This is mainly an issue during the initial adaptation period to ventilatory assistance.
- Verify that the mask is correctly placed; straps should not be too tight, as recommended by your child’s healthcare team.
- If your child sleeps with an open mouth, discuss with your healthcare team whether a chin strap should be used with the mask.
- Increase the humidity level gradually as needed in order to avoid condensation in the tubing.
- Ensure that there is a sufficient amount of water in the water chamber (eg, during the night).
- Verify that your child’s nasal hygiene is optimized; follow the recommendations of your healthcare team.
- Increase the level of humidity.
- If the problem persists, contact your child’s healthcare team.
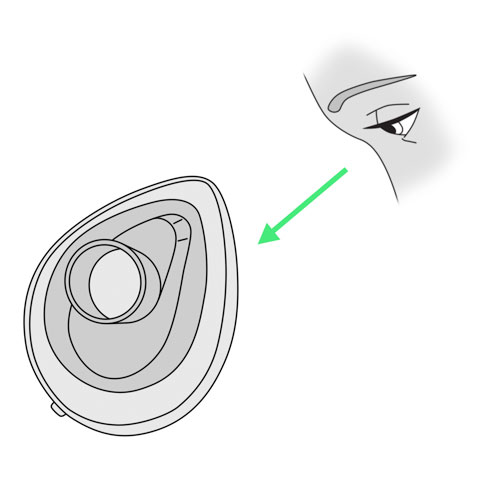
Red, dry or irritated eyes, in the child who uses a mask
Possible cause(s)
- Air leaks around the mask, misdirecting air flow into the eyes
- Mask incorrectly adjusted or positioned
- Incorrect mask (eg, size, model)
What to do?
- Verify that the mask is correctly placed; straps should not be too tight, as recommended by your child’s healthcare team.
- Clean the mask daily, following the recommendations of the healthcare team.
- If the problem persists, contact your child’s healthcare team.
Mouth dryness, in the child who uses a facial mask
Possible cause(s)
- Your child sleeps with an open mouth
- Air leaks around the mask
- Humidity level too low
What to do?
- If your child sleeps with an open mouth, discuss with your healthcare team whether a chin strap should be used with the mask.
- Increase the humidity level gradually as needed in order to avoid condensation in the tubing.
- Ensure that there is a sufficient amount of water in the water chamber (eg, during the night).
- Increase your child’s hydration during waking hours (eg, drink more water).
- Increase the level of humidity.
- If the problem persists, contact your child’s healthcare team.
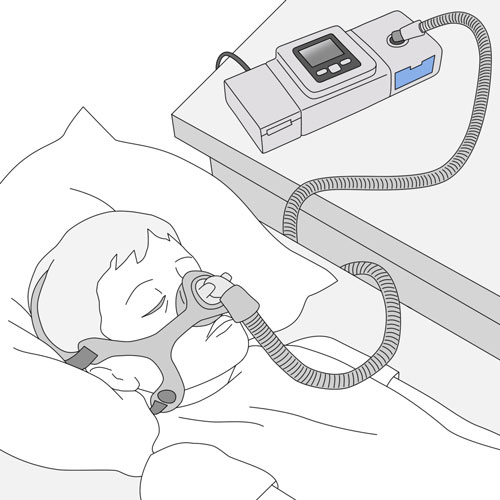
Problems related to invasive ventilation and non-invasive ventilation
Ventilatory assistance device alarms
Possible cause(s)
- Various
What to do?
- Look at your child immediately; verify that your child is breathing effectively. If not, rapidly establish breathing using either the manual ventilatory bag or a spare ventilatory assistance device.
- If your child is in respiratory distress,
- call 911 immediately;
- if required, begin manual ventilation and CPR as instructed.
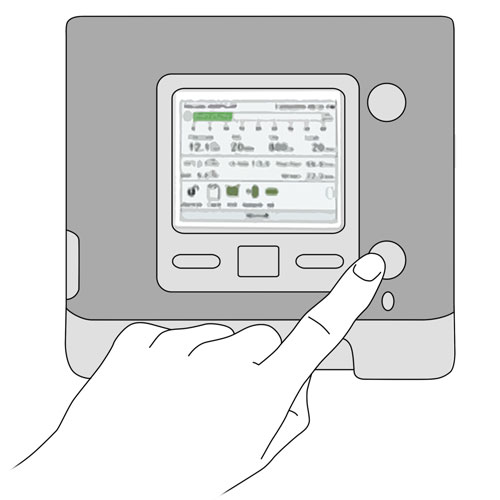
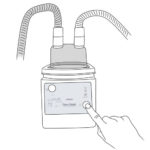
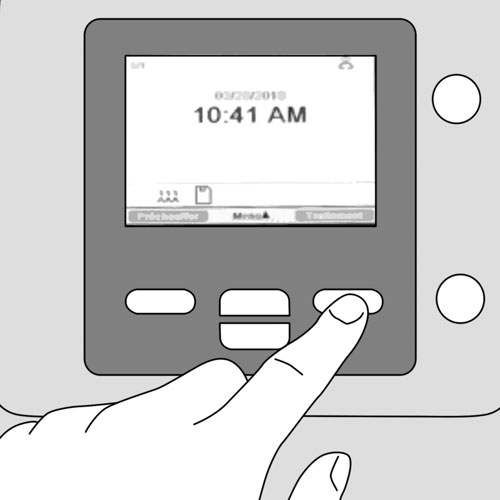
- If your child is breathing effectively, read the message on the device screen.
- Press once on the alarm/silence button on the device to silence the alarm.
- Identify the cause of the alarm.
- Take appropriate action to address the issue identified by the alarm.
- If necessary, consult the manual of the device to solve the issue.
- If you are still unable to solve the issue, rapidly contact your child’s healthcare team.
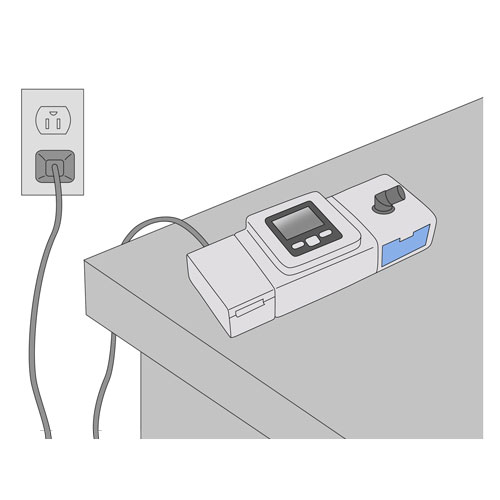
Ventilatory assistance device does not turn on (no lights or alarms)
Possible cause(s)
- Device lacks power
- Not correctly plugged into electrical wall outlet
- Internal battery depleted
- Device malfunction
- Device plugged into a wall outlet that is controlled by a switch that is turned off
What to do?
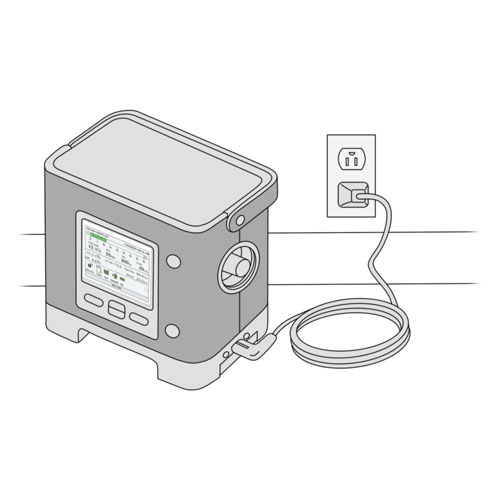
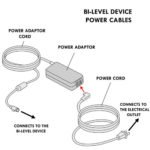
- Verify that the device is securely plugged into an electrical wall outlet or that the internal battery is adequately charged.
- Verify that the electrical wall outlet is not controlled by a switch that is turned off.
- Use an alternative device to support your child’s breathing, if necessary.
- If the problem persists, rapidly contact your child’s healthcare team.
Disconnected parts in the ventilation circuit
Possible cause(s)
- Accident
- Incorrect handling of the equipment
What to do?
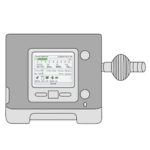
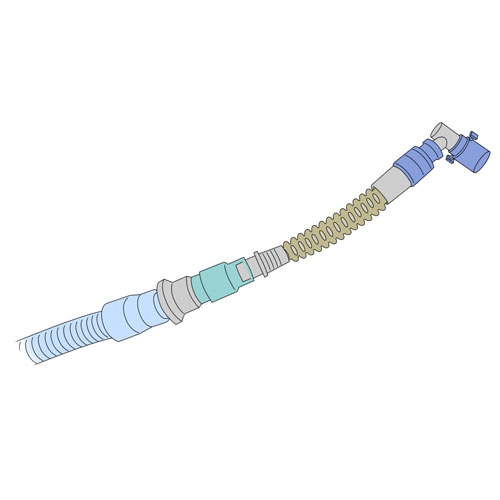
- Make sure that the circuit parts are well connected when installing the ventilatory assistance.
- Check that each part of the circuit is in good condition (no cracks or other signs of wear and tear) during installation and disconnection.
- Ensure that the circuit is adequately positioned so that there is no pulling or tension on the circuit.
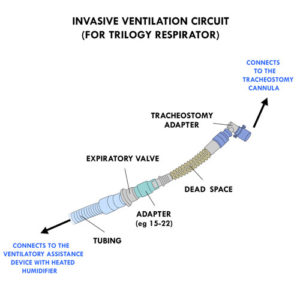
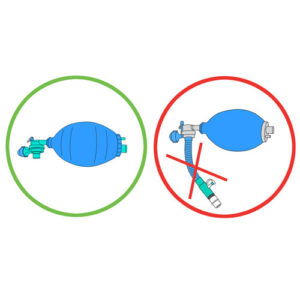
Broken equipment: interface or any components of the ventilation circuit (eg, tubing, tracheostomy adapter)
Possible cause(s)
- Accident
- Incorrect handling of the equipment
- Wear and tear with repeated use
What to do?
- Never use damaged or defective materials or equipment when providing ventilatory assistance to your child.
- Substitute a replacement piece for the broken one.
- Inform your child’s healthcare team that you used spare equipment and arrange to replace the spare items.
- Always handle equipment gently and according the recommendations of your healthcare team.
Insufficient air flow from the ventilatory assistance device
Possible cause(s)
- Circuit incorrectly assembled
- Circuit bent, crushed or obstructed
- Accumulation of water in the circuit
- Obstructed exhalation valve openings in the mask
- Dirty air filter
- Blockage of air going into the device
- Leaks at the level of the water chamber or humidifier
What to do?
- Verify that:
- the circuit is correctly assembled;
- the exhalation valve openings in the mask are clean and not obstructed;
- the tubing of the circuit is not bent, crushed or obstructed;
- there is no accumulation of water in the circuit;
- the air filter is clean; if not clean it or replace it;
- there is no obstruction to the air intake of the device (eg, curtain, blanket, fabric, etc.);
- there is no leak in the water chamber or the humidifier.
- If the problem persists, contact your child’s healthcare team.
Warmer air than usual in the ventilation circuit
Possible cause(s)
- Dirty air filter
- Ventilatory assistance device placed too close to a source of heat (eg, radiator)
What to do?
- Verify that the air filter is clean and intact. If not, clean it or replace it. To clean it, follow the recommendations of your healthcare team.
- Position the ventilatory assistance device away from direct sunlight or other sources of heat.
- Verify that the circulation of air around the device is unobstructed; keep curtains, bed covers and stuffed toys away from the device.
- Verify that the humidity level of the humidifier of the ventilatory assistance device is correct; lowering it if necessary.
- If the problem persists, contact your child’s healthcare team.
Dropped ventilatory assistance device (device falls to the ground)
Possible cause(s)
- Incorrect handling of the device
- Accident
What to do?
- Use a back up device, if available.
- Unplug the dropped device from the electrical outlet.
- Pick up the dropped device and put it in correct position on a flat surface, being careful not to let water run into the device.
- Remove the water chamber.
- If there is spilled water visible, dry the area with a clean cloth.
- Reinsert the water chamber into the humidifier.
- Verify that no excess water has spilled into the circuit; if present, empty it.
- Reconnect the device to an electrical wall outlet.
- Install the interface on your child and start up the ventilatory assistance device. If it does not function or does not work as usual, contact your healthcare team.
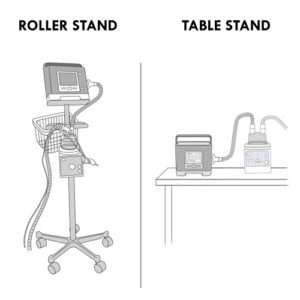
- Prevent accidents by always placing the device in such a way that no one trips on the electrical cord.
- Make sure that the ventilatory assistance device is placed on a stable, solid surface so that it does not fall easily.
- Make sure that the circuit does not pull or put tension on the device.
Irregular display on the ventilatory assistance device
Possible cause(s)
- Device too close to sources of electromagnetic waves
- Dropped device
- Incorrect handling of the device
What to do?
- Position the device away from objects that emit electromagnetic waves (eg, cellphones, base of wireless telephone, some alarm clocks, microwave, etc.).
- If the problem persists, contact your child’s healthcare team.
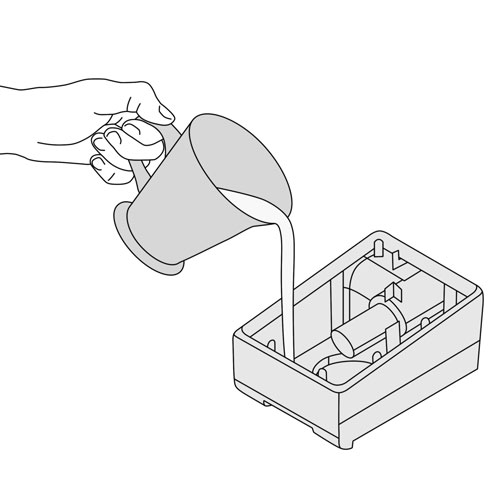
No water in the water chamber of the ventilatory assistance device
Possible cause(s)
- Water chamber was not sufficiently filled
- Excess air leaks around the mask
- Humidity level of the humidifier set too high
- Room temperature too cold or room air too dry
- Cold air flow directed towards the ventilatory assistance device (eg, air conditioning)
- Leak in the water chamber due to cracks or holes.
What to do?
- Make sure that the water chamber is adequately filled to the maximum fill line.
- Ensure that the mask is well positioned on your child’s face; adjust the mask and straps to eliminate any air leaks.
- Verify that the humidity level on the device is appropriately set.
- If necessary, increase the room temperature or ambient room humidity.
- Make sure that the device is not exposed to cold air drafts.
- Ensure that the water chamber is correctly installed in the device.
- If the water chamber is damaged, replace it and contact your child’s healthcare team.
Presence of condensation in the ventilation circuit
Possible cause(s)
- Cold air flow directed towards the circuit
- Room temperature too cold
- Humidity level of the humidifier set too high
What to do?
- Ensure that the device and circuit are not exposed to cold air drafts.
- Make sure that the room temperature is not too cold.
- Lower the humidity level of the humidifier.
- If the problem persists, contact your child’s healthcare team.
Presence of condensation in the mask and/or your child has droplets of water on the face during non-invasive ventilation
Possible cause(s)
- Water chamber of the device
- Condensation in the circuit and/or the mask
- Cold air flow directed towards the circuit
- Room temperature too cold
What to do?
- Do not overfill the water chamber; never fill beyond the maximal fill level line.
- Lower the humidity level of the humidifier.
- Ensure that the device and circuit are not exposed to cold air drafts.
- Make sure that the room temperature is not too cold.
Accumulation of water in the tubing of the ventilation circuit
Possible cause(s)
- Cold air flow directed towards the circuit
- Room temperature too cold
- Humidity level of the humidifier set too high
What to do?
- Ensure that the device and circuit are not exposed to cold air drafts.
- Make sure that the room temperature is not too cold.
- Lower the humidity level of the humidifier.
- Remove excess water from the circuit so that it does not move into the mask or the child’s tracheostomy.
- If the problem persists, contact your child’s healthcare team.
Leakage of water from the water chamber of the ventilatory assistance device
Possible cause(s)
- Water chamber cracked or damaged
- Incorrect installation of the water chamber
What to do?
- Verify if the water chamber is damaged or cracked; replace it and contact your child’s healthcare team.
- Correctly install the water chamber (refer to the equipment manual if necessary).
Sensation that the ventilatory assistance device pushes the air more forcefully or is noisier than usual
Possible cause(s)
- Leakage of air at the level of the mask or tracheal cannula
- Child not optimally positioned to receive ventilatory assistance
- Leaks in the circuit (eg, damaged tubing)
- Variation in air flow due to the child talking, coughing or breathing in an unusual way
What to do?
- Verify that the mask is well placed; straps should not be too tight; follow the recommendations of your healthcare team.
- Ensure that the positioning of your child during ventilatory assistance is not causing leaks (eg, hyperextension of the neck if the child has a tracheostomy, mask placement).
- Make sure that the circuit is correctly and securely connected.
- Ask your child to breathe calmly.
- Encourage your child to stay calm and to relax. Consider using distraction techniques, if needed.
- If your child is coughing, remove the mask and reinstall it once your child has stopped coughing.
- If the problem persists, contact your child’s healthcare team.
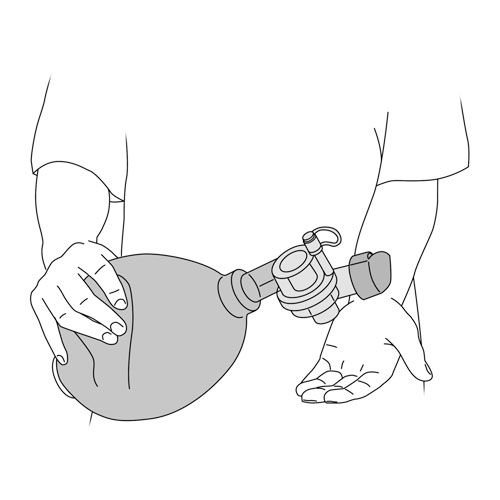
Problems related to manual ventilation
Absence of movement of the chest during manual ventilation
Possible cause(s)
- Air leaks around the facial mask
- Air leakage around the tracheal cannula (eg, cuff deflation or incorrect positioning of the child)
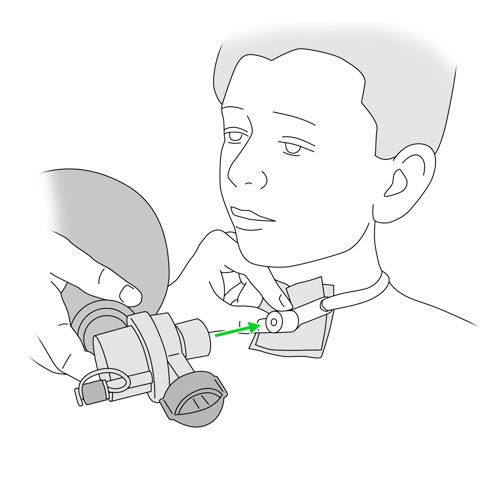
- Disconnection between the ventilatory bag and the tracheostomy connector or the mask specific for manual ventilation
- Defective ventilatory bag
What to do?
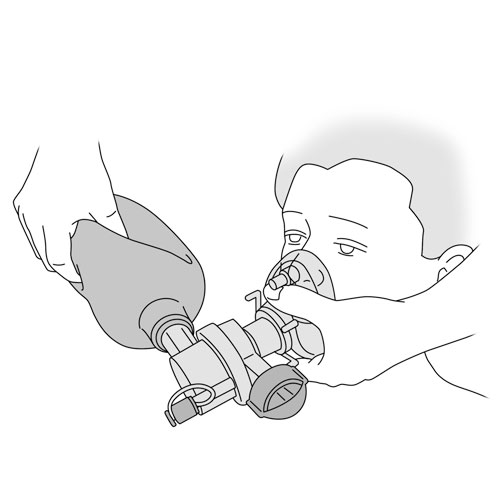
- Reposition the mask.
- Ensure that the child’s head is correctly positioned.
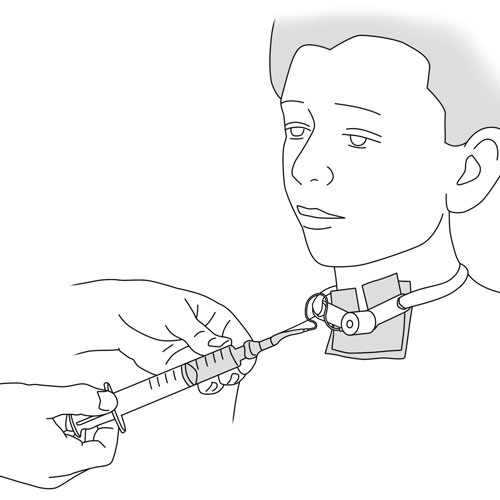
- Verify that the cuff of the tracheal cannula is correctly inflated, if present.
- Ensure that the ventilatory bag and tubing are securely connected.
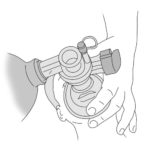
- Verify that the ventilatory bag is correctly functioning: compress the bag with one hand and then release it; at the same time check with your other hand if air is coming out of the bag at the air outlet. The bag should reinflate quickly and automatically.
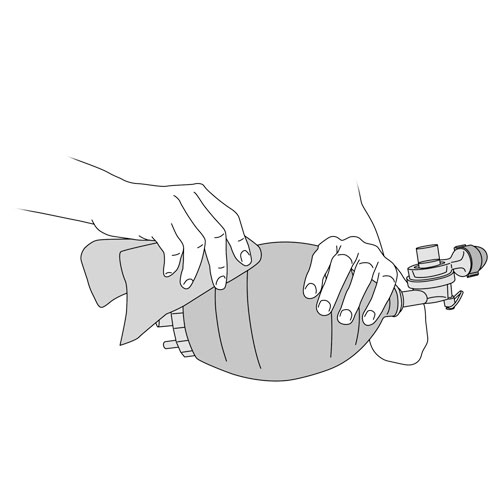
Unable to compress the ventilatory bag during manual ventilation
Possible cause(s)
- Obstruction of the child’s airways or the interface
- Defective ventilatory bag
What to do?
- Ensure that the tracheal cannula is not obstructed with secretions; suction the secretions if needed.
- Make sure that there are no blockages in the mask.
- Ensure that there is no obstruction of the mouth or nose (secretions or foreign body); suction the secretions if needed.
- Verify that the ventilatory bag is correctly functioning: compress the bag with one hand and then release it; at the same time check with your other hand if air is coming out of the bag at the air outlet. The bag should reinflate quickly and automatically.
- If the problem persists, contact your child’s healthcare team.
No resistance during compression of the ventilatory bag during manual ventilation
Possible cause(s)
- Disconnect between the ventilatory bag and the tracheostomy connector or the mask specific for manual ventilation
- Defective ventilatory bag
What to do?
- Ensure that the ventilatory bag and tubing are securely connected.
- Verify that the ventilatory bag is correctly functioning: compress the bag with one hand and then release it; at the same time check with your other hand if air is coming out of the bag at the air outlet. The bag should reinflate quickly and automatically.
- If the problem persists, contact your child’s healthcare team.
Do not hesitate to refer to your child’s healthcare team for any questions or for specific advice related to your child’s condition.